

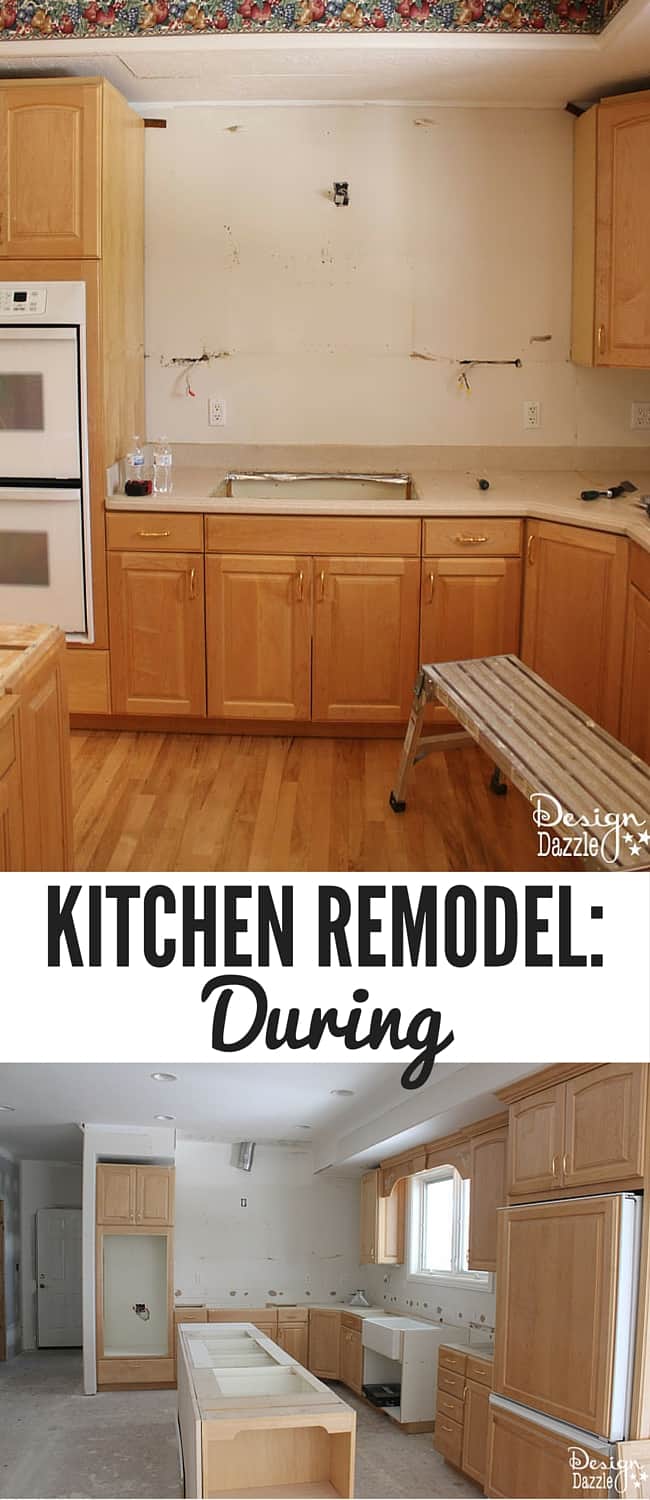
Today I’m sharing some photos of my kitchen remodel during along with some picture of before the remodel. I’m joining the One Room Challenge from Calling It Home! To get an idea of how it originally looked, check out the before images and information here.
Edited to add: Scroll down to the bottom of the post to see all the blog posts related to this kitchen. There are a lot!!
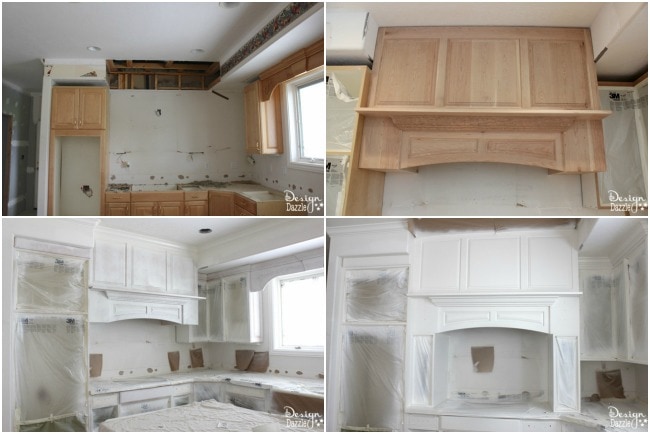
One of the major changes we made was to add a custom hood over the cooktop. Even though the home was originally custom-built, the previous owners had the microwave installed over the stove, which is one of the biggest things that can make a house look a little more generic and like a tract home. In a previous home, I had a custom hood that we just absolutely loved, so I had a replica built by our cabinet maker.

All the custom pieces were made by the cabinet maker, and then he brought them over when it was time to install.
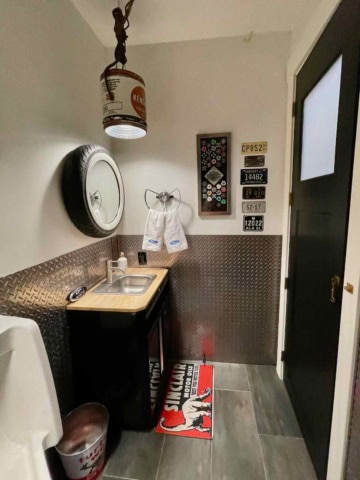
In order to get the custom piece to fit, the wall had to be cut into the interior soffit (top left photo), and we had to work with reinstalling the insulation – but it was, without a doubt, 100% worth it. Here’s a look at some of the work that went into getting the hood in place and on its way to being done:
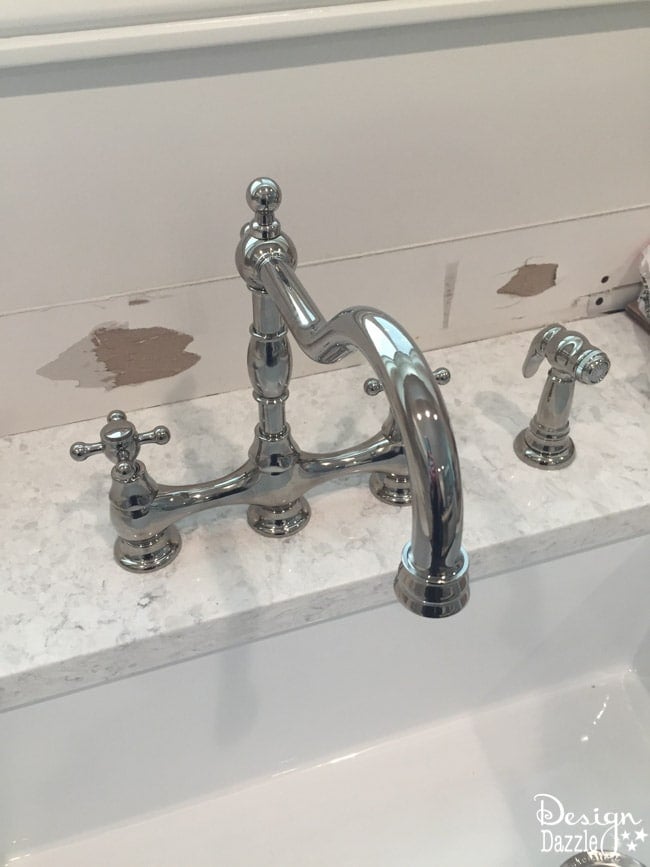
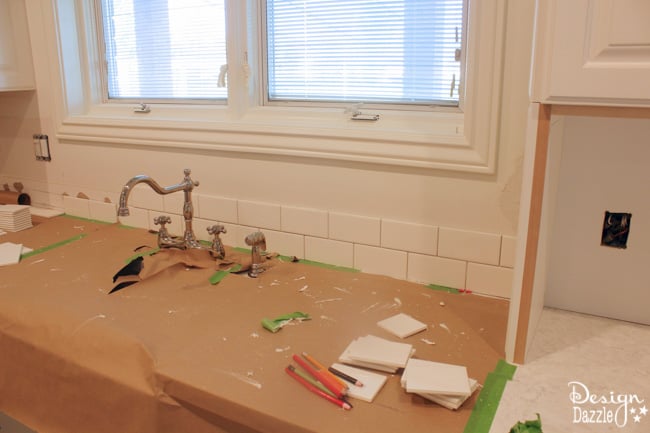
We put in a brand-new farmhouse sink and this faucet. I love how the faucet looks, but have to say I should’ve listened to the reviews. They weren’t the best reviews, but I thought I might get lucky with the faucet. It is beautiful – but the sprayer leaks! edited to add: The faucet was wonderful with no problems for the 6 years we lived here. The sprayer just needed a new little piece to make it all work fine.

Another upgrade we made was to install a white subway tile backsplash. This was actually one of the last things that went in since it couldn’t be installed until all the countertops were done. I’ll make sure to include more details about the process of choosing and installing the countertops in the next post of this series!
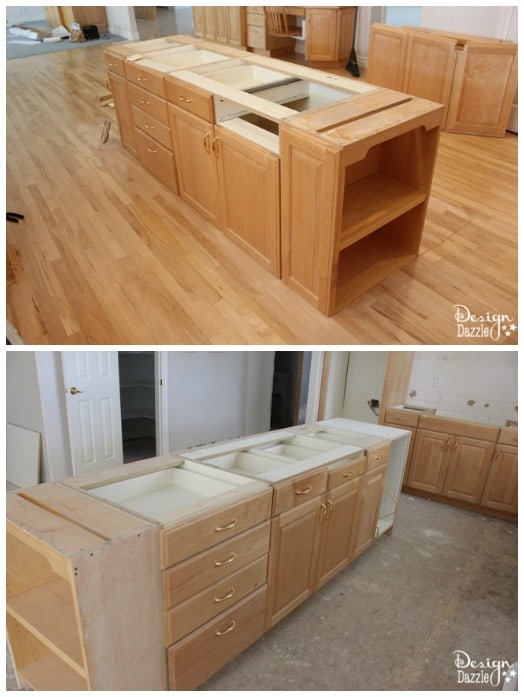
Besides the hood, the other major change we made to the kitchen is the island! I can’t wait to share all the little details and surprises it has later on! The big changes here came from changing the layout, removing the step, and removing the hanging chairs. We used the existing island but just rearranged the cabinets for the best use.
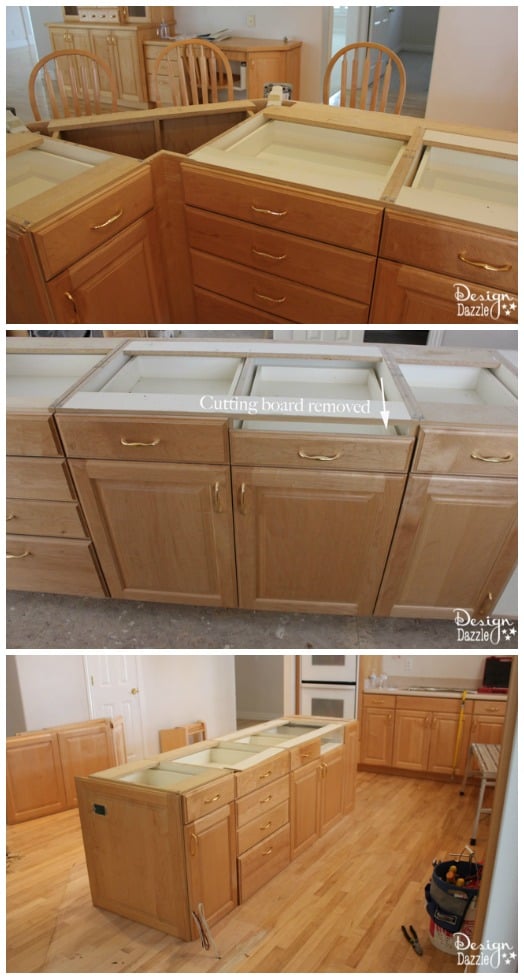
I’m not a fan of using the built-in cutting board that a lot of islands come with, so I wanted that removed. In order to get rid of the gap it left, the cabinet make just had to make a new drawer front. Super easy, but it made all the difference!
I also decided that I didn’t want the bookshelf part of the island to be close to the stove, so I just had it moved to the other side, and it looks great! I’ve added some platters and a couple of faux plants and books. I really like how it turned out facing the other direction so I could decorate the shelves.
The final island is amazing, but here are some pictures of the process it took to get there:
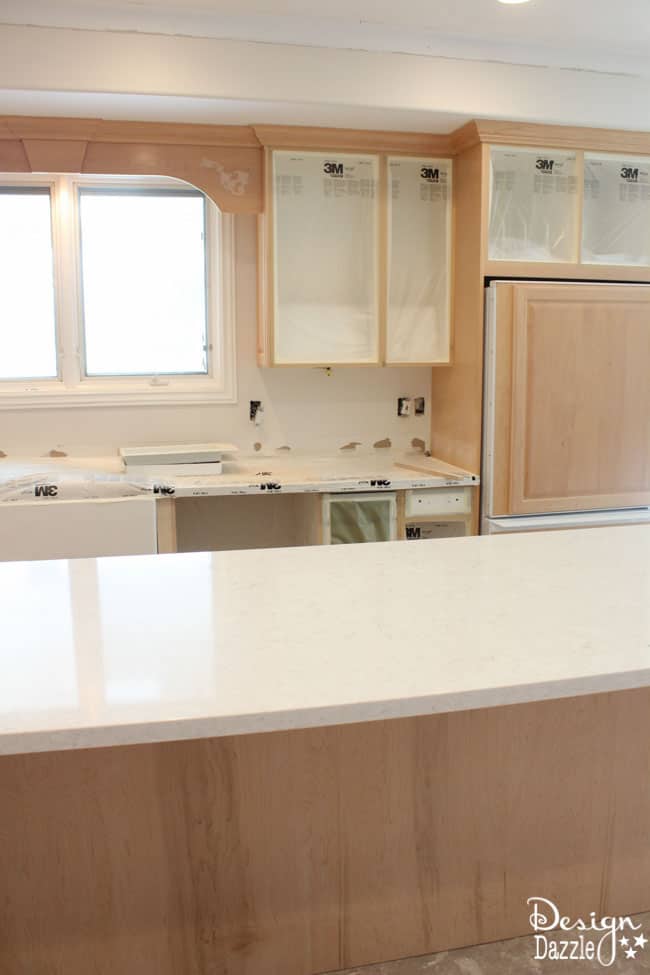
One of the biggest transformations to any room are the colors, and I love the way that choosing to lighten the cabinets changed the whole room. The paint I chose for the walls is Edgecomb Gray from Benjamin Moore. For the cabinets and crown molding, I went with White Dove, also from Benjamin Moore.
For all the cabinet doors, we set up a “spray room” in the basement where the painters could take everything and spray them in there. It reduced the mess and made clean up really easy!
I’m having so much fun sharing this process with you! Be sure to stick around for the finished kitchen reveal and all the details!
Post 1: Dream Kitchen Remodel – Before
Post 2: Dream Kitchen Remodel – During
Post 3: Dream Kitchen Remodel – Countertops/Tile
Post 4: Dream Kitchen Remodel – Reveal
Post 5: Dream Kitchen – Finishing Touches
Post 6: Dream Kitchen – Hidden Kitchen Storage Solutions
Post 7: Dream Kitchen Farmhouse Sink
Post 8: Kitchen Storage Ideas for Baking Zone
Post 9: Hidden Kitchen TV
Post 10: Kitchen Knife Drawer Solution
Post 11: Easy To Install Pre-Made Kitchen Slide-Outs


Iris Nacole says
Just went through a similar makeover for my home, but oh how I wish I had the space to modify my island. It’s going to look great!
Toni - Design Dazzle says
Iris – would love to see your kitchen! I know it’s hard when you don’t have the ability to change a wall or in your case modify the island. Fortunately, I could change my island but no walls could be moved.
Toni
Sonya ~ at home with the barkers says
It is going to be amazing! I love a beautiful kitchen makeover. Can’t wait to see. ~Sonya
Toni - Design Dazzle says
Thank you, Sonya! I’m really loving my kitchen!!!
Robin @ Redo It Yourself Inspirations says
I’m so excited for you, Toni! I did white kitchen in the spring and love it. My gray walls are “Reposed Gray”- Benjamin Moore. I can’t wait to see your reveal. It looks fantastic already!
Toni - Design Dazzle says
Robin –
I need to check out your kitchen! I had a white kitchen 22 years ago and love the classic feel and look.
Reposed Gray is also a great color!
Thank you so much!
Connie says
It’s simply beautiful. Can’t wait to see the finish.
Tell me about your beautiful hardwoods. Are they white oak with only a sealer and no color finish?
thanks
Toni - Design Dazzle says
Hi Connie,
The hardwood floors in these pictures are the “before” floors. They were 18 years old and maple was everywhere, everywhere, everywhere. I really didn’t like the look so they were removed and french oak floors were installed.
Maviya says
Just beautiful! your kitchen has the best function, Island bench rustic and blends in well.
Toni - Design Dazzle says
Maviya – thank you. Working hard on the remodel!
Lucille says
I guess your faucet is Danze. I saw the box in the picture. I’m surprised about the leaking. I wanted a bridge faucet, too, because they’re so pretty, but the Ikea farmhouse sink I got only had one hole. So I got a Danze faucet that only needed one hole. I didn’t use the sprayer because my husband and my contractor (both of them) refused to drill a hole in the sink for the sprayer! I don’t really mind. What I really wanted to tell you was that the handle was loose on our faucet and we contacted Danze and they sent the part we needed. (We hadn’t even registered our faucet!) We only had to pay shipping, which wasn’t much. So probably if you contact them, they will make it right. Maybe you already have, though. I was really impressed! (They really should, though, because their faucets are expensive!)
Toni - Design Dazzle says
Hi Lucille!
Yes, it is a Danze. It is the sprayer that is leaking. When I was debating whether to purchase the faucet the reviews said the sprayer leaked. I was hoping they had fixed it but they hadn’t. I should contact them and ask what they can do about the sprayer. I sure love the look of the sink and the price point!!
Thanks for your comment.