• Skip to primary navigation
  • Skip to content
  • Skip to primary sidebar
  • Skip to footer
  • Home
  • Blog
  • About
    • Contact
    • Press & Partnerships
    • Copyright/Disclosure
    • Links/Parties/Giveaways
    • HOI Friends
      • Toni Roberts
      • Tauni Everett
      • Tammy Mitchell
      • Randi Dukes
      • Michelle Stewart
      • Mariah Leeson
      • Mandy Beyeler
      • Lindi Haws
      • Kim Byers
      • Ashley Johnston
      • House of Ideas
  • Videos
  • SHOP

Design Dazzle

Inspiration for kids rooms, baby nurseries, and kids parties

  • My Home
    • Home Tour
    • Christmas Home Tour
  • My Projects
    • My Projects
    • Companies I Have Worked With
    • Michaels Makers
  • DIY/Decor
    • top tutorials
  • crafts
  • celebrations
    • parties
    • christmas
    • halloween
    • thanksgiving/fall
    • New Year’s
    • Valentine’s Day
    • St. Patrick’s Day
    • Easter/Spring
    • mother’s day
    • father’s day
    • patriotic
    • School/Teacher/Graduation
    • Gift Ideas
    • weddings
    • best ideas
  • Recipes
    • Meals
    • Instant Pot/Crock Pot
    • Desserts
    • Treats & Snacks
  • travel
  • free printables
  • Lifestyle
    • organization
    • Preparedness
    • Healthy Living
  • kids
    • kids parties
    • kids rooms
      • cool bedroom ideas
    • summer camp/crafts
You are here: Home / DIY/Decor / Laundry Pantry Room Combo – Week 2

April 12, 2017

Laundry Pantry Room Combo – Week 2

Since I spend a lot of time in my laundry room (unfortunately) I want to make sure that my laundry room is not only a beautiful room but one that also makes me happy! Last week in my Laundry Pantry Room Combo post I announced that I will be participating in the One Room Challenge hosted by Calling It Home. For this challenge, I decided to show you how I re-did my Laundry Pantry room, aka “Pandry”. This week I will be focusing on how I added some lighting and fun texture to the ceiling!

Where we left off last week (if you want to see more on last week’s progress go here) was me deciding to incorporate my coat closet into the design to create more open space and a larger room. This made my laundry/pantry room quite a bit larger. The coat closet was completely removed and studs and drywall were added to create a wall. The opening is where my swing door will go.
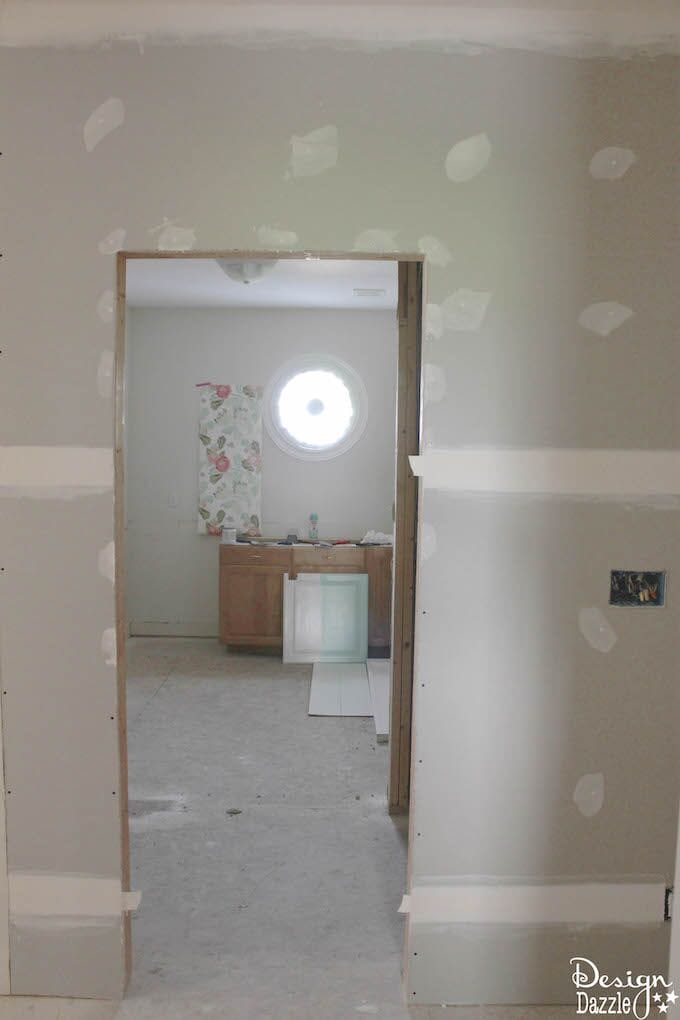
Week 2 of my laundry room pantry combo re-purpose! It will show you how to combine a butler's pantry with the laundry to create a "pandry". | Design Dazzle

The big patch on the wall is where the ironing board used to be, which was causing that whole wall to be a big waste of space. I decided to tear it out and fill in the hole. Since I was creating a “pandry” this is where I want to place cabinets for all my serving items – trust me I have a lot. We also removed the flooring, more on that to come!
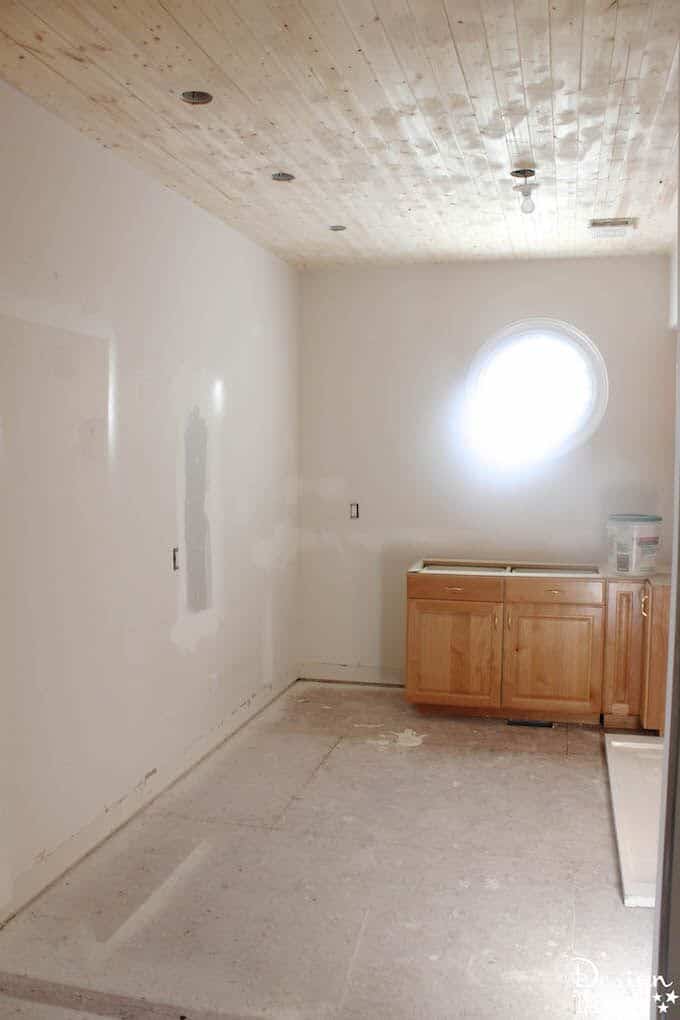
Week 2 of my laundry room pantry combo re-purpose! It will show you how to combine a butler's pantry with the laundry to create a "pandry". | Design Dazzle

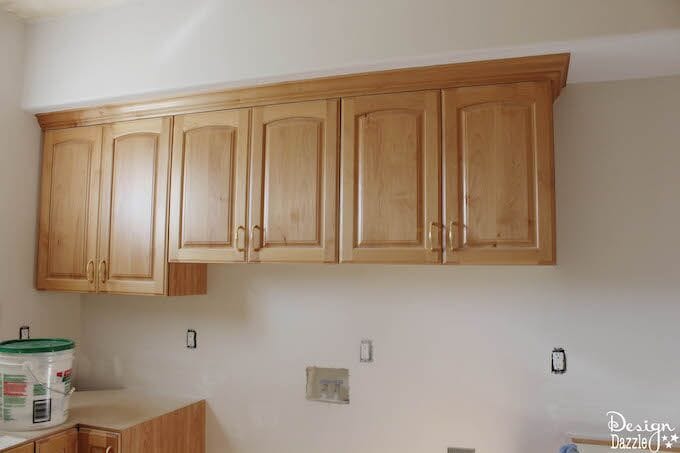
The original cabinets were moved but they were in fantastic condition so I decided to keep them. They just need a face lift!

Week 2 of my laundry room pantry combo re-purpose! It will show you how to combine a butler's pantry with the laundry to create a "pandry". | Design Dazzle

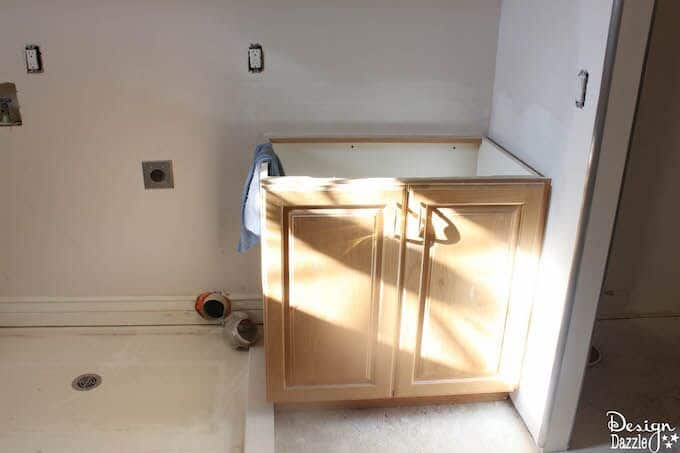
This was the original sink cabinet but it was really quite dirty with paint, etc so we decided to clean it real good and  make a sink top out of wood. More on that next next.

Week 2 of my laundry room pantry combo re-purpose! It will show you how to combine a butler's pantry with the laundry to create a "pandry". | Design Dazzle

Beach banner

As you can see, we added canned lighting and tongue and groove wood to the ceiling. I love the fun and unique texture that the wood ceiling adds to this room! I can’t wait to show you what it looks like when it’s done. In the ceiling, we added a temporary light so we could work in the room with light. The chandelier will come later.
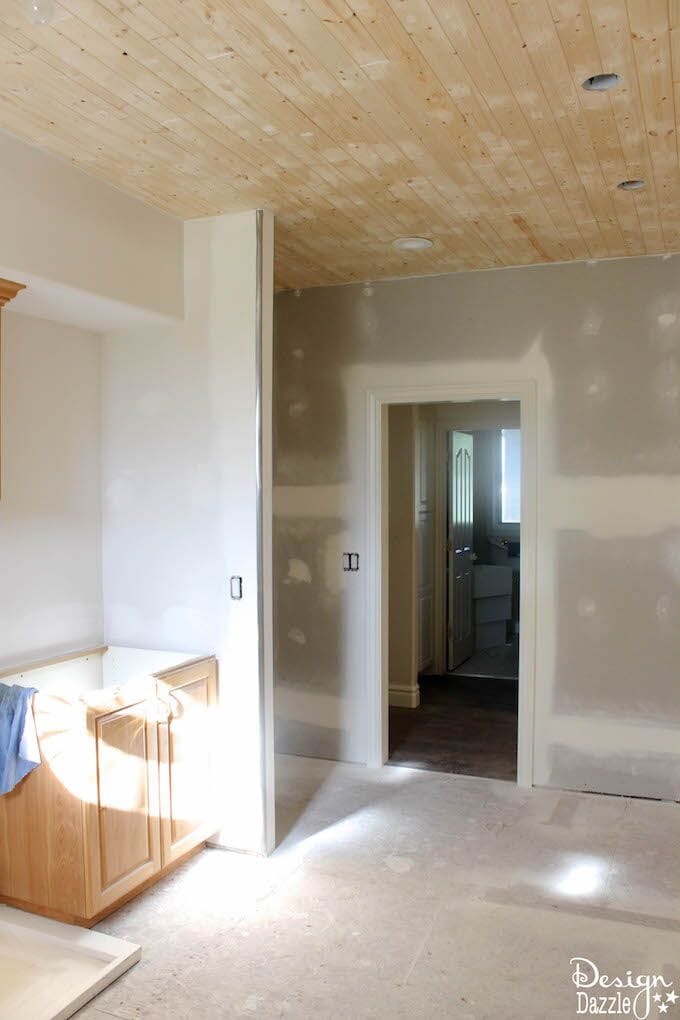
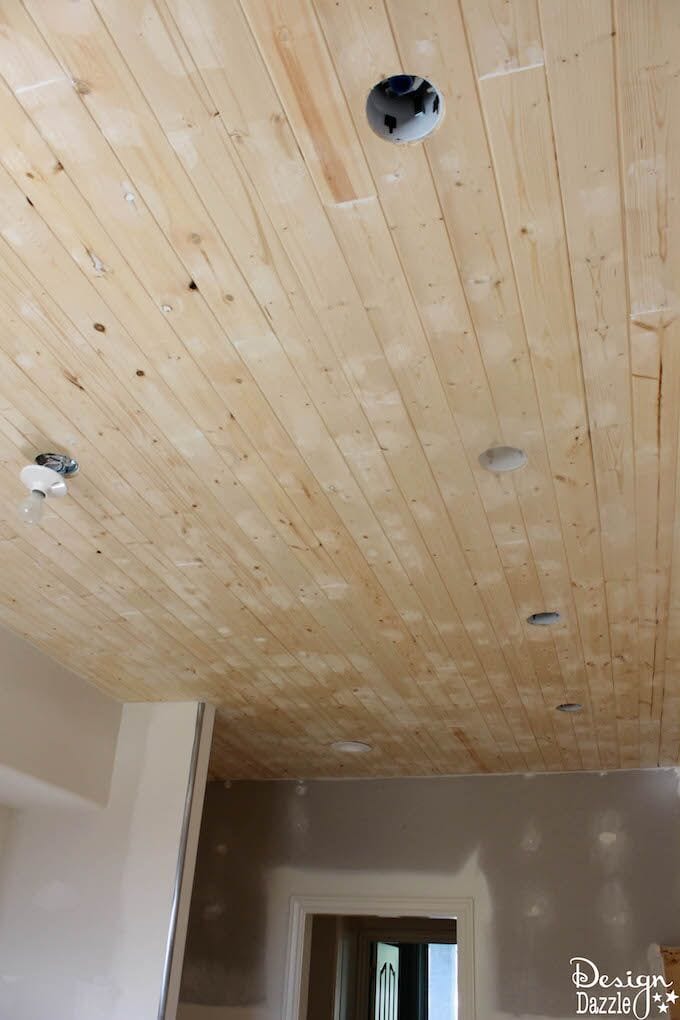
Week 2 of my laundry room pantry combo re-purpose! It will show you how to combine a butler's pantry with the laundry to create a "pandry". | Design Dazzle  Week 2 of my laundry room pantry combo re-purpose! It will show you how to combine a butler's pantry with the laundry to create a "pandry". | Design Dazzle

We added drywall to enclose the “pandry”. Where the small wall and cabinet is was actually the original opening for the laundry room. But because this is my “pandry” we are putting a an extra refrigerator/freezer behind the small wall.

Week 2 of my laundry room pantry combo re-purpose! It will show you how to combine a butler's pantry with the laundry to create a "pandry". | Design Dazzle


My goals for creating a Laundry Pantry Room Combo – PANDRY:

  • Create a happy room!
  • Add tons of storage for my serving pieces – cakes stands, glassware, apothecary jars,  beverage dispensers,  etc.
  • Incorporate different textures into the design
  • Add lighting and a cute chandelier (this is partially done!)
  • Wallpaper the focus wall
  • Creative way to use the ironing board
  • Tongue and groove ceiling 
  • Add a swing door
  • Make sure all the essentials of a laundry room is included 
  • Organization is a must
  • Create a spot for our extra refrigerator 
  • Painted floor
  • Wood counters
  • Style and decorate the room

Be sure to come back next week to see what was accomplished next!


Related Posts

  • Laundry Pantry Room Final Reveal

    When I started this room my main goal was to make a happy room, a…

  • Laundry Pantry Room Combo – Week 4

    My laundry room is a place where I spend a lot of time! Because of…

  • Laundry Pantry Room Combo – Week 5

    Do you hate doing laundry? Would you believe me if I told you that I…

  • Laundry Pantry Room Combo – Week 3

    My laundry room is a place where I spend a lot of time! Because of…

Reader Interactions

Comments

    Leave a Reply Cancel reply

    Your email address will not be published. Required fields are marked *

  1. Summer Harvey says

    April 13, 2017 at 9:28 am

    Love the plank ceiling! I have always wanted to do this, but it looks so hard! I can’t wait to see it finished! It’s looking really good!

    Reply
    • Toni - Design Dazzle says

      April 13, 2017 at 8:58 pm

      Thank you Summer for your kind comments! The plank ceiling was created with tongue and groove so it’s a little easier to install.

      Reply

Primary Sidebar

Hi, I’m Toni! Welcome to my blog Design Dazzle! I love being a designer, DIYer, decorator, traveler, stylist, crafter, party planner, food and treat maker, holiday lover, and memory maker! READ MORE

Sign up to receive FREE printables!

Footer

Instafeed

@designdazzle

Toni Roberts is a participant in the Amazon Services LLC Associates Program, an affiliate advertising program designed to provide a means for sites to earn advertising fees by advertising and linking to amazon.com

DesignDazzle.com is protected by copyright laws. DO NOT distribute or copy the content or share multiple images or collage images without written permission. You can use ONE Design Dazzle image only if there is a link back to DesignDazzle.com. DO NOT edit, crop, or remove watermarks from any image. Please contact me at toni@designdazzle.com with any questions.

About | Contact Us | Privacy and Legal

© 2017 Design Dazzle · All Rights Reserved.