

Make this super cute matchbox valentines in minutes! It’s a great tutorial on How to Make Matchbox Valentines.
It’s a simple but sweet Valentine’s Day gift or token for friends and family. It’s also a great teacher or class gift idea! Remember small parts aren’t good for little kids.
For older recipients place a magnet inside the heart to create a heart magnet to use after Valentines as a pretty reminder. It could be used on the front of a fridge, magnet board, metal file cabinet, etc.

List of Supplies:
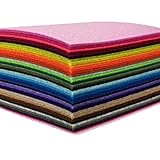
- Felt fabric
- Needle and thread
- Pencil
- Scissors
- Matchbox
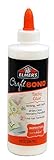
- Craft glue
- Colored craft papers
- Confetti or any kind of craft decor

How to Make Matchbox Valentines
Step -1:
Cut a small heart shape from red colored craft paper (or any colored craft paper you want). Cut out a basic pencil shape from a white craft paper.

Step -2:
Fold the square part of the pencil shape cut out into half, keeping the triangular part intact.

Step – 3:
Now fold the triangular part towards the square part. This will form a mini envelope pattern. Glue the heart cut out on the envelope to close. Keep in mind that the size of the envelope should be smaller than the matchbox.

Step – 4:
Cover the outer part of the matchbox with colored craft paper. You can also cover the inner bottom surface of the inner part of the matchbox, with craft paper.

Step – 5:
Glue the mini envelope (created in previous steps) on any one of the big flat sides of the matchbox. Use a black gel pen to write a message or quote on the matchbox. Draw any design you want. I did a swirly dash lines from the quote towards the envelope.

Step – 6:
Cut out 2 same sized heart shapes from felt fabric. The size of the heart should be smaller than the matchbox, as it should fit inside the matchbox.

Step – 7:
Prepare needle and thread. Place both heart cut outs together, making sure to match the sides of both heart cut outs.

Step – 8:
Do simple running stitch around the sides to join both heart cut outs. Keep a small opening for stuffing the felt heart. Use scrap felt fabrics to stuff the felt heart. Insert the scrap felts through the small opening to stuff the heart.

Step – 9:
Done stuffing the heart? Close the open end to secure the stuffing. Tie knots and cut off extra thread.

Step – 10:
I used round confetti to decorate the small heart plush, Use craft glue to attach the confetti on the heart plush. Allow the glue to dry entirely.

Step – 11:
Place the heart inside the inner part of the match box and cover it with the outer part.
You can put a tiny letter inside the matchbox with the heart plush.

Enjoy!
If you’re looking for more cute Valentine’s Day craft idea, check out these sweet crafts for kids!

Here are some of the items you need to make your matchbox Valentines!


Leave a Reply