• Skip to primary navigation
  • Skip to main content
  • Skip to primary sidebar
  • Home
  • Blog
  • About
    • Contact
    • Press & Partnerships
    • Copyright/Disclosure
    • Links/Parties/Giveaways
    • HOI Friends
      • Toni Roberts
      • Tauni Everett
      • Tammy Mitchell
      • Randi Dukes
      • Michelle Stewart
      • Mariah Leeson
      • Mandy Beyeler
      • Lindi Haws
      • Kim Byers
      • Ashley Johnston
      • House of Ideas
  • Videos
  • SHOP

Design Dazzle

Inspiration for kids rooms, baby nurseries, and kids parties

  • My Home
    • Home Tour
    • Christmas Home Tour
  • My Projects
    • My Projects
    • Companies I Have Worked With
    • Michaels Makers
  • DIY/Decor
    • top tutorials
  • crafts
  • celebrations
    • parties
    • christmas
    • halloween
    • thanksgiving/fall
    • New Year’s
    • Valentine’s Day
    • St. Patrick’s Day
    • Easter/Spring
    • mother’s day
    • father’s day
    • patriotic
    • School/Teacher/Graduation
    • Gift Ideas
    • weddings
    • best ideas
  • Recipes
    • Meals
    • Instant Pot/Crock Pot
    • Desserts
    • Treats & Snacks
  • travel
  • free printables
  • Lifestyle
    • organization
    • Preparedness
    • Healthy Living
  • kids
    • kids parties
    • kids rooms
      • cool bedroom ideas
    • summer camp/crafts
You are here: Home / celebrations / christmas / Marble Painted Christmas Ornaments

Marble Painted Christmas Ornaments

This post may contain affiliate links that, at no additional cost to you, I may earn a small commission. Read our Disclosure Policy.

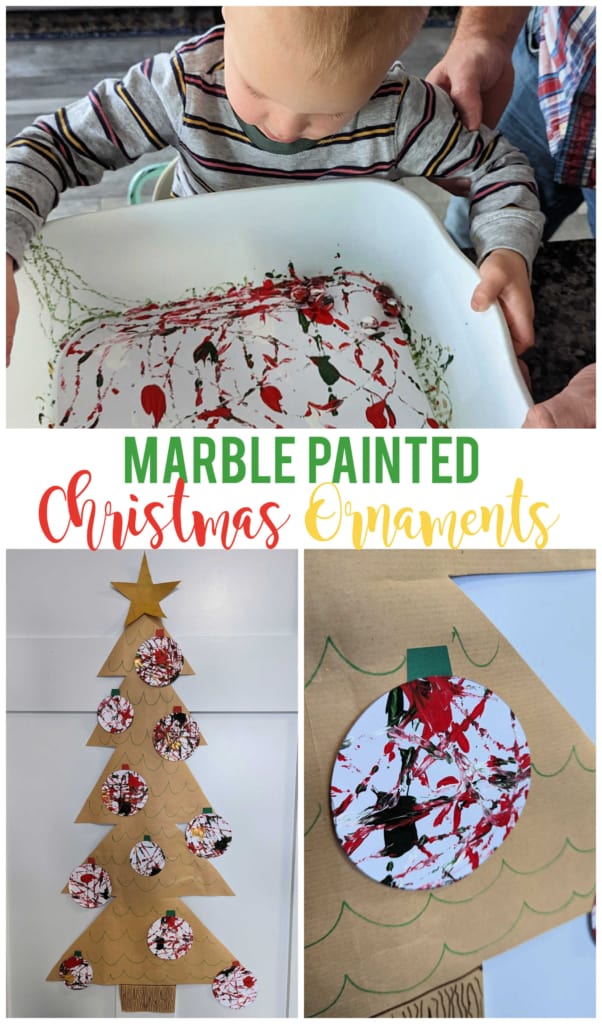
Make these easy marble painted ornaments for kids with a few basic craft supplies! Then put them up on the tree, around the house, or use them as gift tags.

marble painted ornaments activity title

Hello! My name is Shani from Sunshine and Munchkins. I’m so excited to be a part of the Christmas Wonderful series again this year! I hope you love this tutorial for how to make marble painted ornaments for kids.

My kids love a good marble painting activity. It’s easy to put together, doesn’t take long and keeps them entertained for more than a few minutes. This is a great activity for kids ages 2 and up. (Although the younger ones may need some help.) Check out the supply list below and let’s get started!

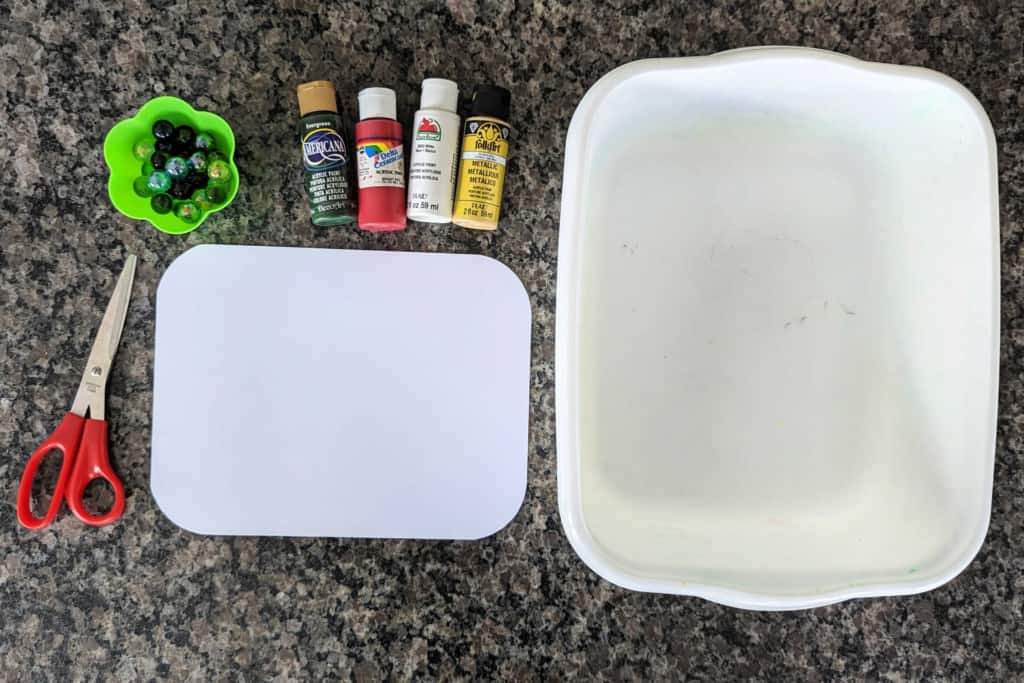
Supplies Needed for Marble Painted Ornaments

  • white card stock
  • acrylic paint
  • shallow plastic bin or box
  • marbles
  • scissors
  • string (optional)
marble painted ornaments activity 1

How to Make the Marble Painted Ornaments

First, you’ll need to get a bin or box that you can put your paper and paint in. I like using the dishwashing bins from the Dollar Tree because they are inexpensive and can be used for all types of kids activities, such as water beads.

Next, grab your white card stock. I highly recommend card stock because it’s thicker and the paint won’t soak through. If your bin/box has rounded corners, you can just use a cup or something similar to trace around on the edges. Then use your scissors to trim the paper.

Place the paper in the bin/box. If it is bigger than the paper, you may need to tape it down on each side.

Now you can add the paint! For the colors, we used red, green, white and gold. Squirt drops of paint randomly all over the paper. We used acrylic paint but you could also use poster paint.

marble painted ornaments activity 2
marble painted ornaments activity 3

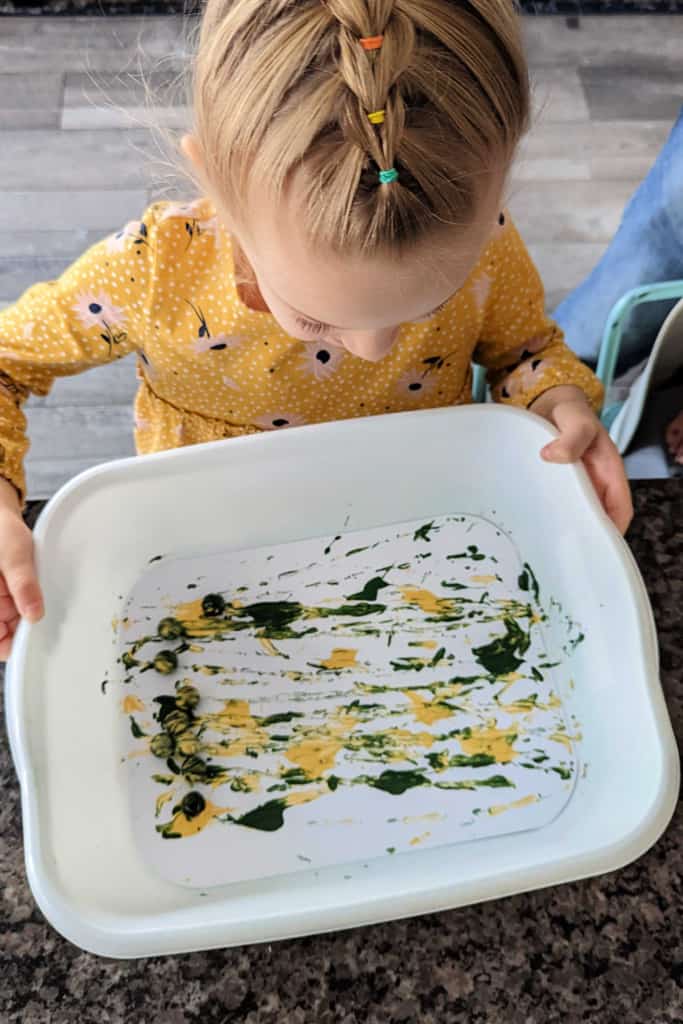
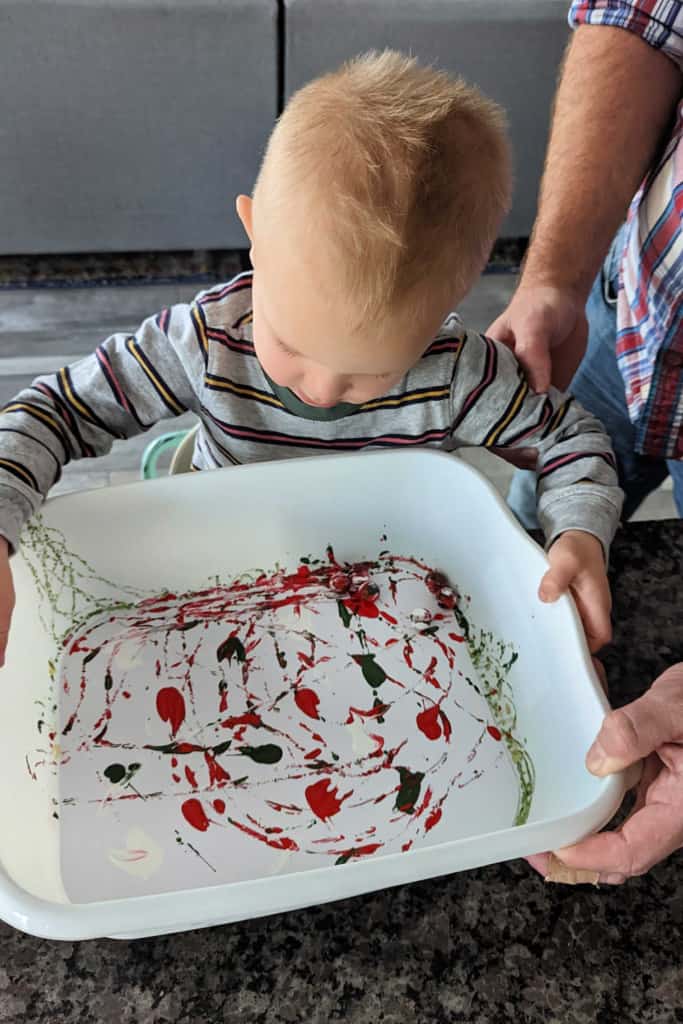
Add the marbles and let your kids roll them around in the bin until they are satisfied with how their painting looks. Then put the marbles in a bowl of water so you can easily rinse them off when you’re done painting.

*PRO TIP* The more marbles you put in the bin, the more likely the colors are to get muddy looking. I’ve found that 4-5 is plenty. Additionally, you don’t need to worry about using the same marbles each time (unless you want to). Just grab a few clean ones for each new painting and wash them all at the end.

Set the paintings aside to dry.

Once dry, you can trace circles on the painting and cut them out. I used a plastic cup (about 4″) for the large circles and a smaller cup for the smaller ones. I was able to get 5-6 circles out of each piece of paper.

marble painted ornaments activity 6
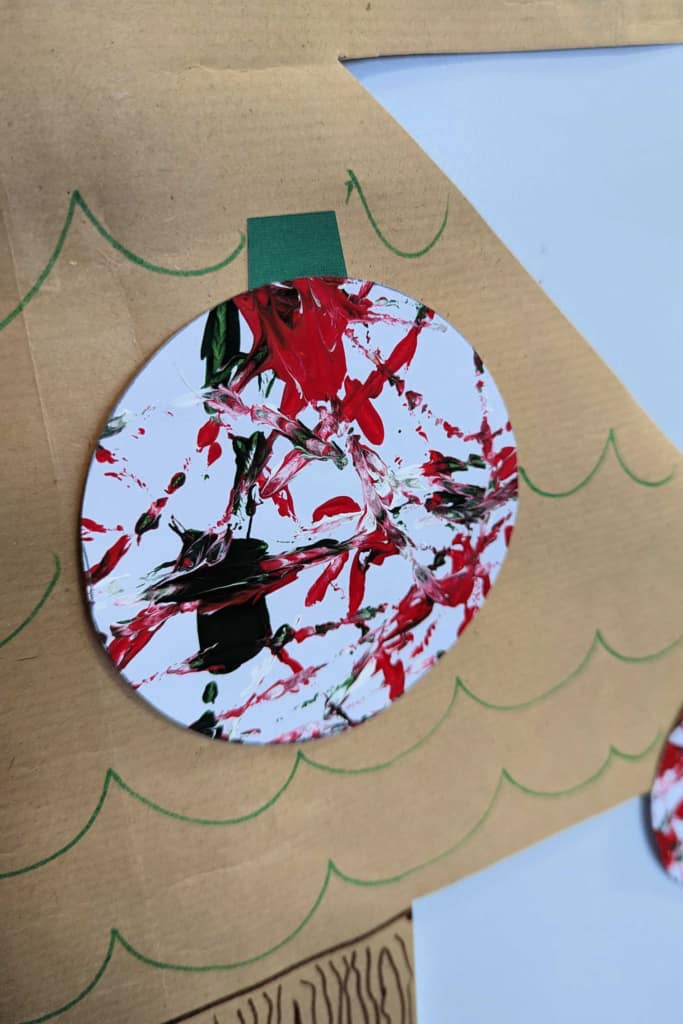
Option #1: If you want to make the circles look more like ornaments, cut a small rectangular piece of card stock. Stick it to the back of the circle with a little poking out at the top.
Option #2: Punch a hole in the circle and loop some string through, tying a knot.

What can I do with the marble painted ornaments?

  • Hang them on your tree.
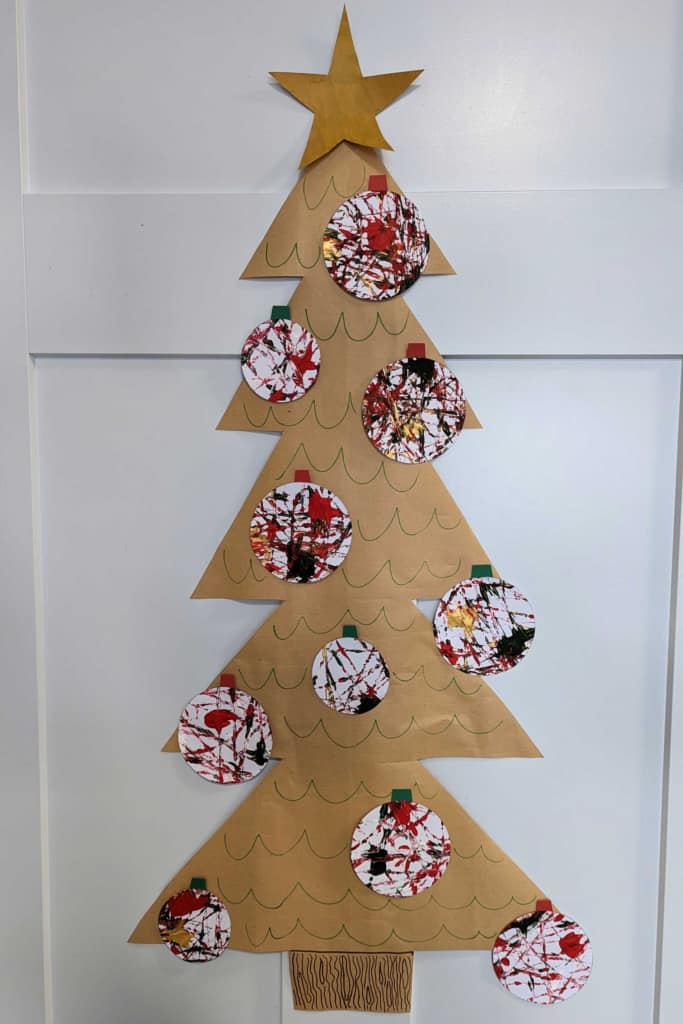
  • Make a large paper tree you can hang on the wall, then put the ornaments on it. (This is what we did.)
  • Stick them to the window.
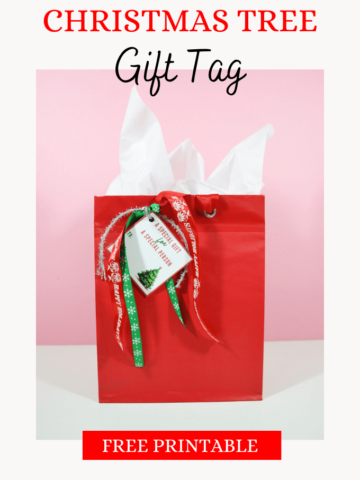
  • Use them as gift tags.
  • Play a hiding game with them. (Hide the ornament in a room and let your child find it.)
marble painted ornaments activity 7
marble painted ornaments activity 10

I hope you love doing this Christmas craft with your kids!

If you want more kid activities and crafts, be sure to follow me on my blog: Sunshine and Munchkins. You can also find me on Instagram, Pinterest and Facebook.

Merry Christmas and happy crafting!

about me guest post blurb
Christmas Wonderful

Related Posts

Christmas Paper Medallion Ornaments

Glittery Painted Putz Style Christmas Houses

DIY Easy Photo Christmas Ornament

Christmas Ornament Memory Tree

Christmas Wonderful: DIY Washi Tape Ornaments

Christmas In A Can

Grinch Christmas Ornament Craft

How to Make Simple DIY Christmas Ornaments with Cricut

Paper Lantern Christmas Ornaments

How to Make Farmhouse Christmas Ornaments | Dollar Tree DIY

Article Rating:
No rating
Author Bio
Article Info
Popular Posts
Guest Blogger

Guest Blogger

Author at Design Dazzle
    Power Bio Box by HOI
    You are here: Home celebrations christmas Marble Painted Christmas Ornaments
    Title:
    Marble Painted Christmas Ornaments
    Authors:
    • Guest Blogger
    Categories:
    • celebrations
    • christmas
    Mentions:
    christmas wonderful
    Keywords:
    marble
    Last Updated:
    December 12, 2022
    • 33 Cute Valentine's Day Recipes For Kids
    • Minnie Mouse Valentine's Cookie Pops
    • DIY Holiday Truck
    • Family Game Night Fun
    • How to Decorate a Thanksgiving Table + Free Printable
    • Edible Snowman Centerpiece
    • Baby's First Christmas Pajamas
    • How To Make a Large Christmas Tree Topper
    • Santa's Special Delivery Gift Tags
    • 100 Mischievous ELF Ideas
    • Make Your Own Childrens' Nativity Set!
    • DIY: Boot-i-licious Halloween Decor

    Sharing is caring!

    Disclaimer

    This post may contain affiliate links, which means that if you click on a product link, we may receive a commission (at no extra cost to you). See my full disclosure for further details.

    Reader Interactions

    Leave a Reply Cancel reply

    Your email address will not be published. Required fields are marked *

    Recipe Rating


    Primary Sidebar

    Img 0422

    Hi, I’m Toni! Welcome to my blog Design Dazzle. I love being a designer, DIYer, traveler, crafter, holiday lover, and memory maker. Read more.

    Toni Roberts is a participant in the Amazon Services LLC Associates Program, an affiliate advertising program designed to provide a means for sites to earn advertising fees by advertising and linking to amazon.com

    DesignDazzle.com is protected by copyright laws. DO NOT distribute or copy the content or share multiple images or collage images without written permission. You can use ONE Design Dazzle image only if there is a link back to DesignDazzle.com. DO NOT edit, crop, or remove watermarks from any image. Please contact me at toni@designdazzle.com with any questions.

    About | Contact Us | Privacy and Legal

    © 2017 Design Dazzle · All Rights Reserved. | Hosted by House of Ideas