

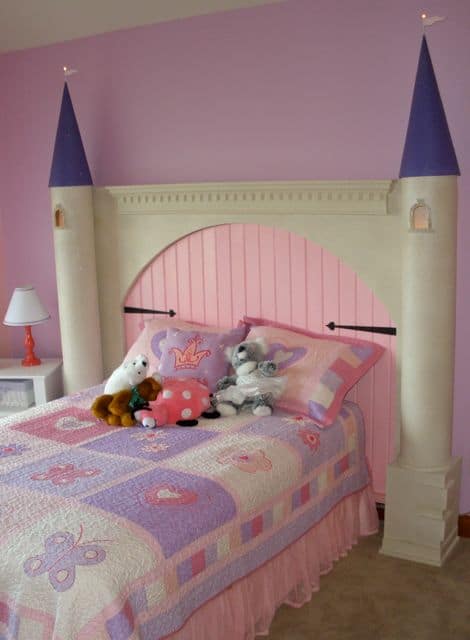
 Some people are just too clever and Tim Schepp of Wisconsin is one of them. Tim designed and made this sweet princess castle headboard with products from a home center and hobby store.
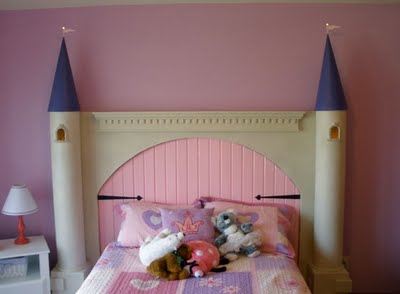 A little princess would feel like royalty with this castle bed. A perfect focal point for a royal chamber.
Tim’s instructions to make a castle headboard:
Arched Door:
“I used some pine tongue and groove boards for the door.
Main Body:
A large piece of insulation foam board for the arch, (cut with a jigsaw).
A prefab shelf glued onto the foam board.
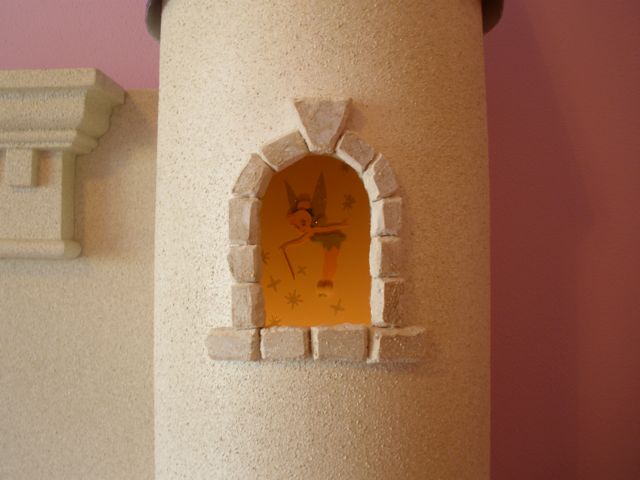
Towers:
The towers are made of cardboard concrete forms, (drywall compound was used to smooth the seams). Once I cut out the windows, I carved little pieces of drywall for the stones and glued them around them to make it look like stones. I made a box for the tower base our of 2×2’s and drywall, topped with a decorative column mount.
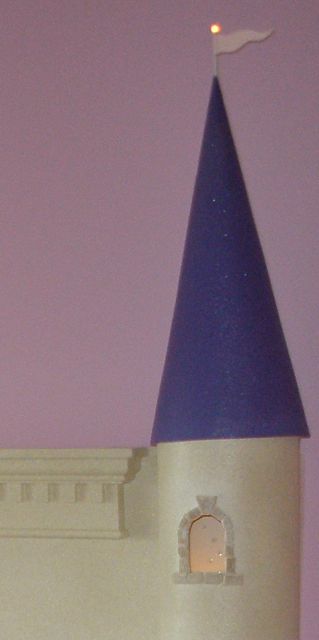
The tops are doll cones.
Paint:
I used a white primer paint on everything first, because the stone fleck paint doesn’t cover very well. Then I used American Accent’s Bleached Stone fleck paint. (Krylon’s “make it stone” in White Onyx works too). The tops were painted violet, over the stone coat, for texture. Next, was a clear coating for durability. Then the entire castle, (not the door) got a coat of spray glitter.
Disney’s Fairytale Pink by Behr paints, was used for the door, (headboard).
 Lighting:
I used a stripped extension cord to go from the wall to the inside of one tower base. Then I installed a dimmer in an electrical box, and ran romex to outlets mounted in the towers, just below the windows. Then I plugged in nightlights.
On the top of the towers, I used heavy straws for the flag pole. I found small lights that were for a train set street light kit, and mounted them on the top and ran the wires though the straw, to the power supply, and plugged into the outlet.”
 Doll cones, are acrylic cones that can be ordered on many craft sites. I found mine at www.sunshinecrafts.com. They are thin and flexible, so I used some Great Stuff spray foam, to keep them rigid. My fear was that if the cones flexed, the fleck paint would crack and fall off.”
Another option for the cones – little traffic cones found at toy stores. Thanks Tim for sharing such a wonderful DIY project!


Kari @ Ucreate says
AMAZING!! I have to feature this, too!
Melissa says
Brilliant! Definitely on the to do list!
Jessalyn says
This is so cute!
Alice says
This is Very clever! The only thing I will add is some wall decals (I get mine from https://www.wallslicks.com)of tree branches and greenery to make the castle snug in a "forest"! Thanks for the inspiration!
Alice says
This is Very clever! The only thing I will add is some wall decals (I get mine from https://www.wallslicks.com)of tree branches and greenery to make the castle snug in a “forest”! Thanks for the inspiration!
Lorna Terry says
I love this idea for my little girl's bedroom! About how much did all the materials cost?
Anonymous says
I would like too take some time too Thank all the people for doing what you do and making the community what it is im a long time reader and first time poster so i just wanted to say thanks.
Anonymous says
I am very happy to read this article..thanks for giving us this useful information. anti viral Read a useful article about tramadol tramadol
Alekicha says
I really like it. I love themed bedrooms. I did one for my son. I used cars as theme. I bought red racing car bed, tarmac carpet and curtains with formula 1 cars. It looks amazing.
Diane says
Hi! FANTASTIC idea!
I would love to do this for my son. Would you have any ideas on how to make it look a little masculine?