

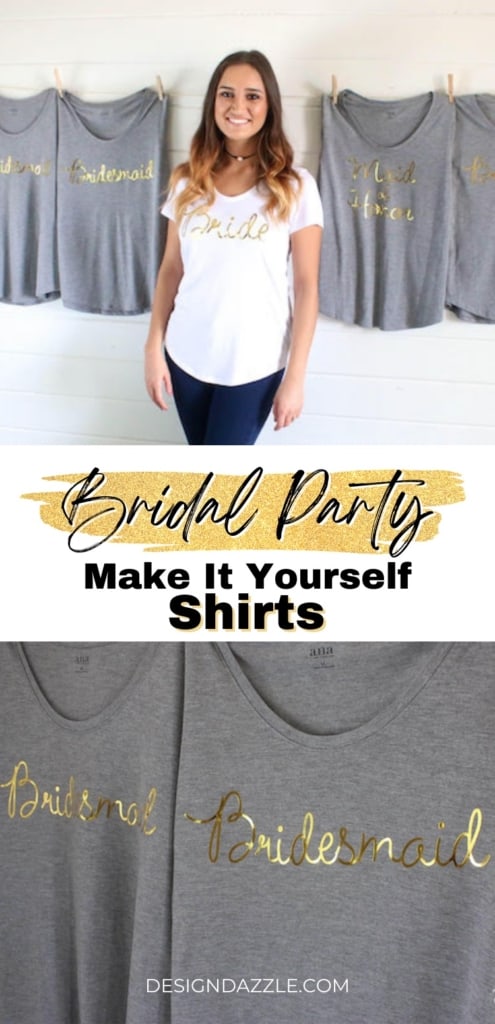
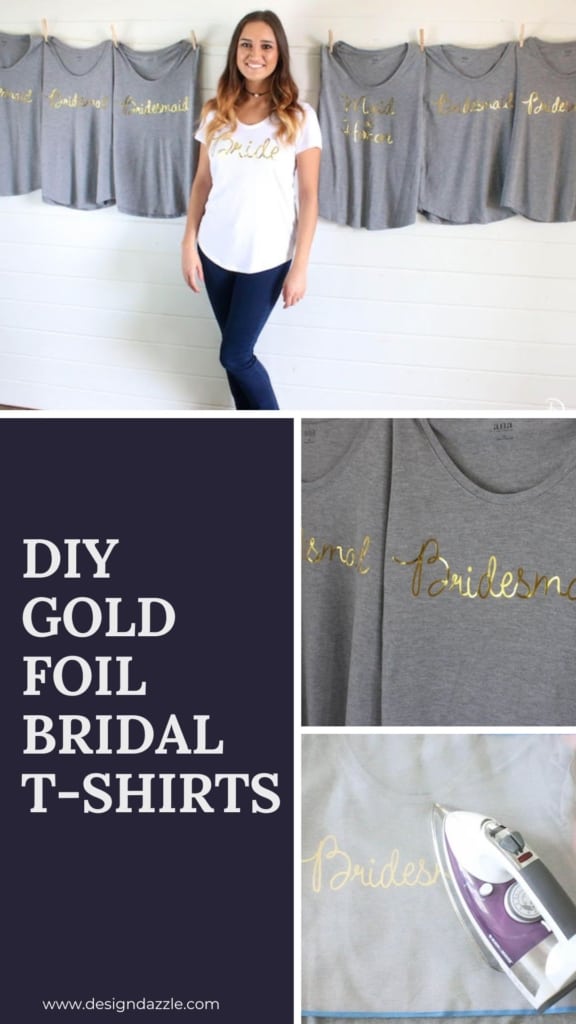
When your daughter is getting married and she wants gold foil bridal t-shirts with cute wording. You say, “I’ve got the perfect thing to do this”!! I’ve been using a Cricut for several years. I have the small first edition machine – not sure when it came out. But since then have owned several various models. What can I say but it is a fun, must-have crafting machine. This is the first time I have made DIY gold foil bridal t-shirts using the Cricut. Crafting with my daughter is very enjoyable! We made 1 brides shirt, 1 maid of honor shirt and 7 bridesmaid shirts.

First up before I get to the tutorial, I wanted to share some of the various items you can cut with a Cricut. You might be surprised.
- Paper – Standard, Cardstock, Vellum, Poster Board
- Vinyl – Standard, Premium, Dry Erase, Chalkboard
- Iron-On – Heat-Transfer Vinyl (HTV)
- Craft Materials – Washi Tape, Craft Foam, Glitter Paper
- Upcycled Materials – Chipboard, Cereal Boxes, Aluminum Cans
- Fabric – Felt, Denim, Polyester, Burlap, Canvas
- Plastic – Stencil, Window Acetate, Silicone
- Thick Materials – Leather, Balsa Wood, Magnet Materials
I have cut many various supplies with my Cricut, fabric, iron-on, stencil and even wood art! You can change the settings on the Cricut for various thicknesses and products you are cutting. It is a great machine to make so many different items with. Your imagination is your limit with this machine! So I’ve always wanted to make some t-shirts using foil. Sharing tips on how I created the…
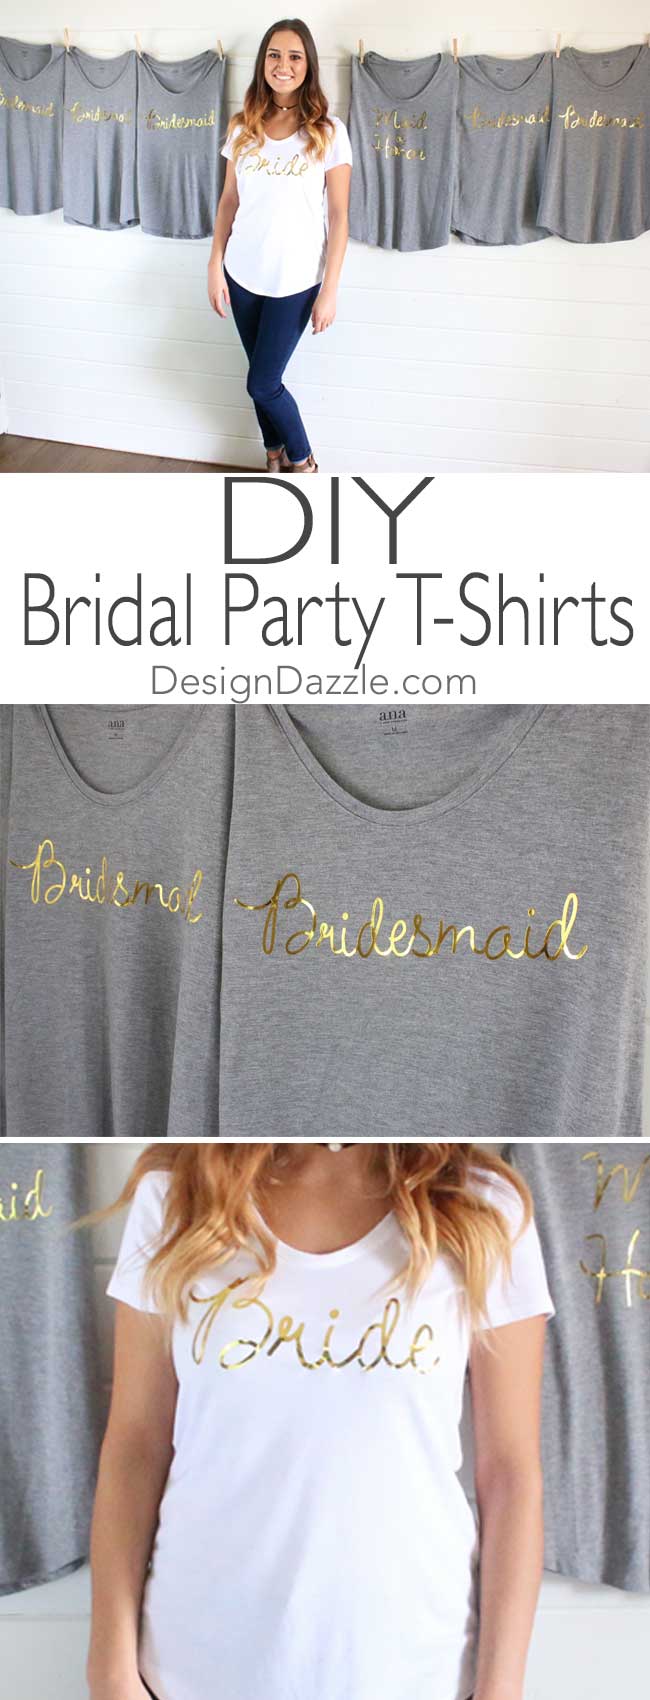
DIY Gold Foil Bridal T-Shirts Using The Cricut!
This post contains affiliate links at no additional cost to you. For further information, please see our disclosure policy.

Supplies:
- Cricut Machine
- Cricut cutting mat
- Cricut tools
- Women’s Cotton T-shirts
- Gold Foil – I used this exact 12″ x 19″ gold foil for this project. For Cricut iron-on visit here.
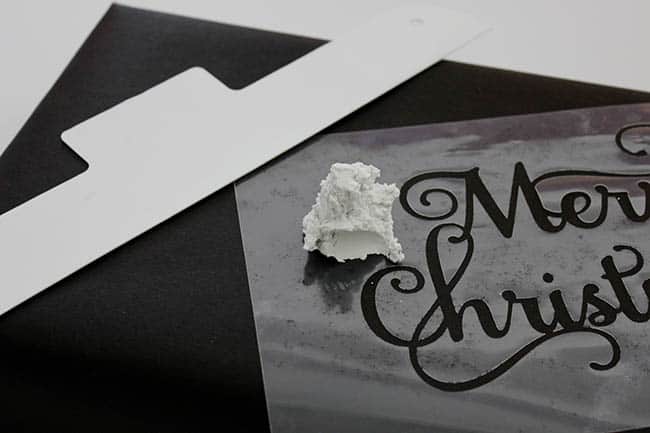
- Cardstock scraps
- Iron
Step 1
Wash and dry the t-shirts. You will need to remove the sizing on the cotton t-shirts. We did not use any fabric softener. Iron the shirts to get rid of any wrinkles.

Step 2
Organize your Cricut and supplies and log into Cricut Design Space. Figure out the font you would like to use for your wording. We used two different fonts – “Haley” and “Yours Truly” was used for the letter “B”. My daughter wanted the “B” for bride and bridesmaid to look a certain way. When I try out different fonts I will cut out the text on scrap cardstock first to get an idea of how it will look cut and also for the sizing. I don’t want to waste the gold foil. What looks to be the right size on the computer screen can vary when you place it on a t-shirt. We ended up not using this font.

Step 3
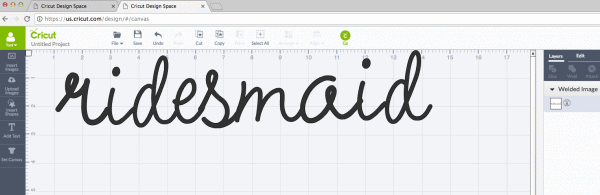
Cricut Design Space is pretty easy to learn. The Design Space is where you create your project to be cut out by the Cricut. The font we used needed to be cut out with the letters “attached” so it looks like one word script. For this to happen, you will need to “weld” the word together. To do this – type your word, click “select-all” and click layers – and then weld. This will create one word where the letters are completely attached to each other.
I also clicked on “mirror” to have the reverse image cut out. Read the directions on the type of product you are using to see if it needs to be “mirrored”. The bottom image shows the “mirrored” text and shows that 3 “ridesmaids” will be cut using the Haley font. Which is kind of funny because her Maid of Honor is Haley – even spelled the same ; ) The “B” was cut out using a different font (not sure which font this was)

Step 4
You are ready to cut! Place the foil shiny side down on the sticky mat (the back of the foil is the grey showing). Load the mat into the Cricut, select the product that will be cut, hit go and then push the letter “C” to begin cutting. I cut out several words at a time. We cut out the letter “B” by itself.

Step 5
Weeding. Yep, you need to weed when cutting with the Cricut. But it is much easier than outdoor weeding ; ). Using the tools package, I used the mini spatula to remove the cut-outs, extras and negative pieces of gold foil off the sticky mat. This is what the left over foil looks like when I removed the text.


Step 6
Iron-on the foil! I set-up a towel on my kitchen counter. A hard surface is really important when ironing on fabric. Make sure to measure to accurately place your wording evenly on the t-shirt. I placed a pressing cloth over the wording. I don’t want to accidentally burn the t-shirt. Follow the instructions of the brand of foil/iron-on you are using.


This is what the gold foil looks like when ironed on. How cute did the DIY Gold Foil Bridal T-Shirts Using The Cricut turn out? The most time consuming part was finding the exact type of font and the size of the wording my daughter wanted. Once we figured out all that. It went pretty quickly.
What materials have you cut using your Cricut? To find more information on cutting various materials, check out Cricut material settings page.
This is a sponsored conversation written by me on behalf of Cricut. The opinions are all mine. #ad


Milie says
Can you please tell me what size font you used? Thanks
Toni - Design Dazzle says
Hi Millie,
I’m sorry I don’t remember the little details. Check the post to make sure I don’t state it in the post. We did a little experimenting.
Sarah says
Could you share where you found the two fonts you used? They are so cute!!!
Toni - Design Dazzle says
Hi Sarah!
“Haley” and “Yours Truly” are the fonts.