

Whenever I used to think of a balloon garland I would think of a kids party or something similar. But not anymore! I created this balloon garland for my daughter’s bridal shower and could not believe how classy and simply gorgeous it turned out! Find the step by step balloon garland tutorial below.

Making this balloon garland is surprisingly simple and straight forward! Continue reading to see how I made it and get the links to the products I used, some of them make all the difference!


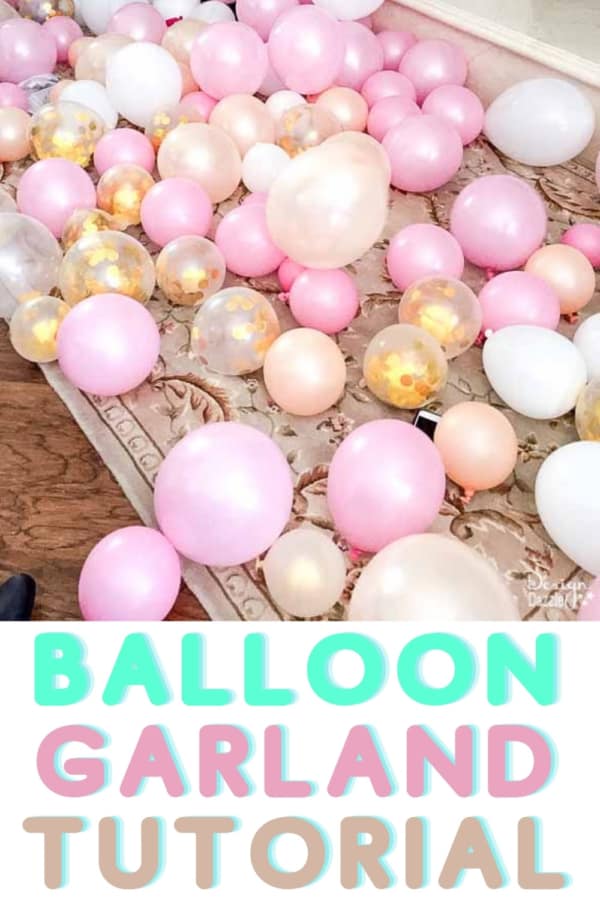
Supplies:
- Gold confetti balloons
- Smaller gold confetti balloons
- Peach Balloons
- White Balloons
- Pink Balloons
- Artificial greenery and faux flowers (optional)
- Deco strip to insert the balloons into
- Glue dots (we also used a double-sided tape and it worked well.)
- Hand-pump (we had two or three-very helpful for inflating a lot of balloons with several helpers)
- Balloon inflator (this is a must if you want easy and faster than hand-pumps we used both!)
How to Make a Balloon Garland
- Cut your balloon tape to size- give yourself a little extra wiggle room, you can always trim it down if you need.
- Attach your Command hooks to the ceiling or you can tie your banner to (a mantle, a stair rail, table, etc). We chose to use a staple gun to staple our balloon garland to the wallboard.

- Inflate your balloons- Inflate the balloons to various sizes. We inflated balloons from 5 in – 11 in. Most of them were smaller. You will need lots of small ones to fill in the gaps.

- Plug the balloons into the balloon strip- eyeball where to put the balloons, we didn’t put a balloon in every hole and we mainly used the larger balloons with the balloon strip.
- Not every balloon goes into the balloon tape. Some balloons get added to the garland with the glue dots (see below)
- Add the glue dots and/or double-sided tape- after you add the balloons to the tape, then start adding the glue dots to keep the balloons in place.
- It might look like it’s not coming together, but it will! Just keep adding little balloons to the garland to fill in all the spaces.

Important Tips!
- The balloon inflator was a must! We inflated around 100-110 balloons. This machine was invaluable.
- There were five of us inflating the balloons. It took about 45 minutes – 1 hour to inflate all the balloons and about 30 minutes to add them to the balloon strip. Another 20-25 minutes to add it to the wall and place florals in between the balloons. We didn’t add any glue dots to the florals we just placed them in between the balloons
- We used a staple gun to staple the plastic ballon strip (not the balloons) to the wallboard. Be careful though! We only had one balloon pop. The wallboard was created just for this event. So we weren’t stapling to something important. You will need to figure out BEFOREHAND where you are placing the balloon garland and what you will be using to attach to your “structure”.
- Zip ties can be a great way to attach a balloon garland to where you will be hanging/placing it. I’ve used polystyrene/foam core many times for a party backdrop. Zip ties would work with polystyrene. Here’s my first party backdrop (many years ago) using polystyrene.
- If you do create the garland ahead of time, do not place in a hot room like a garage. Heat will destroy the prettiness of the balloons and shrivel them.
- Make sure to start early on the balloon garland. You could also do it the day before or several days before the part. Since there is no helium in the balloons only air – the garland should last for 3-4 days. Depending on the size of the garland it can hours to make. Ours took under 2 hours. We had 5 helpers doing the garland.


Some of my cute helpers!

I love that this garland is very versatile and would work for any type of party with any color scheme! Do you think you’ll try making one! I would love to hear what you think in the comments!
Another blog post we share how to create a Christmas Balloon Garland for the table.


Leave a Reply