


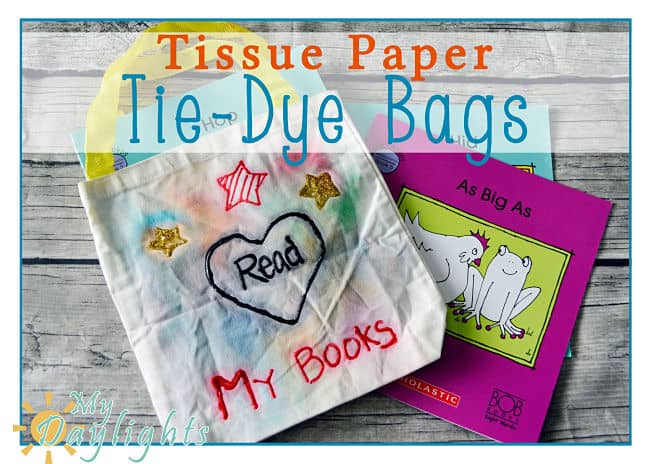
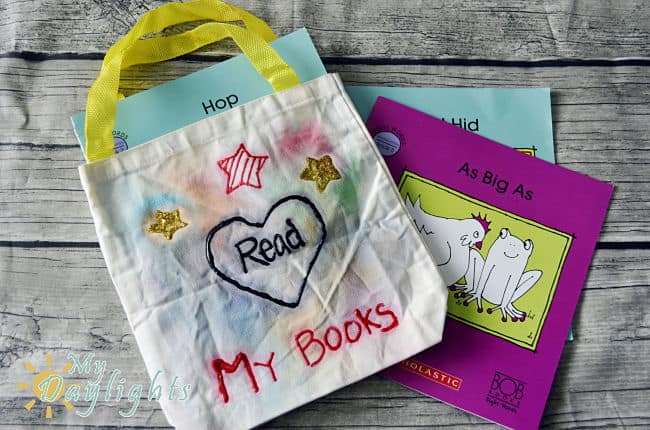
Summer has begun and my kids are already complaining about being bored. Seriously! My oldest is always seeking entertainment. Thankfully, they love getting their craft on, just like mommy, and this craft was a hit! And it used something that I have too much of in our house-tissue paper. We made Tissue Paper Tie-Dye Bags to carry their books, toys, and other treasures this summer.
This was a really fun craft to do together and something that can easily be done with a group of children. You do need to supervise because it uses water and can get a little messy. The key ingredient to this project is tissue paper, preferably the cheap kind. You need it to “bleed” when it touches water so forget about buying the expensive gold stuff! Here’s the rest of what you need.
Supplies:
Canvas Tote Bag (anything that’s canvas will work great)
Tissue paper in several colors, cut or ripped into pieces
Dropper
Cookie sheet or cardboard
Puff paints, fabric markers, or sharpies (optional)
To put them together:
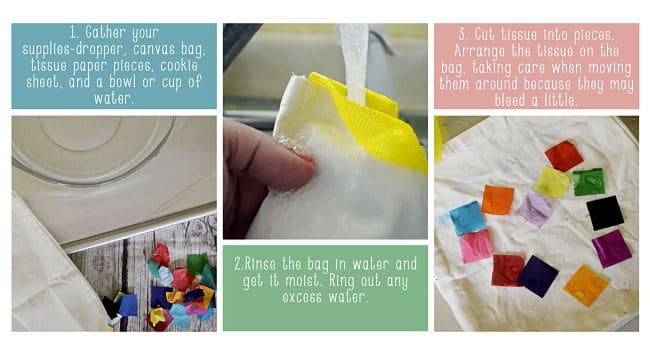
1. Gather your supplies-dropper, canvas bag, tissue paper pieces, cookie sheet, and a bowl or cup of water.
2. Rinse bag in water and get it nice and moist. Ring out excess water. If you don’t want the colors to bleed on the back of the bag or inside, place a cardboard piece inside to prevent leaking.
3. Cut tissue into pieces if you haven’t already. Arrange the tissue on the bag, taking care when moving them around because they may bleed a little when touching the wet bag.
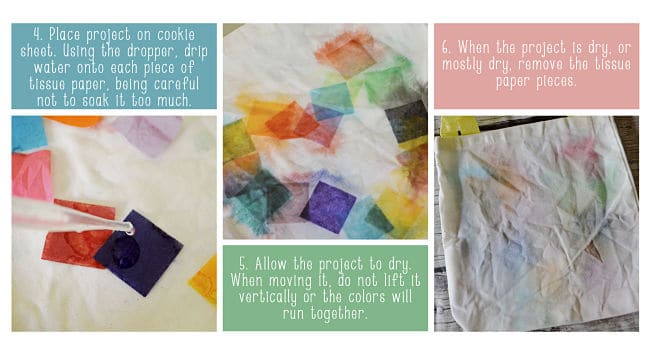
4. Place project on cookie sheet. Using the dropper, drip water onto each piece of tissue paper, being careful not to soak it too much or it will become overly saturated.
5. Allow the project to dry. When moving it, do not lift it vertically or the colors will run together (I learned that the hard way!).
6. When the project is dry or mostly dry, remove the tissue paper pieces. They can be thrown away.
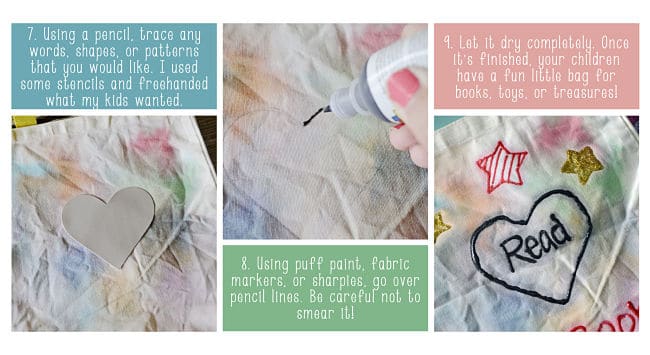
7. Using a pencil, trace any words, shapes, or patterns that you would like. I sued some stencils and freehanded what my kids wanted it to say.
8. Using puff paint, fabric markers, or sharpies go over the pencil lines. Be careful not to smear it! This step is optional. You can leave it blank if you’d like.
9. Let it dry (best to let it dry overnight if using puff paint). Once it’s finished, your kids will have a fun bag for books, toys, or treasures. Mine decided to put rocks in it. Go figure!
This really was a fun project to do together and it didn’t take too long either. The kids loved watching the colors bleed out of the tissue paper and then personalizing them with the paints and markers. You could easily do this project with other things too like aprons, t-shirts, and even canvas shoes or hats. We have an entire summer to do more projects and a pile of tissue paper to use up!


I’m Jennifer from My Daylights. I’m a creative Momma to two boys and wife to my best friend. I love design, crafting, recipes, photography, and finding inspiration in the every day. My life is crazy, unpredictable, and I always seek to find miracles in each moment. I would love to connect with you! Come by and visit my blog and social media to find more ideas like this one or to just say “hi”.
Facebook | Instagram | Pinterest | Twitter

This looks so fun, Jennifer! Thanks for sharing and for being a part of our 5th Annual Summer Camp Series!
Want to see more summertime fun ideas? Check out the Summer Camp Archives!


Leave a Reply