

Hi everyone! I’m Heidi from Mom’s Crafty Space where I blog about all sorts of fun crafty things to do with your kids (and some stuff for the grown-ups too!). I am Mommy to three boys ages 5 and under, and we are always in the middle of one creative (and usually messy!) adventure or another. I’m so excited to be over here today sharing how to make your very own rock candy. It’s so easy!
Rock candy is always a fun favorite of children, and it’s a fantastic way to disguise a Summer science lesson as a sugary treat! All it takes is a few simple tools, lots of sugar and even more patience!
Rock candy ingredients & supplies: Wooden skewers (cut in half), water, sugar, clothespins and glass jars/drinking glasses. The amount of water and sugar you need depends on how many pieces of rock candy you would like to make and the number of jars you have available (I recommend no more than 2 pieces per jar) – the standard ratio is 2 cups of sugar to 1 cup of water, but we found that we had to add a bit more sugar than our recipe called for. In the end, we used 10 cups of sugar to 4 cups of water.
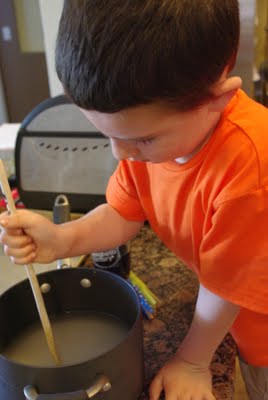
To make our batch of rock candy, we started with 4 cups of water and 4 cups of sugar. Put it all into a large saucepan, because once you put it on the stove it will expand while boiling. I let my 4-year-old mix up the first bit of sugar before putting it on the stove. He was fascinated with watching the sugar dissolve, and it was especially interesting for him to see that we could dissolve even more sugar with the addition of the heat from the stove. Once your pot is on the stove, bring it to a low boil over medium heat, and continue to add sugar one cup at a time until you can no longer dissolve any more of it (making a completely saturated sugar solution).
Turn off the heat and allow it to cool for 15 minutes.
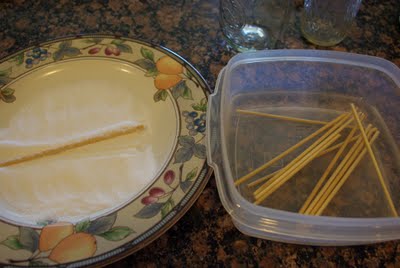
While your sugar is cooling you can prep your sticks. Soak them in water and roll them in a coating of sugar to give the new sugar crystals something to “seed” to. Be sure to let them dry all the way! If they are still too wet when you put them into the hot sugar solution, all of the sugar coating will fall off, and the new crystals will have nothing to grow on.
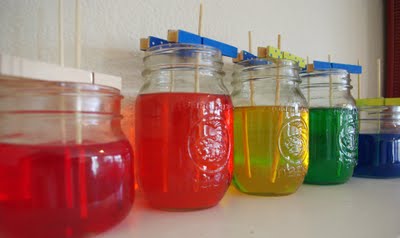
CAREFULLY pour your sugar solution into your glass jars. If you’d like to add food coloring or flavoring to your rock candy, now is the time to do so. We added color, but we kept the flavor all natural (what kiddo doesn’t like the taste of plain sugar?).
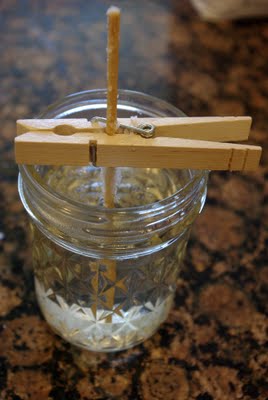
Slowly insert your sugared skewers into the solution. You can use a clothespin as shown to keep your sticks in place. Smaller mouth jars/glasses work best, but only allow room for about two sticks per jar. Be sure that your sticks are not touching the sides or bottom of the glass or each other! They need room for the new crystals to grow!
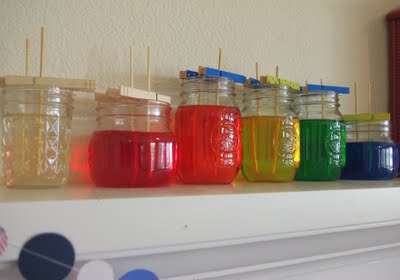
Set them up in a warm, sunny location where they won’t be disturbed, and wait…
…and wait…and wait…and wait (still with me?)…and wait some more…
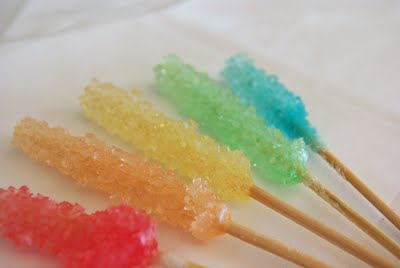
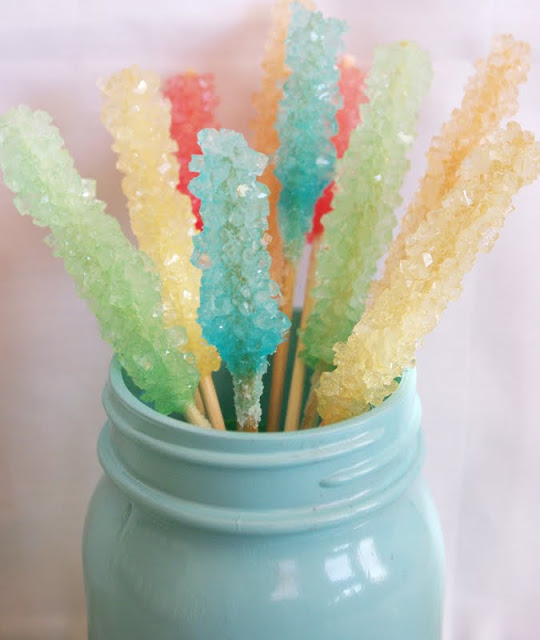
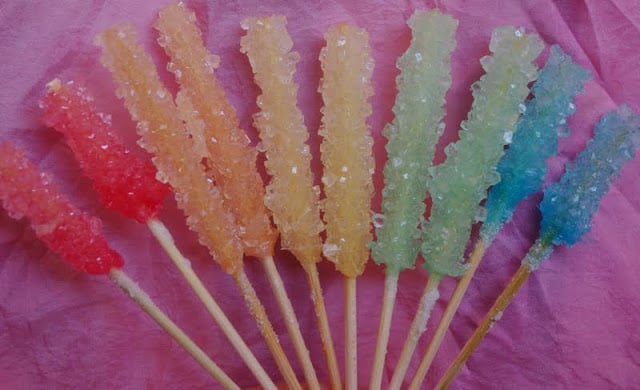
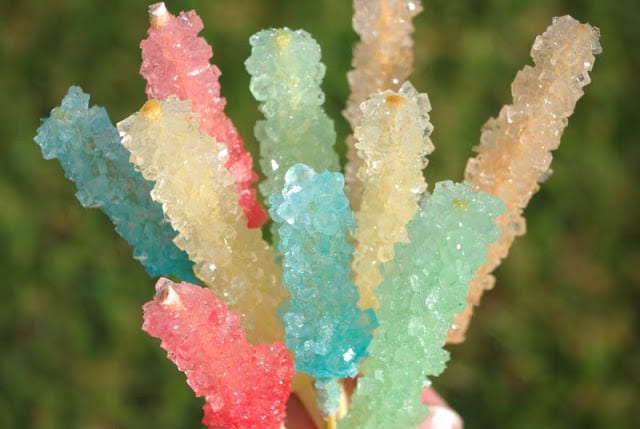
After about a week you will have made yourself a batch of sparkling sugar rock candy!
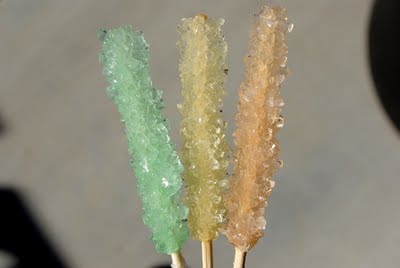
Yummy!
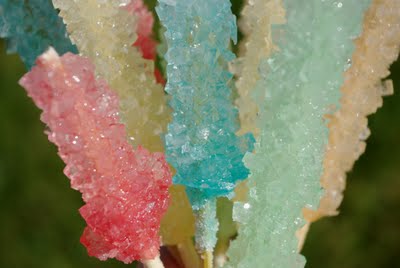
So pretty, so tasty and sooooo worth the wait! These would make fantastic holiday gifts to go along with tea or coffee sets (is it crazy that I have Christmas on the brain in July?)!

You can find me over at Mom’s Crafty Space and on Facebook and Twitter 🙂
We’re having a Summer CampLink UpParty!


Lissa (Bellenza) says
Such sweet colors you chose! Can imagine these as part of holiday gift packs, as you mentioned (got Christmas on the brain, too)!
theolivetree says
ummmm wow! I had no idea it was so easy to make!!
MistyandCarla says
So…it just kind of magically forms around the sticks? I'm kinda confused about that part.
Heidi @ Mom's Crafty Space says
Thanks for having me over here today Toni!
@MistyandCarla Yes, the sugar crystals will slowly start to grow on the sticks over the course of a few days. It works best if your sticks have a good coating of granulated sugar before you place them into the hot sugar solution so that the new crystals have something to grab ahold of 🙂
designdazzle.blogspot.com says
So awesome!! Thanks Heidi for the tutorial. Can't wait to make some and eat some : )
Toni
Anonymous says
so i wonder if it would work with sucker sticks instead of skewers????
Anonymous says
Think this would work with xylitol? Would be pretty cool to make candy for kids thats actually good for the teeth :0)
Amanda says
I made these last night. Crystals are already starting to form…big time. So much so that most of the jars are completely crystallized inside. Not really sure what to do about that. Or why it's doing it, or what I did wrong…or maybe what I did too right. lol help! 🙂
Patricia Needham says
This is awesome. I'm on it!
Anonymous says
So cool! Thanks for the excellent detailed explanation!
Bargainmoose says
Thisis such a great idea! I used to love these as a kid, and have always wanted to use them as a party favor. I have some birthday's coming up in my family and this idea is SO perfect! Thanks for the detailed explanation and idea!
Anonymous says
How many rock candy sticks did the 10 cups of water make?
Stephen Right says
It just seems like the perfect summer treat! My boys will love doing this and watching them grow!
Toni - Design Dazzle says
It sure is a fun project with your kids. Enjoy!