

Our 5th annual Christmas Wonderful series has officially begun! We have an amazing list of bloggers who will be sharing Christmas ideas to make Christmas Wonderful. First up is me sharing one of my favorite Christmas traditions. Simple And Easy To Make Santa Sacks!

How would Santa or should I say Mrs Claus like to have LESS presents to wrap?!? Santa Sacks has been in our family for four generations. It is the best way to have Santa leave gifts on Christmas Eve. They are the perfect gift sack for a bulky hard-to-wrap gift. Also, they these sacks look so cute under the tree. I especially like this Santa sack that was sewn from curtains.
How does a Santa Sack work?
- The kids leave an EMPTY Santa Sack under the Christmas tree or at the end of their bed (depending on your Christmas traditions).
- Santa fills the Santa Sack with UNWRAPPED gifts during the night while everyone is asleep.
- On Christmas morning the kids take turns “opening” their Santa Sack and pulling out their gifts one at at time.
- Our family gifts are wrapped and placed under the tree.
This Santa Sack shown is a laundry bag with an iron-on printable. You can purchase our printable below.
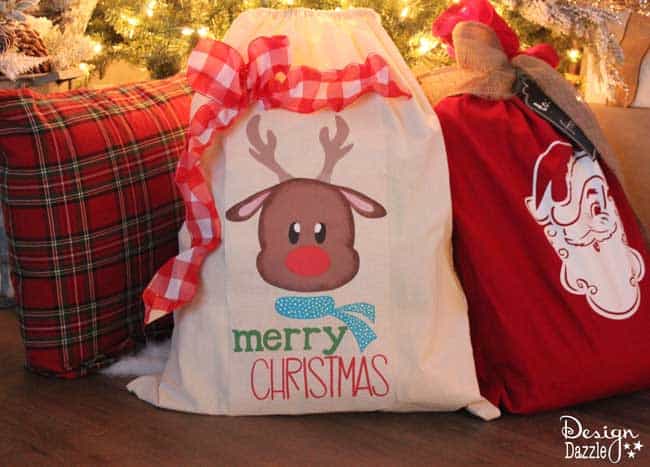
How to simply make this Santa Sack:

1. Purchase a Cotton Laundry Bag Extra Large. This is the exact one I used and it is awesome quality for a Santa Sack and at under $8 it’s a great deal. Using a white pillow case is another way to create the Santa Sack. However, there is no drawstring but you can tie a ribbon around the opening of the pillow case. Another option is to sew your own Santa Sack.
2. Upload our Deer Merry Christmas Santa Sack PRINTABLE to your computer. The file can be purchased below.
3. Using an Iron-on transfer for Inkjet Printers or Laser Heat Transfer Paper 8.5″x11″ 25
(depending on your printer – inkjet or laser). Print the Deer Merry Christmas file on your home printer. The Deer Merry Christmas Santa Sack file uses THREE 8.5″ x 11″ transfer papers. The deer image and text is approximately 22 inches high and 11 inches wide.
5. Read the instructions for the iron-on transfer carefully. IMPORTANT: Trim away an unnecessary part of the print e.g the white edges of the paper that have no ink. Line up your prints carefully. Remember what ever you see will be transferred to your project. Iron on to your canvas or pillowcase bag.
6. Use the iron’s hottest setting, no steam. You need to press firmly. It is easier to work on a table and not an ironing board. Usually it takes double the time to press your iron-on than what the instructions say.
7. Add a ribbon if you choose.
8. Let your family know about your new Christmas tradition. You can always have your Santa Sacks “delivered” from the North Pole.
IMPORTANT INFORMATION:
Some iron-on transfers require the text to be a reverse image and some do not. This is why we offer our text in reverse and regular text. You will need to read your instructions on which image to use.
We offer the Deer printable with TWO different backgrounds – one has a canvas looking background (for a canvas laundry bag) and one has a white background for a white pillowcase.
Why I LOVE Santa Sacks…
1. Saves moms sanity! Have you ever found yourself staying up late at night on Christmas Eve wrapping gifts? Well, not with Santa Sacks – place Santa’s gifts in the sack and voila all done!! It takes me all of 5 minutes. There is no wrapping of Santa gifts – none, nada, not one bit! Santa Sacks leave a lot less mess to clean-up Christmas morning!
2. Eco friendly – completely reusable year after year! Such a perfect way to prevent waste of money on gift wrap.
3. Odd sized or bulky gifts – these can be so difficult to wrap! Santa Sacks make it easy : ) Our Santa Sack measures 21″ x 33″
4. My children LOVE their Santa Sacks. They talk about how they will carry on this tradition when they have kids.
5. Awesome family tradition!
Here is another iron-on printable Special Delivery Santa Sack that we have featured.
Make sure to check out all the amazing ideas that will be shared here at Design Dazzle for our Christmas Wonderful series.


Leave a Reply