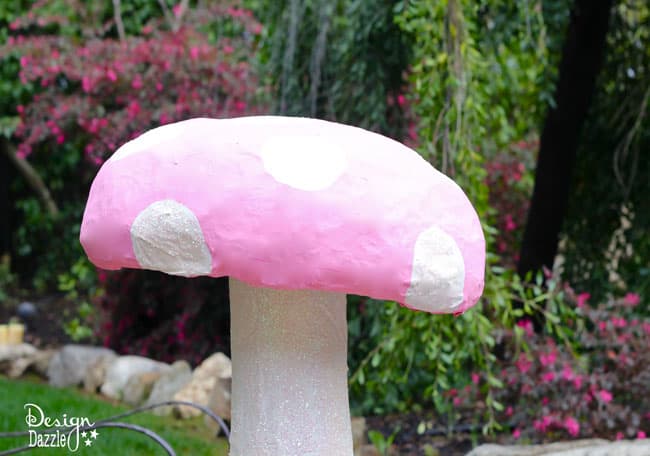
Props are important for creating the perfect party atmosphere. I made this giant mushroom for a Vintage Glam Wonderland Party. It was easy to do and took a bit of time. But more importantly it turned out awesome and was very inexpensive to make. Can you guess what the top of the mushroom is made of? Any guesses? It’s an aluminum foil roast pan purchased at the dollar store! You can make this mushroom using recylables. Save your roast pan when done cooking with it. Save your old newspapers and you have the makings of a paper mache mushroom.

SUPPLIES:
large aluminum roast pan – I purchased this at the dollar store. It is the large turkey sized one
stack of newspapers
two empty oatmeal or powdered drink type cylinder containers
paper mache recipe – flour and water
paint – I used cream and pink
glitter – optional
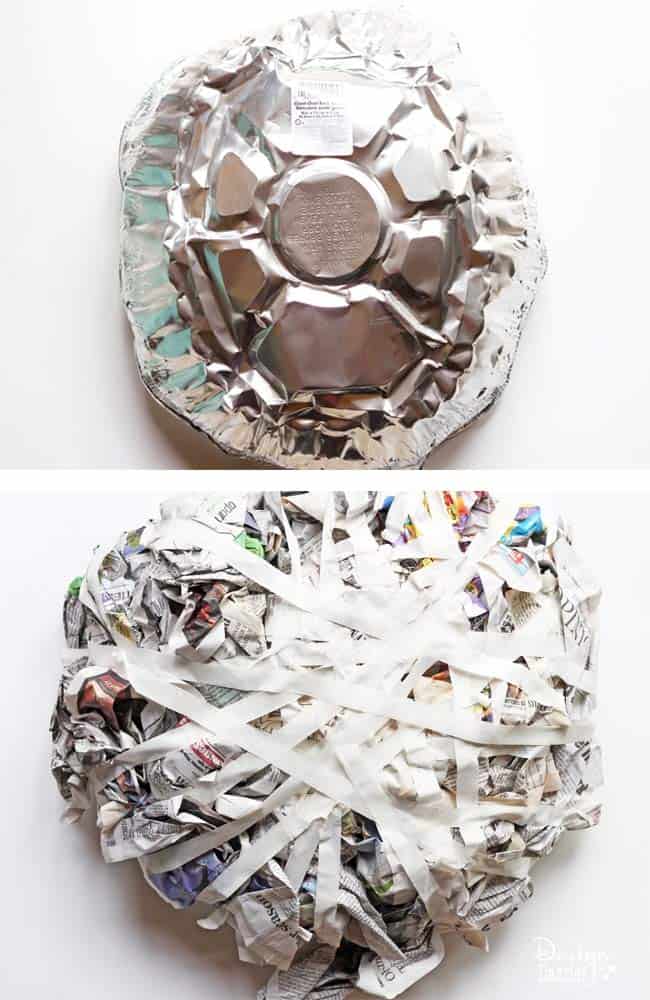
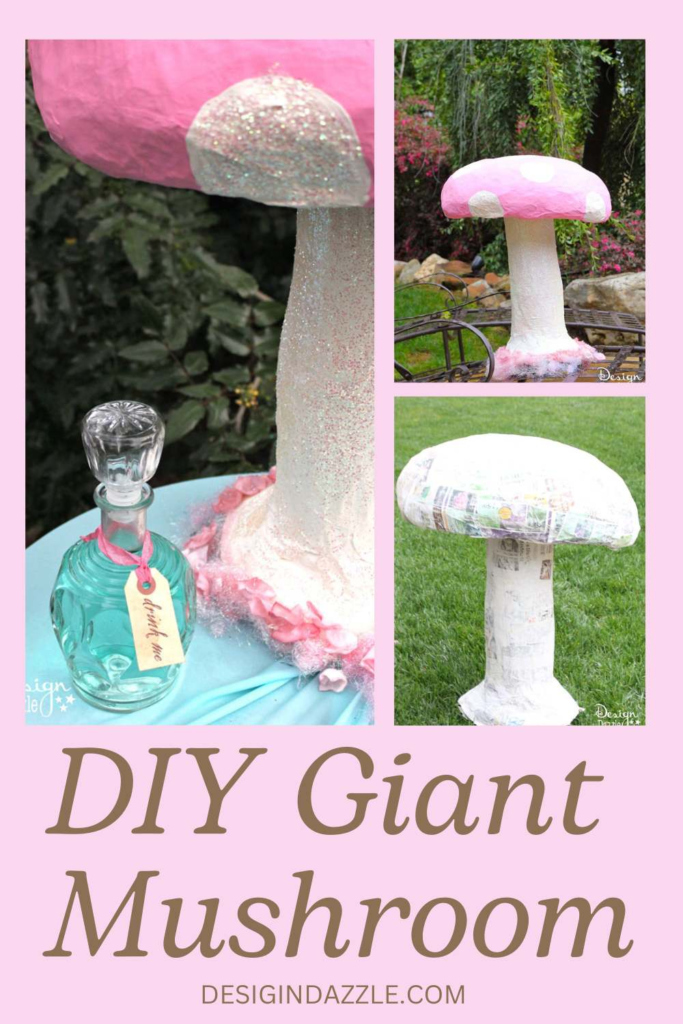
Shape the aluminum pan to the shape you need. The aluminum pan is easily workable into a round shape. Turn the tray upside down. Wad up newspapers and lay on “top” of the pan which is actually the bottom (see the top image). I used masking tape to hold the papers in place
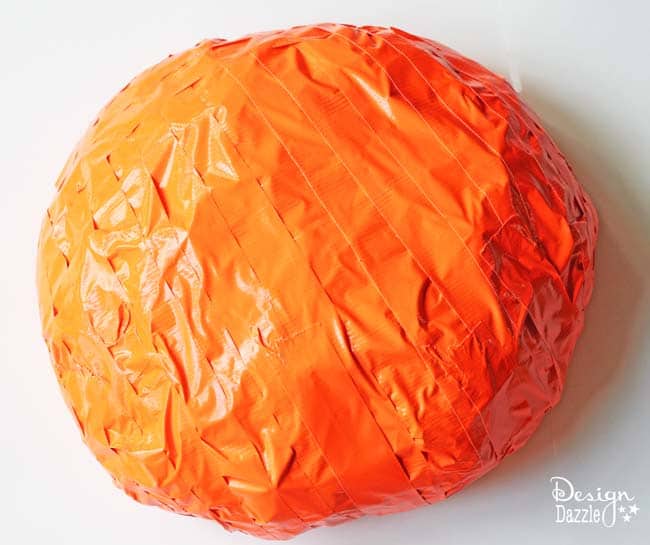
Then I covered the top in duct tape. This was the color of duct tape I happened to have on hand. All the newspaper was held together by the tape and it also helped shape the top!
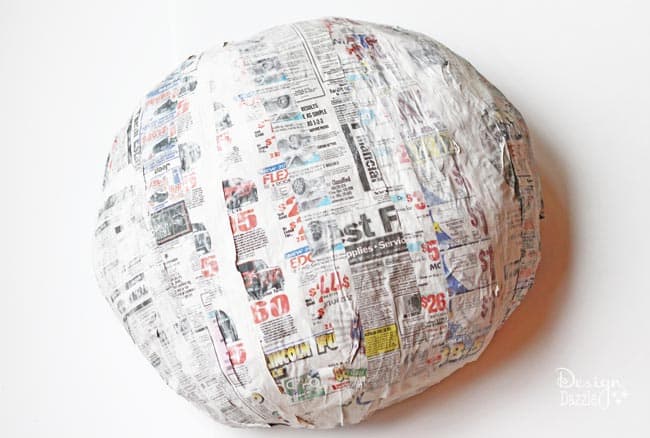
Paper Mache solution: Mix flour and water together to create a paste that resembles thick cream. Stir until lumps are gone.
Tear strips of newspaper and dip into the paper mache solution. Adhere to the top of the mushroom. Keep applying in layers until you get the shape you want. Make sure to let it dry thoroughly between a couple of layers. If not, you can get mold.
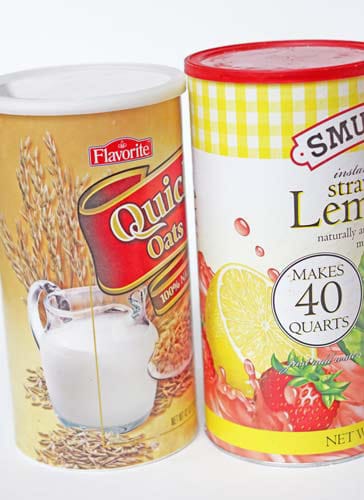
The stem of the mushroom was created with these two empty cylinder containers stacked on top of each other. Duct tape held them together in place.
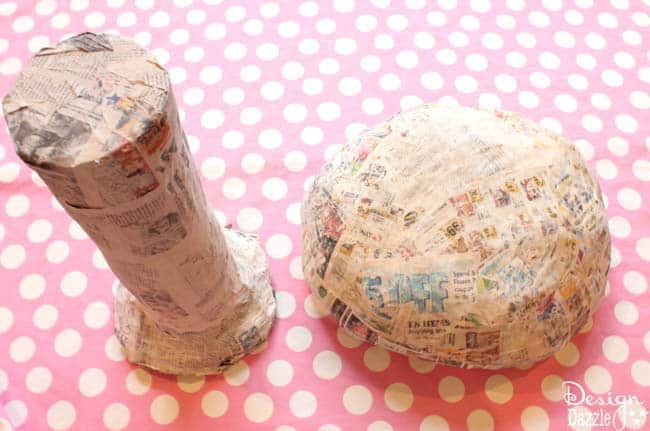
Apply paper mache to the stem same as the instructions for the mushroom top. The bottom of the stem was flared out a bit .
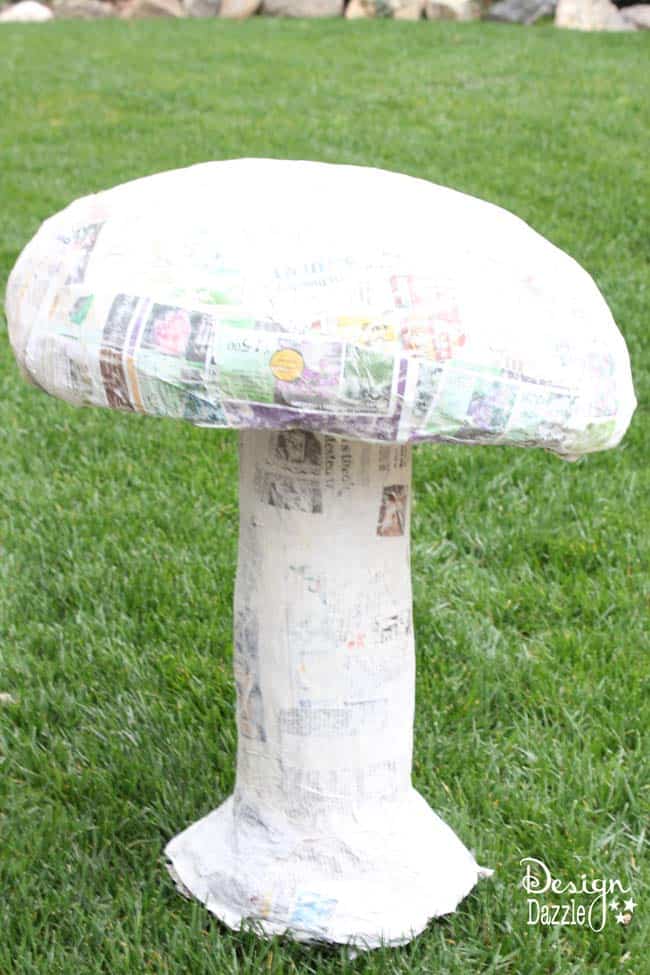
The top dimension is 18″ diameter and 7″ in height. The stem is 20.5″ high and 5″ in diameter.
Paint the mushroom with craft paint. I used cream and pink paint!
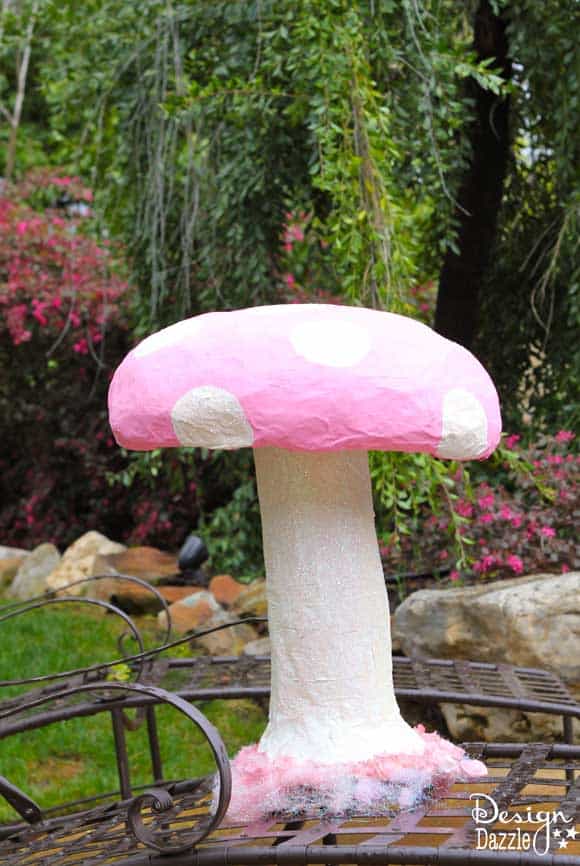
Glitter was applied to the mushroom stem and polka dots. I added rose petals and opalescent pink shred to the bottom of the stem.
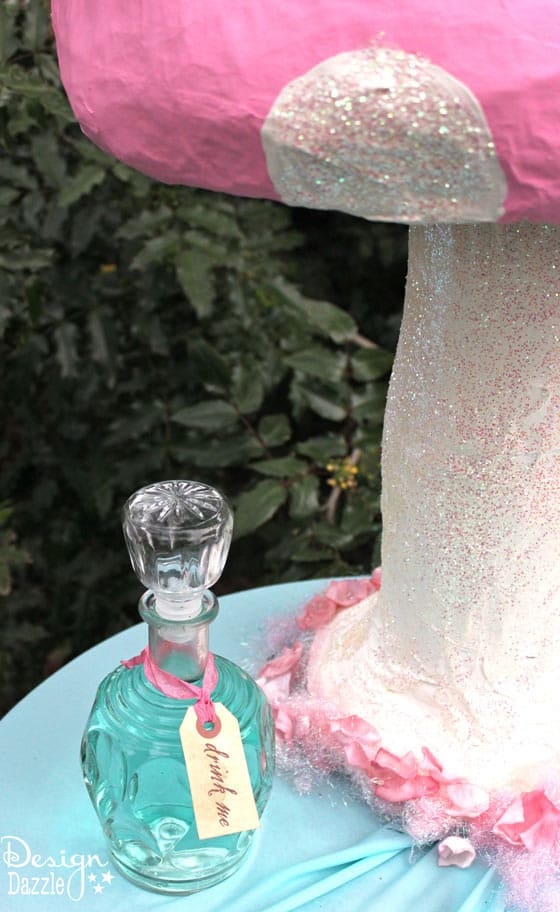
This giant mushroom party prop was used at my Vintage Glam Wonderland Party. It’s been one of my favorite parties ever! Check out the Vintage Glam Wonderland Party. You’ll love the details!
A delicious and favorite cake to serve at a Vintage Glam Wonderland Party is my good friend’s Chocolate Orange Cake. This cake is moist and gluten-free (although you would never know)!



Missy says
Great idea! This would be perfect for a fairy or Tinkerbell party!
Toni - Design Dazzle says
Thank you Missy! Yes, this mushroom would definitely work for fairy and Tinkerbell!! Even a Mario Bros red mushroom. : )
Toni
Sunny says
Adorable Toni. I love it. Would be perfect for an Alice tea party.
Leonie @ Ashlee Rae says
SO adorable!!!!
Toni - Design Dazzle says
Thank you Leonie! It makes my heart smile when I realize what it’s made out of!
Toni
Michelle at Honey I'm Home says
This is BRILLIANT Toni! Love it & I pinned it for future reference.
Warmly, Michelle
Toni - Design Dazzle says
Thank you Michelle! You are a sweetheart! I love your talent and your blog!!!
Cindy Minguez says
OMG! You’re a genius! I have been looking everywhere for an affordable mushroom prop rental for my upcoming Alice in Wonderland party in October and now I can just make my own for super cheap. This is perfect!! Thanks for sharing.
Toni - Design Dazzle says
Thank you Cindy! My one tip is to start early. A larger prop like this does take time to dry.
Enjoy!
Toni
Jennifer says
You’re a genius!! I’m making a whole patchful of these!!
Toni - Design Dazzle says
Thank you Jennifer! I would love to see a picture when you are done. What a great idea to make a whole patchful!
Jennifer says
You’re a genius!!
Sue says
How did you attach the cap to the stem? It does not say.
Toni - Design Dazzle says
Sue,
I kept it in two separate pieces (easy to store). I just place the cap on the stem – it’s heavy enough that it worked without glue. But you could certainly use E600 to glue it in place.
Selsy says
This is so cool. I will have to try to make one!
Tammy Barr says
Will the mushroom be hard or will it still be kind of squishy because it’s balled up paper underneath the paper mache
Toni - Design Dazzle says
My mushroom is hard but not indestructable. The paper mache hardens.
Rachael Binder says
Hi! I really want to use this for an Alice in Wonderland Halloween Party this year. When you form the turkey pan, do you stuff the news paper all around, or just in the concave space?
Thank you!
Toni - Design Dazzle says
I did both! When you start working with it you’ll add a few layers – keep going and adding until it is the shape you want. Get started now because it takes a while to dry.
Sounds like such a great party. I would love to see pictures! Here is an Alice in Wonderland party I did https://www.designdazzle.com/vintage-glam-alice-in-wonderland-party/ It’s not Halloween but it’s still one of my favorite parties.
I also did a Halloween in Paris party…
https://www.designdazzle.com/halloween-in-paris-party-reveal-part-1/
Jools says
Double discovery – First Pinterest which has led me to you and your amazing ideas.
My daughter has just started studying art and has to come up with art ideas using different mediums. These toadstools are a great idea and with full instructions so she can easily make these for any forthcoming projects. Thank you Toni
Toni - Design Dazzle says
I hope she likes making the mushrooms. They are a lot of fun to paint and make!
Crystal says
How was the stem attached to top
Toni - Design Dazzle says
It’s not attached. There are two pieces. The top of the mushroom sits quite nicely on the stem.
Jitchie H. Barcebal says
Wow! Very creative, perfect for Alice and wonderland theme party!
Toni - Design Dazzle says
Thank you very much!
Annette says
How did you attach the top of the mushroom to the stem?
Toni - Design Dazzle says
I didn’t. I just set it in place. It seemed to work fine.
Sandie Rabena says
My girl Toni to the rescue AGAIN! Last year, I made her AWESOME paper towel garland for my daughter’s baby shower. It was so beautiful that even when I told people that it was made from Bounty paper towels, they kept asking questions because they couldn’t wrap their head around the idea of something so simple turning out so beautiful!
Now it’s my other daughter’s turn for a baby shower! So you know we’ll be making a few of these for our Wonderland/Woodland vibe! Thank you, Toni! You’re SO creative! Thank you for sharing your amazing creativity with all of us!
Toni - Design Dazzle says
Sandie – I just saw your comment. I love that you’ve used some of my ideas. Did you end up making these? With how your paper towel garland turned out I would love to see!
xoxo
Kissné Mika Judit says
Szeretnék ötleteket a kézműves munkáimhoz
Denise Sherrell says
Brilliant idea love things like this
Toni - Design Dazzle says
Thanks, Denise. It was enjoyable to create!
Doris Herrero says
Great idea, I’m gonna try to make one for my granddaughter birthday next month
Love it, beautiful
Toni - Design Dazzle says
Make it far in advance. It is super cute.
Sandra says
Currently making this for a play! How did you create the flared out base?
Thanks!
Toni - Design Dazzle says
I used newspaper to shape the flared base. I would love to see pics when you’re done. : )
żabaztupotu says
Hi,
will it be destroyed in case of rain? Can I somehow prevent this?
Toni - Design Dazzle says
If a bit of rain got on it I think it would be ok if it was wiped off right away. This is made with papermache so it is paper. I wouldn’t know how to seal it to prevent it from being destroyed by water. Maybe check into some type of clear sealer. Please let me know if you find a solution.
Thank you!
Tammie says
This is a great idea. Once you taped the newspaper inside did you paper mache that too or just the top?
Toni - Design Dazzle says
Tammie- I did add paper mache to the inside but not as much as I did with the outside of the mushroom. I wanted the mushroom to be as smooth as possible. But the inside of the mushroom top didn’t matter as much.
Have fun!
Christine Doroshenko says
These are perfect for what I want to do thanks
Toni - Design Dazzle says
I’m so glad to help. I would love to see what you end up doing. Send me pics!
Alice Sm… says
This is Great… ♠️♣️♥️♦️🕕
Hi… 👋. My Name Is… Alice… I am 69yrs
Young… Next Year in June I Will be Turning
“The Big 70yrs Young”… I’ve told My Daught
For the Past 2 Years… I Want to Have an
Alice in Wonderland Party.., So i Have Been
Searching the Internet and Pinterest for
Birthday 🎂 Party Idea’s… I Love the
Mushroom’s and the Recipe for the Paper
Mache… I Hope You Don’t Mind if i Save it…
into My “Alice 70nth Tea Party Idea’s “
Thank You…. Sooo… Much… Alice
Oh… I’m Late… I’m Late… I Really
Must Go… ⏱⏰
Have a Magical Day… 🪅💫🌟✨
Toni - Design Dazzle says
Oh, you made my day! What a fitting party for Alice : )
This mushroom is such a cute party prop for Alice in Wonderland. Did you also see my Wonderland Alice glam party? https://www.designdazzle.com/vintage-glam-alice-in-wonderland-party/
Please let me know how your 70th party is!!
xoxo
Corrina says
Hi! I just made the top half of my toadstool yesterday. Did you paper mache the underside of the cap or just the visible side? I also somehow missed stuffing it with newspaper… would’ve made the shaping MUCH easier…. so I think I’ll stuff the underside today and then paper mache the underside to attach the cap the newspaper ball. Does that make sense?? Excellent idea, either way. I appreciate you!
Toni - Design Dazzle says
Yes, the paper mache of the mushroom top was done on the underside. The tape helped keep it all together.
Yes, it makes sense to stuff in and then paper mache. My mushroom was done in two pieces but you could make one total piece.
Have fun!