

Hi Campers! My name is Crystal and I’m the publisher and creative director of Hello Creative Family! I’m so thankful to Toni for asking me to be a camp counselor this year! At Hello Creative Family we believe that creative parents raise creative kids so crafty summer camp fun is right up our alley! I’d love for you to come check out the site for creative inspiration for parents and kids alike!
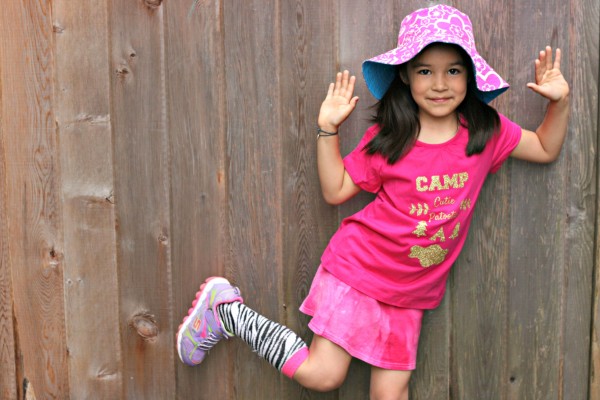
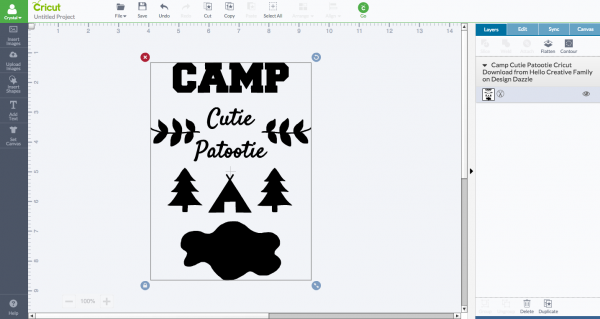
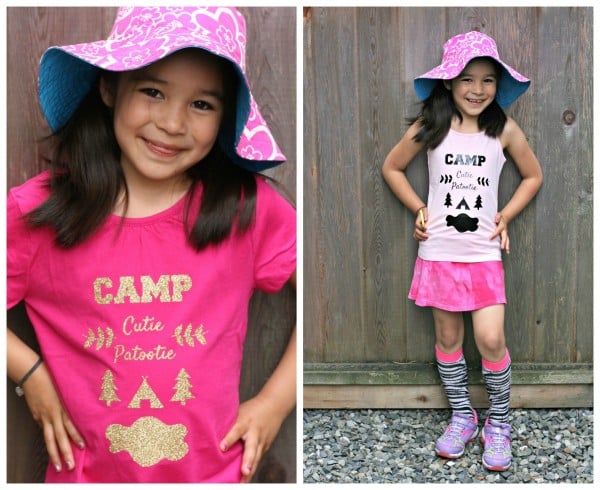
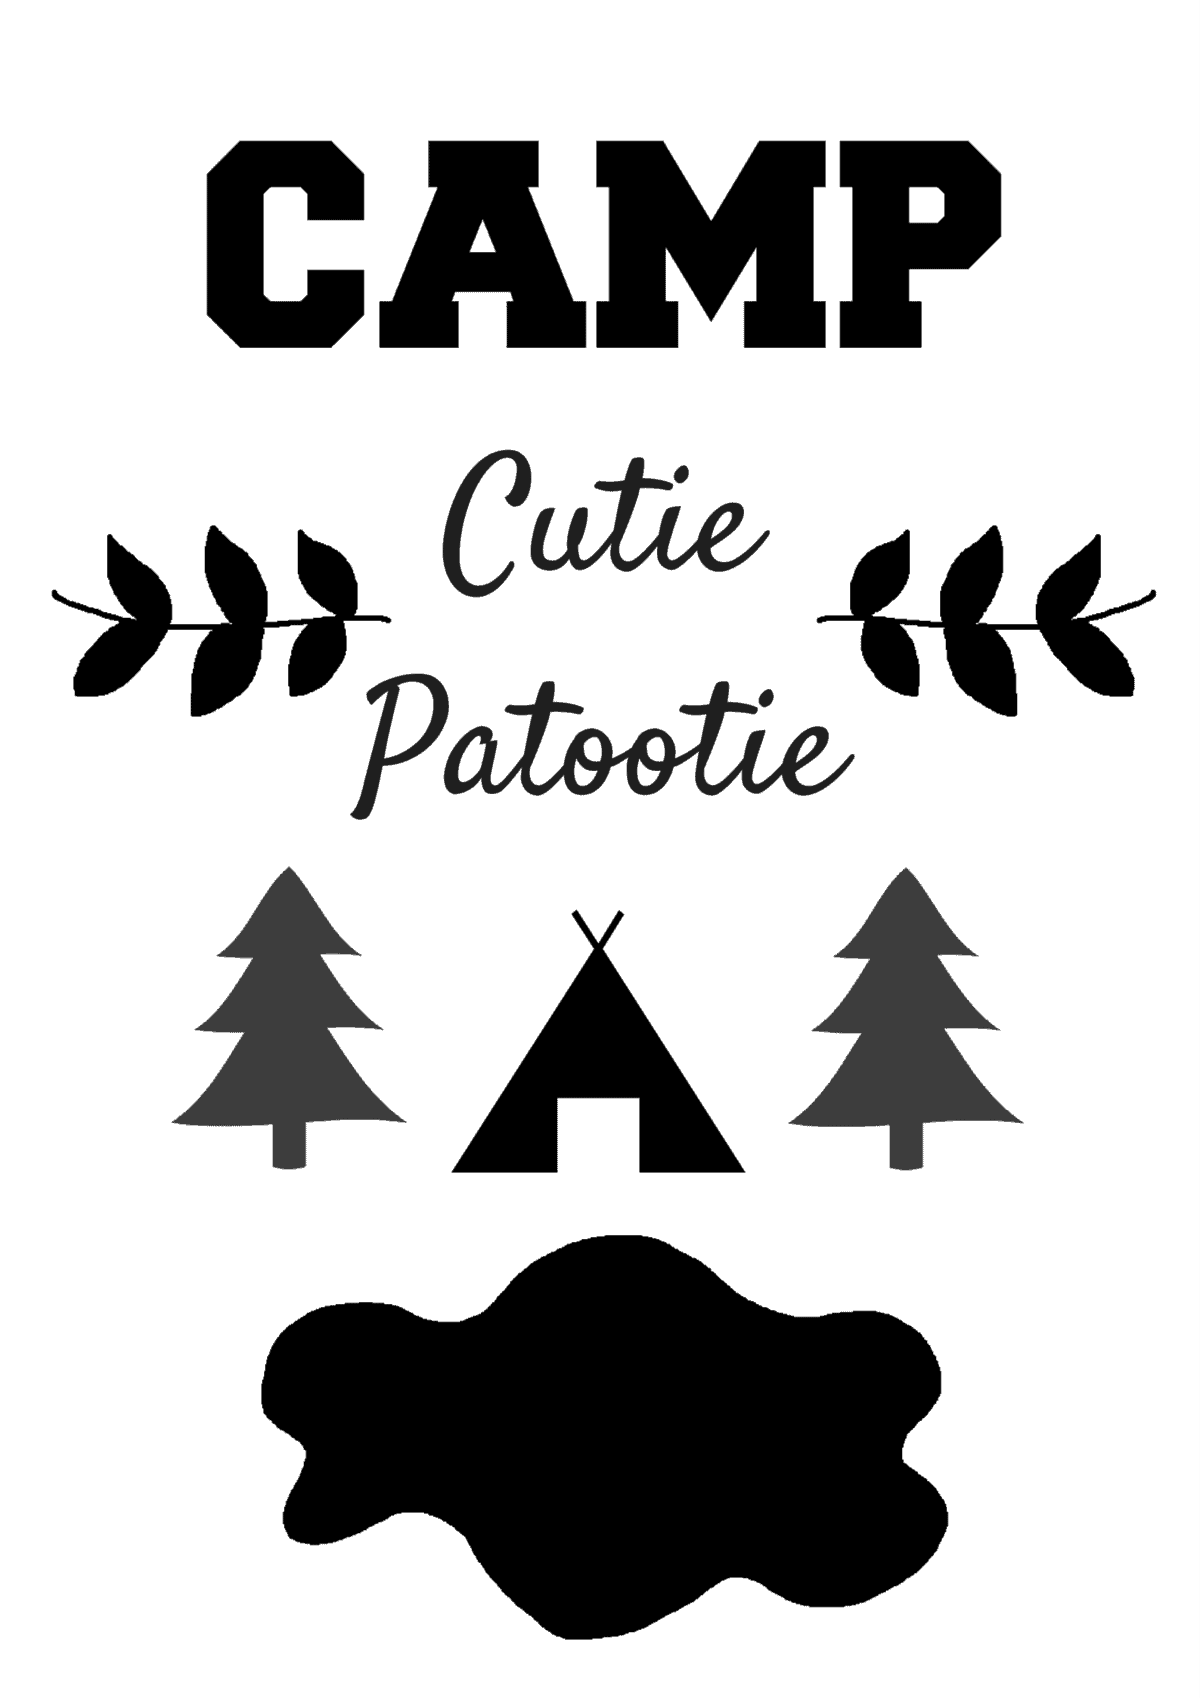
When I think of summer camp, I think of all of the things you have to pack for a summer camp full of fun. No summer camp is complete without a great camp uniform, so that’s what I decided to make! Welcome to Camp Cutie Patootie where all the cutest kids spend their summers!
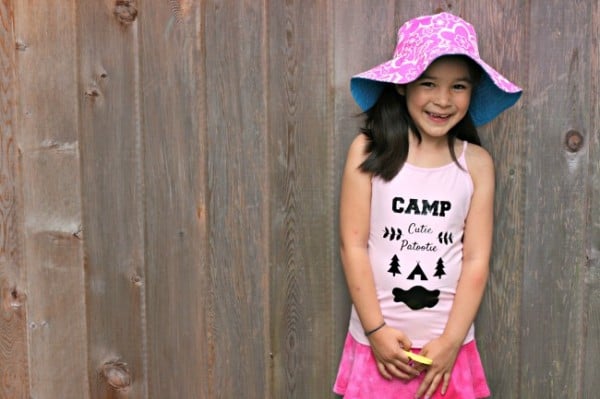
This is my little camper, Bean. Bean loves hanging out with her friends on the monkey bars, lounging in mommy’s sewing room brainstorming creative project ideas and creating new outfit combinations (which usually involve brightly colored knee high socks). Yes, Bean is my little fashionista! One of Bean’s favorite craft activities is coming up with T-Shirt designs using the Cricut Explore.
I love my Cricut Explore for all kinds of reasons. The number one being that I can upload my own designs and have the Cricut cut them out for me! I think it’s so fun when Bean wants to be involved in the design process. We use a combination of Canva, Paint and my Wacom Intuos Tablet to create our designs.
Today I’m going to walk you through how we made this cute custom design, give you the file to make one of your own, and teach you how you can make your own designs using the Cricut Explore.
Don’t have a Cricut? No worries! You can download my design, hand cut it out of iron on vinyl, and create a shirt of your own too!
Let’s get started!
Materials:
- Cricut Explore
- Standard Grip Cutting Mat
- Cricut Iron-On in your favorite colors (I used Gold Glitter and Iron On Lite, Black for the two shirts)
- Iron
- T-Shirt or Tank Top
Creating your own designs:
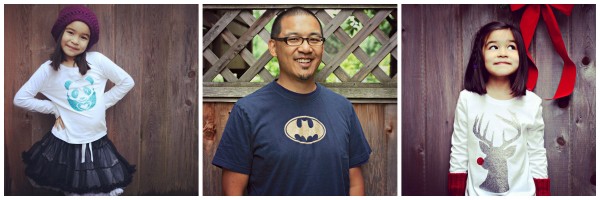
These are a few of the shirts that I have made for my family. You can find the file for the Hipster Rudolph Shirt here. You can create your own t-shirt design by either drawing a picture on paper and scanning it to the computer, drawing a photo in paint or photoshop, or finding an image you like online to use. Images with clear, clean borders work best. If googling for images to use I usually put “silhouette” in the search terms to find an image that has a solid colored center. If using an image you find online please remember to respect copyright laws and only make shirts for personal use.
Creating a shirt from your image:
Now I’m going to walk you through the process of uploading an image to Cricut Design Space. You’ll want to know how to do this whether your using one of my images or uploading one of your own.
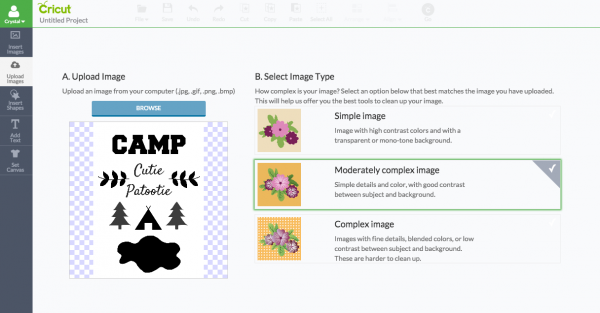
Step 1: Log into Cricut Design Space. Click to create a new project and then click upload image. Depending on the complexity of your image you can either choose Simple Image, Moderately Complex Image or Complex Image. For my purposes I usually choose Simple Image.
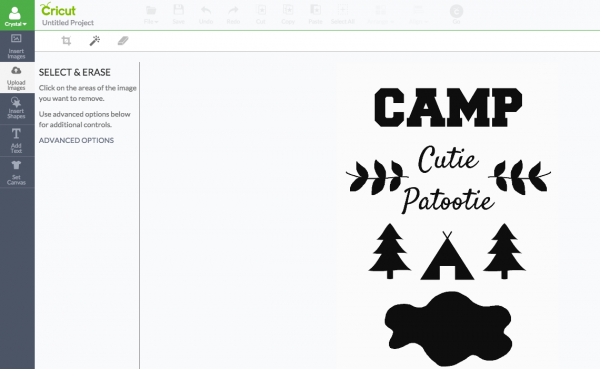
Step 2: Select and Erase. When you upload your image it will look like the above. Start clicking on the white areas/negative space (AKA areas where you don’t want vinyl).
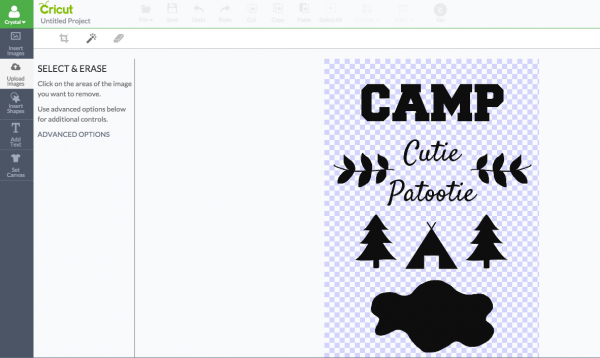
Blue checkered boxes will start to appear in the areas that will be cut away. Don’t forget to click your mouse in the center of letters, like the A, P, E and O. You can click the preview button to see how you are doing and use the zoom button to see if you have missed anything. When everything looks good, click continue.
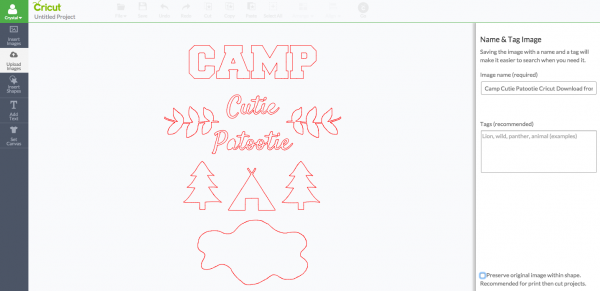
Step 3: With the new Cricut Print and Cut, Cricut Design Space automatically preserves the images within the shape. You only need this when using the Print and Cut function. We’re not going to be printing this image so you can uncheck the box in the bottom right hand side that says “Preserve original image within shape.”
Step 4: Select your newly upload image and click Insert Images.
Step 5: You’ll now be brought into design space where you can resize your image to be the size that you want it for your shirt. When you have it the correct size click the green circle Go button in the upper right hand side of the screen.
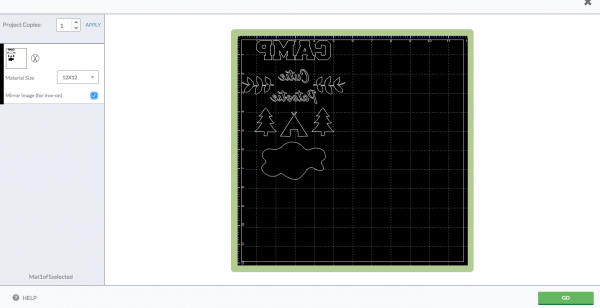
Step 6: THIS IS A CRUCIAL STEP THAT YOU WON’T WANT TO MISS WHEN CUTTING IRON ON VINYL!!! Make sure that you click the “Mirror Image” button that appears in the box on the left hand side of the screen. Put your iron on vinyl so the shiny plastic is facing down on the cutting mat. Set the dial of your Cricut to Iron On, click Go and load your cutting mat into your machine.
Step 7: Once your design is done cutting, remove your sheet of vinyl from the cutting mat and weed the vinyl so that only the your design is left on the plastic front.
Step 8: Iron on your design according to package instructions. I usually do this on my dining room table or my kitchen cabinet because I find that my ironing board is too soft. I lay out a bath towel, lay my shirt on top of it, heat my iron on linen/cotton setting with no steam, press the shirt with the iron to get the material nice and warm, lay my design where I want it on the shirt, lay a dish towel over the design and press for 25 seconds. I then flip the shirt, lay the dish towel over it again and press for another 25 seconds. I then flip the shirt back over and slowly remove the plastic making sure the vinyl is firmly adhered. If it’s lifting anywhere I press for another 10 seconds.
Viola! You are left with an adorable shirt or tank top your kiddos will love!
Want to create a Camp Cutie Patootie Shirt of your own? Download the design here!
Thank you so much to Toni for having me guest post today on Design Dazzle. I’d love for you to come visit me at Hello Creative Family for more Cricut projects along with a ton of recipes, DIY’s and crafts to get you in the creative spirit so you can raise your kids in a homemade, handmade, heart-made home!

Want to see more summertime fun ideas? Check out the Summer Camp Archives!


Anonymous says
This is a cute shirt. Short but very precise info_ Many thanks for
sharing this one. A must read article!