• Skip to primary navigation
  • Skip to main content
  • Skip to primary sidebar
  • Home
  • Blog
  • About
    • Contact
    • Press & Partnerships
    • Copyright/Disclosure
    • Links/Parties/Giveaways
    • HOI Friends
      • Toni Roberts
      • Tauni Everett
      • Tammy Mitchell
      • Randi Dukes
      • Michelle Stewart
      • Mariah Leeson
      • Mandy Beyeler
      • Lindi Haws
      • Kim Byers
      • Ashley Johnston
      • House of Ideas
  • Videos
  • SHOP

Design Dazzle

Inspiration for kids rooms, baby nurseries, and kids parties

  • My Home
    • Home Tour
    • Christmas Home Tour
  • My Projects
    • My Projects
    • Companies I Have Worked With
    • Michaels Makers
  • DIY/Decor
    • top tutorials
  • crafts
  • celebrations
    • parties
    • christmas
    • halloween
    • thanksgiving/fall
    • New Year’s
    • Valentine’s Day
    • St. Patrick’s Day
    • Easter/Spring
    • mother’s day
    • father’s day
    • patriotic
    • School/Teacher/Graduation
    • Gift Ideas
    • weddings
    • best ideas
  • Recipes
    • Meals
    • Instant Pot/Crock Pot
    • Desserts
    • Treats & Snacks
  • travel
  • free printables
  • Lifestyle
    • organization
    • Preparedness
    • Healthy Living
  • kids
    • kids parties
    • kids rooms
      • cool bedroom ideas
    • summer camp/crafts
You are here: Home / kids / Summer Camp : DIY Nautical Anchor Rag Wreath

Summer Camp : DIY Nautical Anchor Rag Wreath

This post may contain affiliate links that, at no additional cost to you, I may earn a small commission. Read our Disclosure Policy.

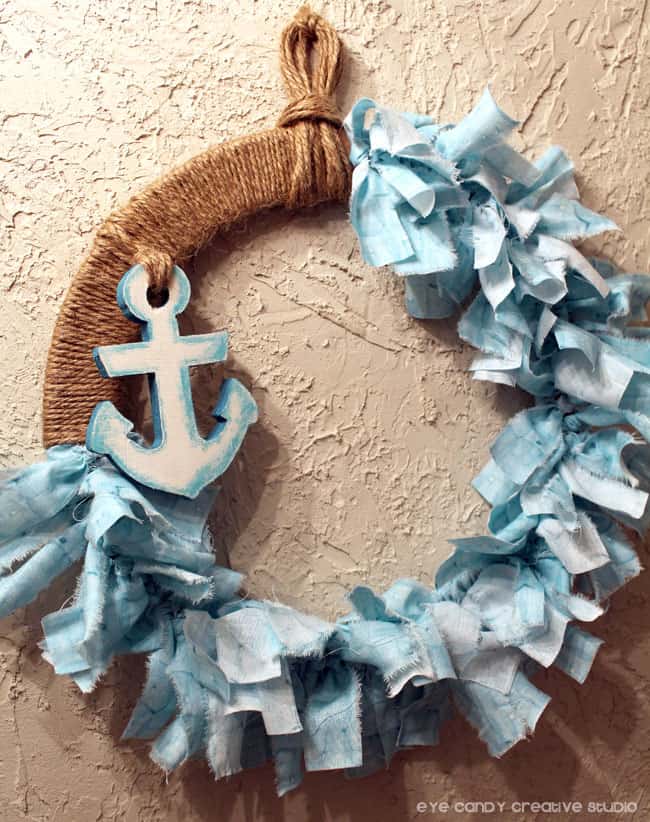
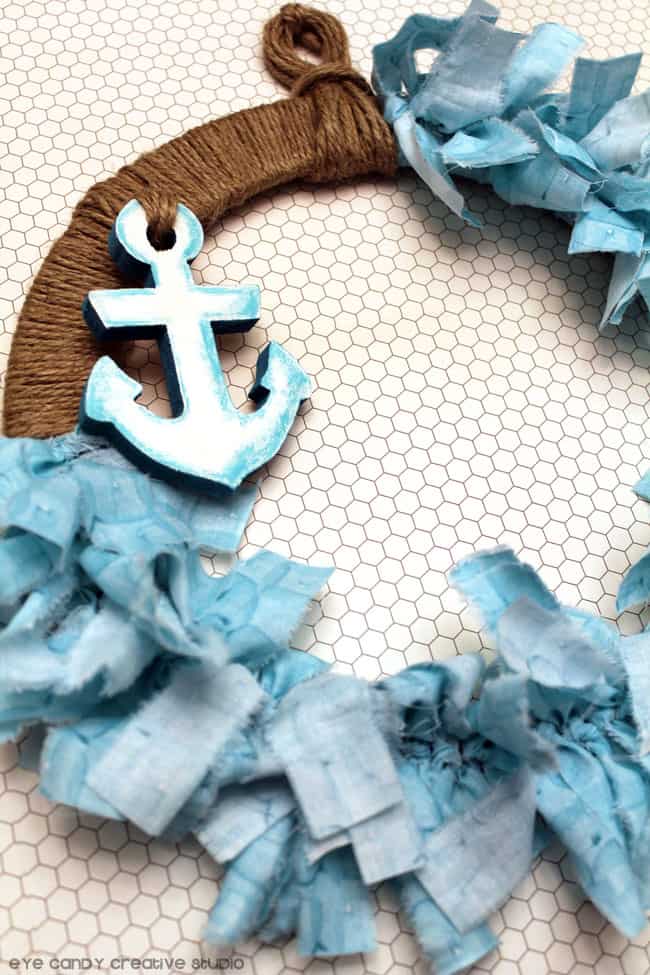
Hello there everyone I am Laura from Eye Candy Creative Studio and I am here to day to share a fun craft with you for the Summer Camp series 2016. I will be sharing how to make this fun and easy nautical looking: Anchor Rag Wreath.

Gorgeous DIY Anchor Rag Wreath! Beautiful summer time wreath!

I love making crafts and am doing so quite often around my house, so I am not surprised that my daughter thoroughly enjoys crafting as well. Of course it makes this momma super happy when she asks to craft with me and even more excited when she comes up with a great idea for a fun craft to share. She turned thirteen in April and we recently re-did her bedroom and we are getting ready to re-do her bathroom so she suggested that perhaps we should make a wreath to match the nautical art we bought the other day for her bathroom, while shopping at Michaels. So we picked up a few supplies for this wreath and made it the next day. We love the way it turned out.

Having a teen that loves to craft at this age is so much fun as I can teach her how to do the things I am making now as we have progressed past the basics. So I would suggest this craft for older kids but there is no reason the younger ones couldn’t do it or at least help you, but it does take a little bit of time but it IS easy to complete. 😉

Anchor-Rag-Wreath-Bathroom


So let’s find out just how easy this wreath is to make . . .

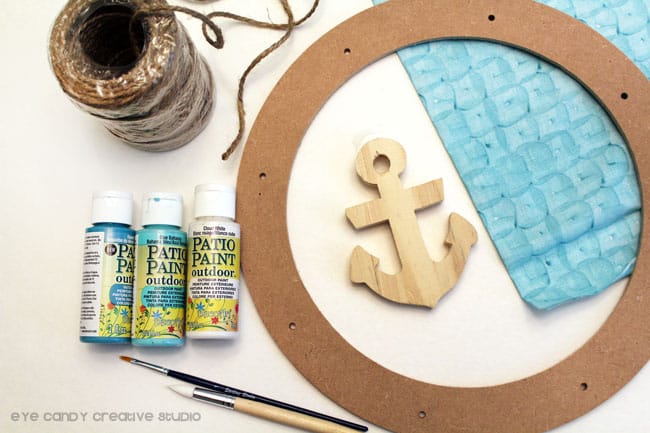
  1. Gather all of your supplies! You will want a flat wreath form, your fabric color of choice, jute twine, scissors, a wooden anchor or other wood item to paint, paint and paintbrushes.

Anchor-Rag-Wreath-Supplies

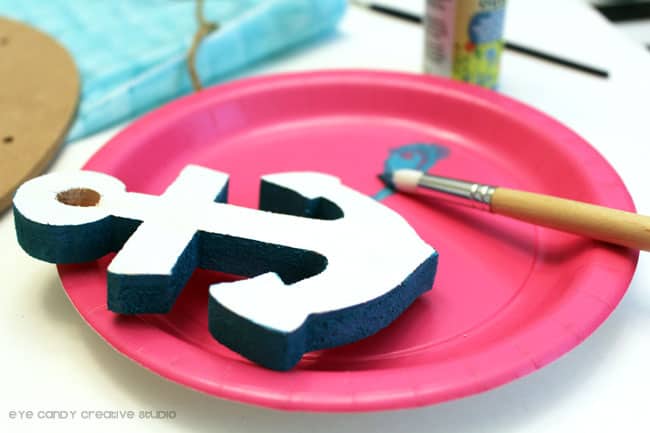
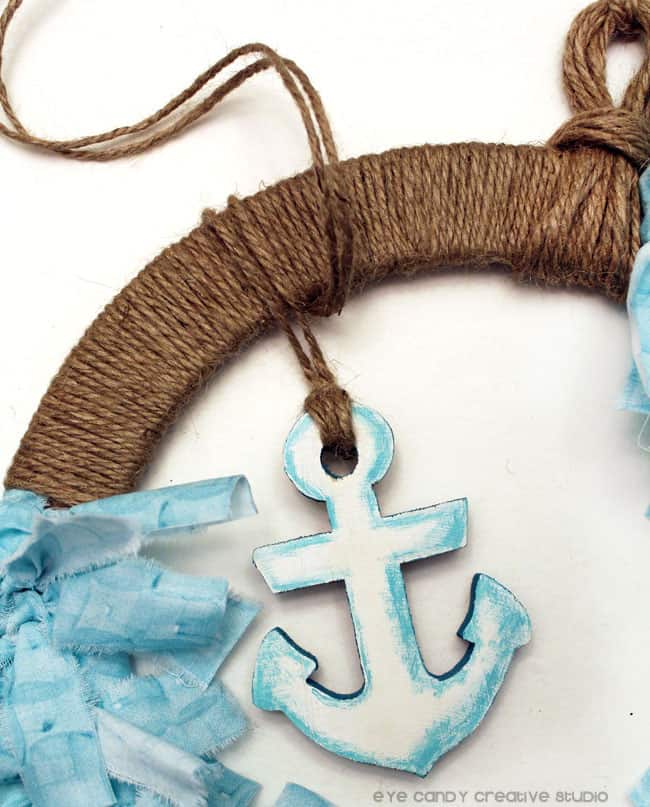
2. First she painted the wooden anchor – white paint on the front and the sides a darker teal blue. She then did some shading on top too (for dimension).

Anchor-Rag-Wreath-Painted-Anchor

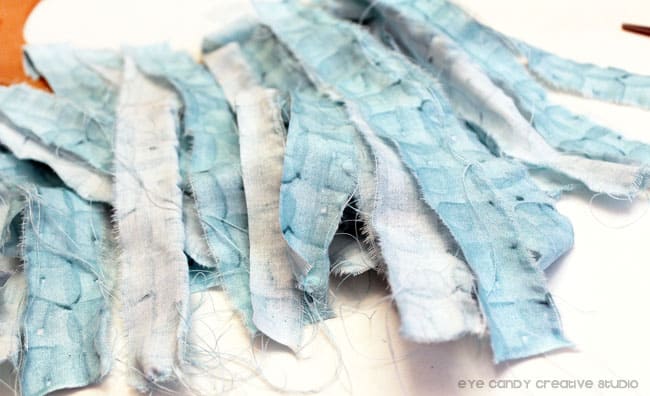
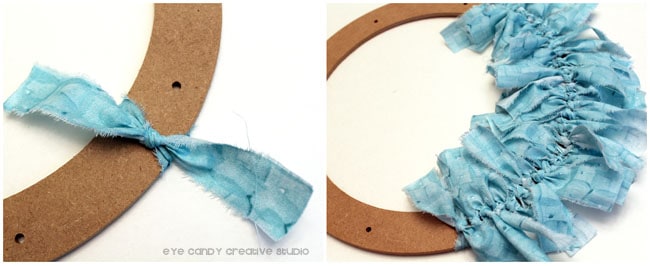
3. Take your fabric and cut them into 1 inch wide strips by 7 inches long. To do this, I used two fabric quarters to complete the wreath, folded each in half and then made small cuts about every inch and then pulled the fabric to “rip” it to get the rag look. Hope that makes sense but if not feel free to email me. 😉 You can choose to pull off all of the loose threads from tearing the fabric or leave them – the ‘look’ is totally up to you!

Anchor-Rag-Wreath-Fabric-Strips

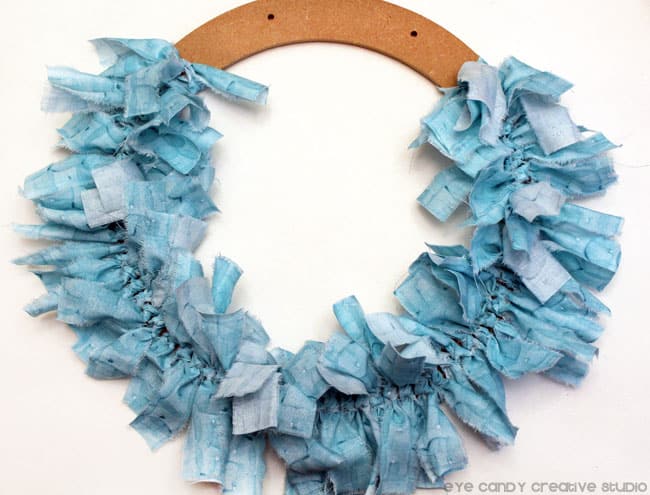
4. To create this look, simply tie each piece of fabric you tore around the wreath form, into a knot, until you have it about three quarters of the way filled. (like photo below). This will take a little bit of time to complete but it’s not hard. We tied these in the front but play around with different looks . . . perhaps the knot on the side.

Anchor-Rag-Wreath-Fabric-Strips-Tied Anchor-Rag-Wreath-Tied-Fabric-Strips

5. Next take a piece of jute, tie in a knot and simply wrap around the remainder of the wreath and then tie off.

Anchor-Rag-Wreath-Wrap-Jute

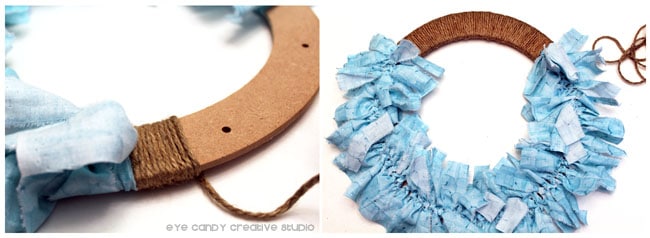
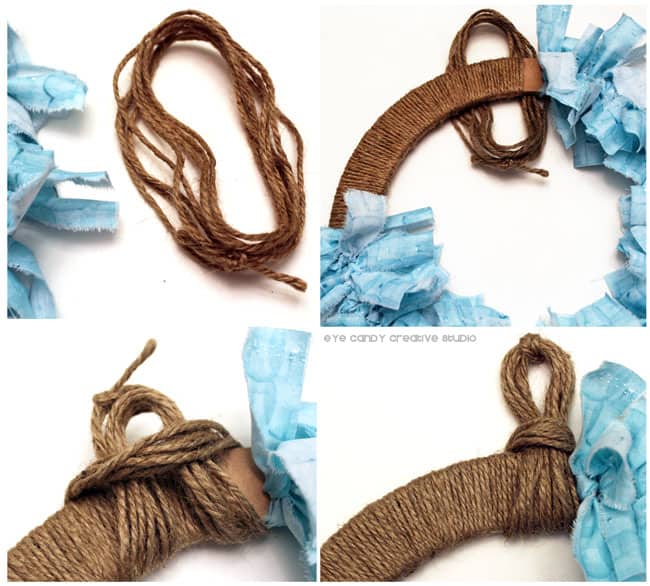
6. Cut off a piece of jute (ours was probably 80 inches long) and tie together so you have one big circle. Fold over into fours and then place under the wreath form and loop through to create this look below that will allow you to hang it on a wall or perhaps a front door, even. 😉

Anchor-Rag-Wreath-Jute-Loop

7. The last step is to tie your painted anchor on. We placed ours off to the top left.

Anchor-Rag-Wreath-Tie-Anchor

That is it! What a cute wreath right? She was so excited to have something new to match that anchor art we bought for her new bathroom decor and I promise to have a full reveal on my blog when we finish it. But for now I can always hang this on our front door to enjoy this summer!

Anchor-Rag-Wreath1

What do you guys think? Pretty cute huh? Please let us know if you think you will give this a try or what you would put on yours as we would love to hear from you in the comments below . . .

Thanks so much to Design Dazzle for letting me share this fun wreath with you all today and I hope to see you all over on my page sometime too! Have a great summer y’all! xo

Eye-Candy-Creative-Studio-Bio


Gorgeous DIY Anchor Rag Wreath! Beautiful summer time wreath!

summer-camp-banner

Gorgeous wreath, Laura! Thank you for sharing!

Stay tuned for more summertime fun ideas! Our Kids’ Summer Camp Season will last until mid-July. Want to see more? Check out the full collection (including the archives!) of Summer Camp ideas.

Related Posts


Summer Camp Series


Summer Wreath


Summer Camp: Summer Treasure Boxes


Summer Camp: Easy DIY Lemonade Stand


Summer Camp: How to Make Bugs


Summer Camp: DIY Fishing Pole


Summer Camp: Paper Lanterns


Summer Camp 2015 Favorites


Nautical Party Ideas | Summer Celebrations


Painted Nautical Anchor Sign

Article Rating:
No rating
Author Bio
Article Info
Popular Posts
Toni - Design Dazzle

Toni - Design Dazzle

Owner at Design Dazzle
Toni Roberts is a DIYer, designer, crafter, traveler, holiday lover, and memory maker. Design Dazzle encompasses ideas and inspiration for life’s celebrations, home projects, DIY crafts, holiday fun (especially Christmas), travel and more.
Power Bio Box by HOI
You are here: Home kids summer camp/crafts Summer Camp : DIY Nautical Anchor Rag Wreath
Title:
Summer Camp : DIY Nautical Anchor Rag Wreath
Authors:
  • Toni - Design Dazzle
Categories:
  • kids
  • summer camp/crafts
Mentions:
anchor, door decor, fabric scraps, nautical, rags, summer camp, wreath
Keywords:
anchor rag wreath
Last Updated:
February 16, 2018
  • Minnie Mouse Valentine's Cookie Pops
  • Mickey And Minnie Christmas Decorating Ideas
  • Enter A Secret Playroom Hidden Behind Wardrobe Doors
  • China Cabinet Makeover
  • Vintage Antique Nursery Room Ideas
  • Gorgeous Girl Baby Shower Dessert Tables
  • Straw Weaving Bracelets
  • 10 Best DIY Birthday Banners
  • Dollar Store Plate and Special Paper Make A Designer Plate
  • Halloween Birthday Party
  • Make A Giant Outdoor Kerplunk Game From Tomato Cages
  • Summer Camp: 10 Awesome Glow Stick Ideas

Sharing is caring!

Disclaimer

This post may contain affiliate links, which means that if you click on a product link, we may receive a commission (at no extra cost to you). See my full disclosure for further details.

Reader Interactions

Primary Sidebar

Img 0422

Hi, I’m Toni! Welcome to my blog Design Dazzle. I love being a designer, DIYer, traveler, crafter, holiday lover, and memory maker. Read more.

Toni Roberts is a participant in the Amazon Services LLC Associates Program, an affiliate advertising program designed to provide a means for sites to earn advertising fees by advertising and linking to amazon.com

DesignDazzle.com is protected by copyright laws. DO NOT distribute or copy the content or share multiple images or collage images without written permission. You can use ONE Design Dazzle image only if there is a link back to DesignDazzle.com. DO NOT edit, crop, or remove watermarks from any image. Please contact me at toni@designdazzle.com with any questions.

About | Contact Us | Privacy and Legal

© 2017 Design Dazzle · All Rights Reserved. | Hosted by House of Ideas