• Skip to primary navigation
  • Skip to main content
  • Skip to primary sidebar
  • Home
  • Blog
  • About
    • Contact
    • Press & Partnerships
    • Copyright/Disclosure
    • Links/Parties/Giveaways
    • HOI Friends
      • Toni Roberts
      • Tauni Everett
      • Tammy Mitchell
      • Randi Dukes
      • Michelle Stewart
      • Mariah Leeson
      • Mandy Beyeler
      • Lindi Haws
      • Kim Byers
      • Ashley Johnston
      • House of Ideas
  • Videos
  • SHOP

Design Dazzle

Inspiration for kids rooms, baby nurseries, and kids parties

  • My Home
    • Home Tour
    • Christmas Home Tour
  • My Projects
    • My Projects
    • Companies I Have Worked With
    • Michaels Makers
  • DIY/Decor
    • top tutorials
  • crafts
  • celebrations
    • parties
    • christmas
    • halloween
    • thanksgiving/fall
    • New Year’s
    • Valentine’s Day
    • St. Patrick’s Day
    • Easter/Spring
    • mother’s day
    • father’s day
    • patriotic
    • School/Teacher/Graduation
    • Gift Ideas
    • weddings
    • best ideas
  • Recipes
    • Meals
    • Instant Pot/Crock Pot
    • Desserts
    • Treats & Snacks
  • travel
  • free printables
  • Lifestyle
    • organization
    • Preparedness
    • Healthy Living
  • kids
    • kids parties
    • kids rooms
      • cool bedroom ideas
    • summer camp/crafts
You are here: Home / DIY/Decor / Repurposed Entertainment Center to Shoe Storage Cabinet

Repurposed Entertainment Center to Shoe Storage Cabinet

This post may contain affiliate links that, at no additional cost to you, I may earn a small commission. Read our Disclosure Policy.

Anyone else have tons of shoes? I have a lot of shoes and stuff and I needed a great way to store them to keep them organized. I decided to find and purchase an entertainment center in the classifieds which was to be repurposed to create the ultimate shoe storage. And guess what? It turned out awesome!

So for some reason I don’t have any before pictures. Yeah, I know hard to tell what it used to look like.

175 entertainment center twin side towers and connecting bridge 22575641

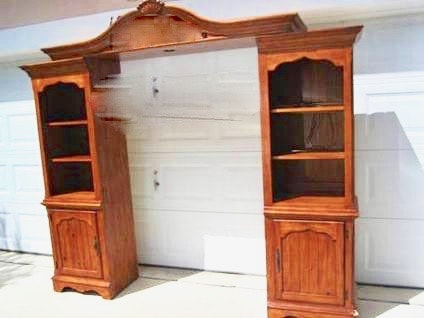
I did find this image from here that was being sold in the classifieds. It looks pretty similar to what the entertainment center looked like when I purchased it. The main difference was the “bridge” that connected the two cabinet towers – my units bridge was not as big with the scalloped shell on the top. Since the bridge sits on top of the cabinet towers it makes it easy to move the towers if you need them wider apart or closer together.

Besides creating a shoe storage cabinet, this would make a great bookshelf or toy shelf for a kids playroom or bedroom.

Interested to see the after?

Img 3954

How to create this look:

Figure out the size and width of shelves. Determine the spacing of the shelves which will be based by the height of the shoes (heels, flats, boots, etc)

Purchase bead board, shelving, wood screws, 1″ x 1″s, primer, paint, and knobs.

For the backing between the cabinet towers, we used a bed board. Shelving supports were cut to size 1″ x 1″s. Shelving was also cut to size and wood screws were used to attach the shelves to the supports.

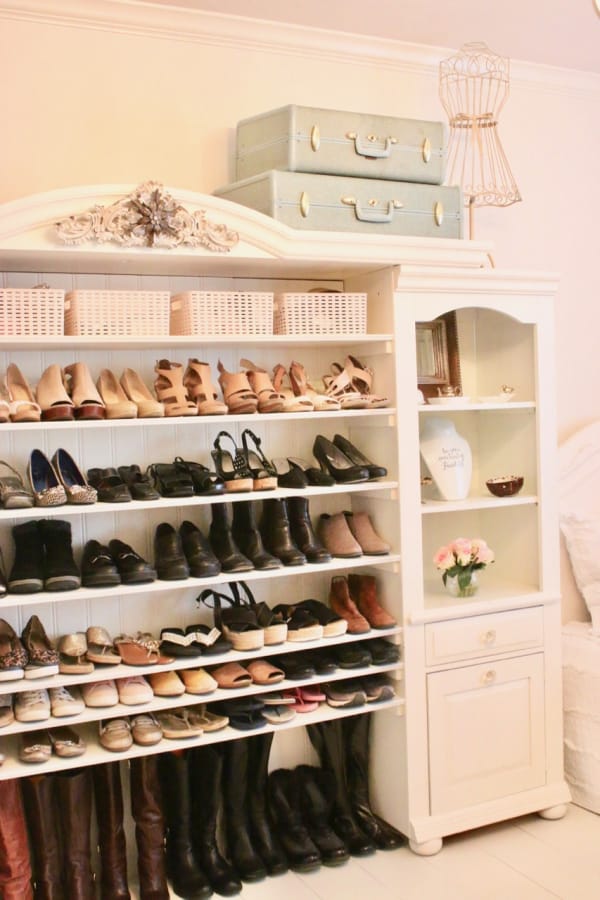
I made sure to put the BOTTOM shelf up higher so my boots could fit underneath. As you can see, the boots sits directly on the floor.

The original honey-colored entertainment center was lightly sanded, wiped meticulously clean, painted with primer, then white dove paint. Crystal knobs replaced the old dated ones.

A decorative resin/crystal detail was attached to the top of the unit to add some pizzazz to the shoe storage cabinet.

Repurposed Entertainment Center to Shoe Storage Cabinet
Img 3963

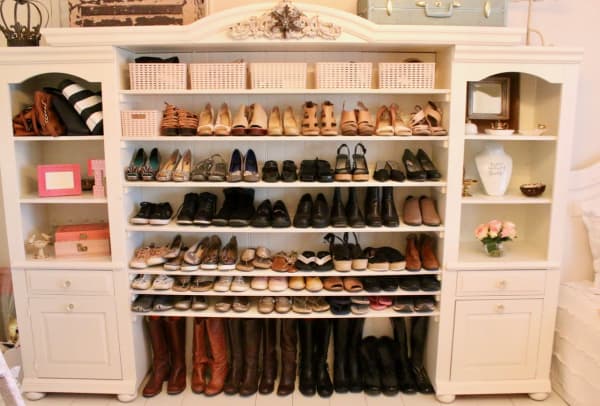
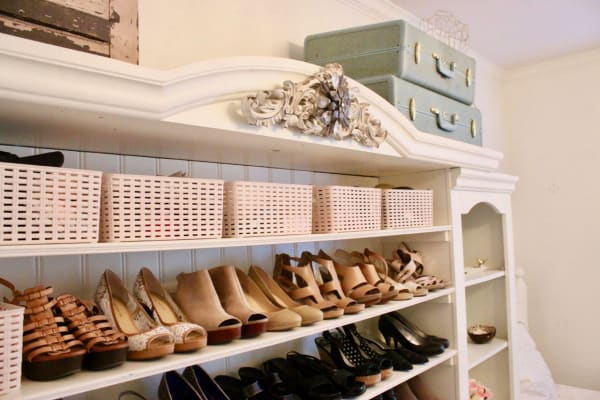
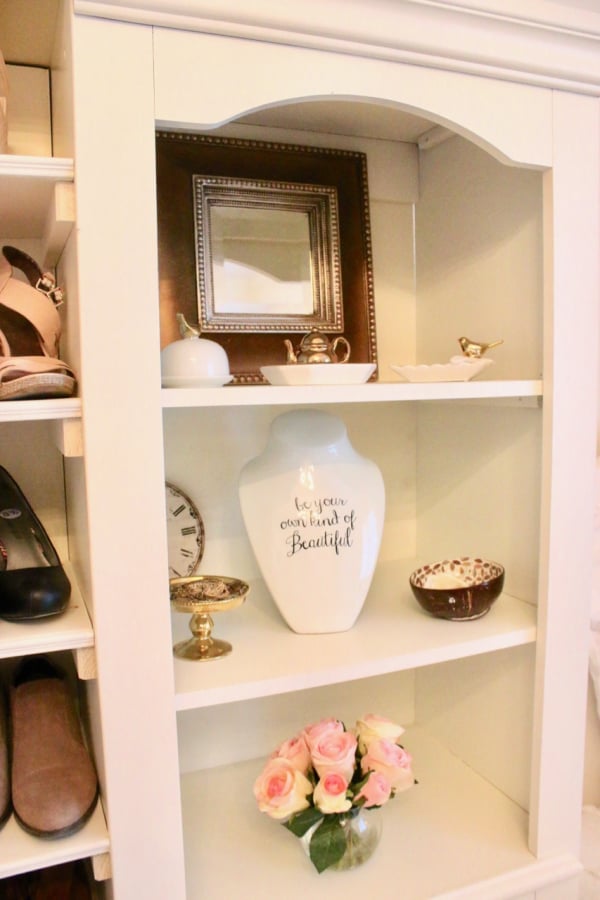
Organizing my stuff makes my life much easier. I placed several blush colored baskets on the top shelf to store item such as – sunglasses, masks (for COVID), hats and more. It’s nice to have a storage unit so organized that you know right where everything is!

Check out what I repurposed this night stand into! It turned out adorable.

Let me know if you have repurposed anything and how it turned out.

dd happy designing Toni

Sharing is caring!

Reader Interactions

Comments

    Leave a Reply Cancel reply

    Your email address will not be published. Required fields are marked *

    Recipe Rating


  1. Ivory says

    May 6, 2021 at 8:14 am

    I absolutely love this diy. So fabulous. What a creative idea. I wish you had the space to create this outstanding storage for my shoes. Thanks for sharing. Happy Mother’s Day

    Reply
  2. Lyndy says

    July 5, 2022 at 8:05 pm

    Lovely! Did you sand and then apply the primer?

    Reply
    • Toni Roberts - Design DazzleToni - Design Dazzle says

      August 3, 2022 at 12:26 pm

      I just updated the post. Thank you for helping me clarify!

      Reply

Primary Sidebar

Img 0422

Hi, I’m Toni! Welcome to my blog Design Dazzle. I love being a designer, DIYer, traveler, crafter, holiday lover, and memory maker. Read more.

Sign up
Sign up to receive our newsletter and all our FREE printables! 
Toni Roberts is a participant in the Amazon Services LLC Associates Program, an affiliate advertising program designed to provide a means for sites to earn advertising fees by advertising and linking to amazon.com

DesignDazzle.com is protected by copyright laws. DO NOT distribute or copy the content or share multiple images or collage images without written permission. You can use ONE Design Dazzle image only if there is a link back to DesignDazzle.com. DO NOT edit, crop, or remove watermarks from any image. Please contact me at [email protected] with any questions.

About | Contact Us | Privacy and Legal

© 2023 Design Dazzle · All Rights Reserved. | Hosted by House of Ideas