


How would you like to have had this lemonade stand as kid? This DIY lemonade stand is not too complicated and pretty simple to put together. Take a nightstand and turn it into a lemonade stand!! The only tools you need are a drill and a screwdriver. The most time consuming part is the painting – other than that it’s pretty basic. Scroll down to see the steps outlined below.

Crocheted doilies with ribbon and yellow straws make for a cute presentation.

The right supplies are very important when dealing with pure CUTENESS!! Paper Party Green Straws, cute napkins and yellow candy sticks
certainly helped with the cuteness factor.
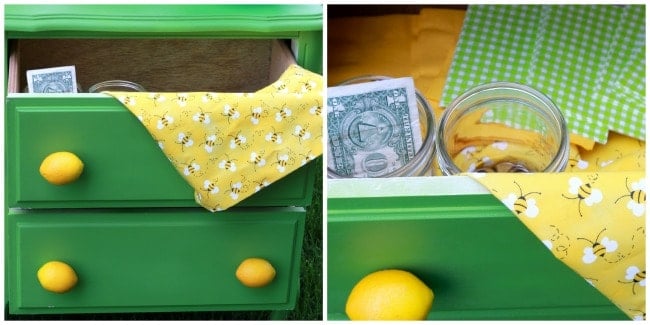
Would you rather the drawers be the front or the back of the lemonade stand? We used the drawers as the back of the stand for supplies and the change drawer. Mason jars work for change and currency.
HOW TO MAKE THE LEMONADE STAND:
Supplies :
-Nightstand
– TWO 1 x2 lumber 5′ long (all wood was purchased at Lowe’s and cut by their employees)
– One piece of scrap lumber for topper
– Lauan Plywood 2 x2 Lowes cut it to size to it the back of the night stand (this is for the chalkboard) OPTIONAL
-Primer
– Spray Paint (Green)
– Yellow chalkboard paint recipe
– Wood Glue
– Screws
-Poly Seam Seal or Caulk (optional)
Plastic lemons were used as knobs (optional)
Tools:
-Drill
-Screw Driver
Steps:
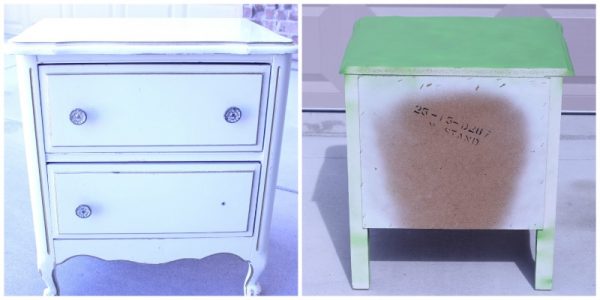
I picked this beauty of a night stand up at the thrift store. Start by wiping down any dust and lightly sand down the nightstand to create some texture for the primer to grab on to. Pull out the drawers from the nightstand and spray them with primer along with the two pieces of lumber and scrap wood. Allow time for them to dry completely then spray paint them all green. You will need several coats for an even finish. Since we were placing a chalkboard on the back we didn’t spray the back green. If you prefer to have the drawers facing front, no need for the chalkboard. The chalkboard step is optional.
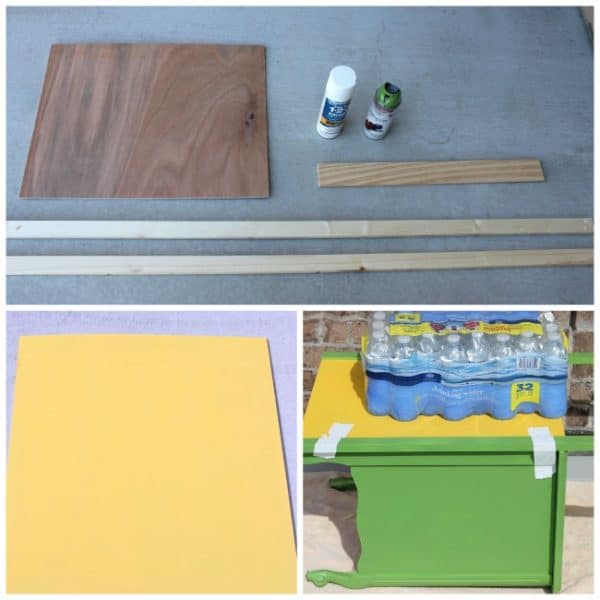
The top images shows the wood before spraying with primer and paint. The luauan board (top left) was painted with a yellow chalkboard paint (recipe for chalkboard paint).
Once everything is dry glue all the pieces together using wood glue. We started by gluing the chalkboard to the back of the nightstand. We found something heavy (water bottles) to weigh down the board to hold in place. Next we glued the two 1″ x 2″ pieces of wood in place on either side of the chalkboard. Duct tape came in handy for helping to hold it in place.
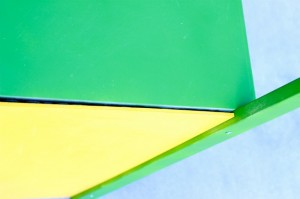
When dry – use screws to make sure the wood piece becomes permanent. We used clear caulk to fill in the gap between the nightstand and chalkboard. Screw the last piece of wood across the top of the (two 1 x 2’s)

Now the lemonade stand is almost ready. You can just use regular knobs on the drawers but we found plastic lemons that we could drill holes into and screw into for drawers knobs. It makes the lemonade stand that much cuter. Although, it’s not very practical ; )


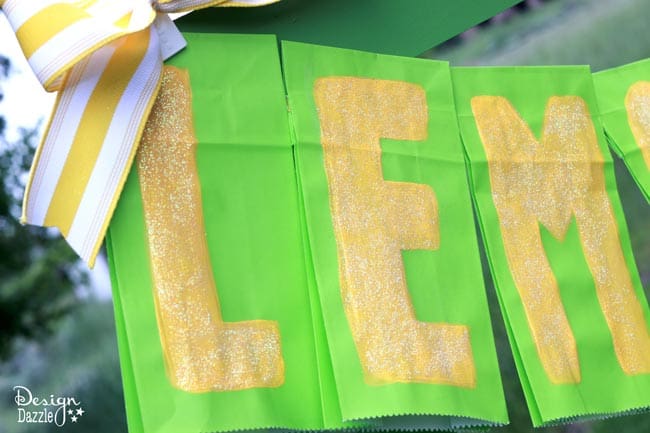
Lemonade Banner:
-Green paper bags (Michaels Stores)
-Yellow Paint
-Thin Yellow Ribbon
– Thick yellow striped ribbon for bows
-Glitter (optional)
We took green paper bags (turn the bag upside down) and painted the letters on with yellow paint. It took 3 coats and some glitter. Next glue the paper bags flap over a thin ribbon and you have a darling lemonade sign. We glued some yellow ribbon bows onto clips to hold the sign up. Don’t you LOVE how easy this is?
Give your kids some paper bags and have them create a simple but cute lemonade banner!
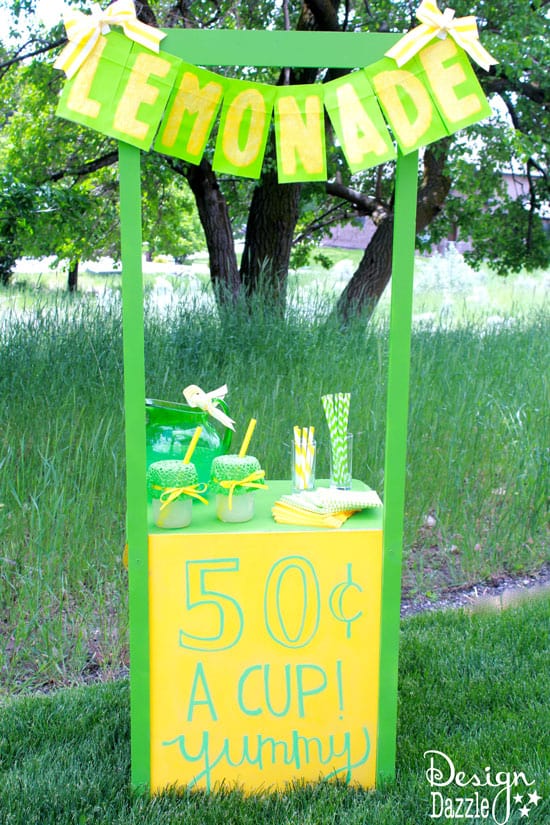
Do you prefer the chalkboard front or the drawer front?


We are hosting Summer Camp Mon- Fri June 3rd to July 3rd (weekends will be for our regular posts). We are featuring awesome “Camp Counselors” (blogging friends) who have created super fun ideas and activities to help you SURVIVE summer with the kids. Click on the Summer Camp banner to be taken to our Summer Camp series.


Kristin says
So cute! Love it!
Toni - Design Dazzle says
Thank you Kristin! I would have loved this lemonade stand as a kid. Looking forward to your summer camp post : )
Toni - Design Dazzle says
Thanks, Kristin. It is super cute. People driving by would have to stop to buy lemonade just because the stand is so cute!
Be Inspired PR says
This is beyond adorable! This is so much fun for kids!
Toni - Design Dazzle says
Kids love having a lemonade stand. It doesn’t hurt if it’s adorable!
Lisa says
This is so darling! I am totally planning on making one for my kids. Where did you find the cute green paint?
Toni - Design Dazzle says
Valspar spray paint brand from Lowes. There paint is terrible quality but they have great colors!
Toni
Aida says
I love this idea!!! We might just do this soon:)
Toni - Design Dazzle says
Aida – I would love it if you send pictures our way.
Tami @ Curb Alert! says
What a great lemonade stand. The colors you used are perfect! I’m sure any kid would have a ball serving here!
~ Tami
Ashley @ Simply Designing says
This is so much fun Toni! I LOVE the green you chose!
Bliss says
T.D.C….. too darn cute! I have a nightstand that I’ve been planning on turning into a little kitchen, but now I’m thinking it should be a lemonade stand. Pinning.
Toni - Design Dazzle says
I’d love to see what you decide. I’m sure either one would be awesome!
Toni