

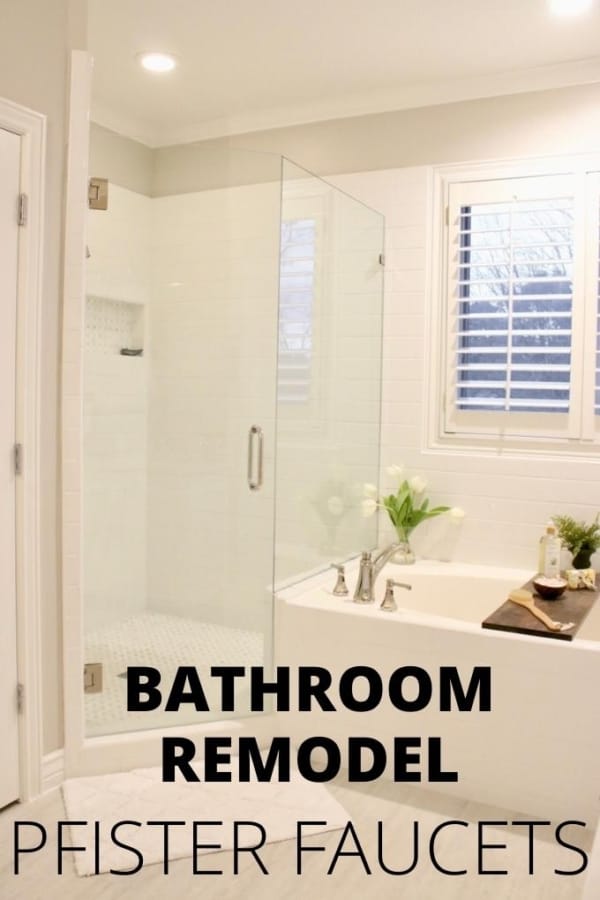
Have you ever lived with an ugly master bathroom? I have and I couldn’t wait to remodel it.
One of the worst things about our bathroom was it had carpet and not a pretty color but green carpet. Yes, true story. Not only green carpet but dated everything – faucets, fiberglass shower stall, dated lighting, and more. It was a little dark and a little dreary bathroom. I couldn’t do anything to make it pretty except to tear out and start over.
We had been traveling quite a bit the last several years. It was always a question of “do we remodel our master bathroom” or “go on a trip for a couple of months”? Traveling won out but we finally bit the bullet and got the bathroom done.
I really love how the bathroom turned out. There are two parts to this blog post.
Scroll to the bottom to see part two.
Let’s start with all that was wrong…
The before:
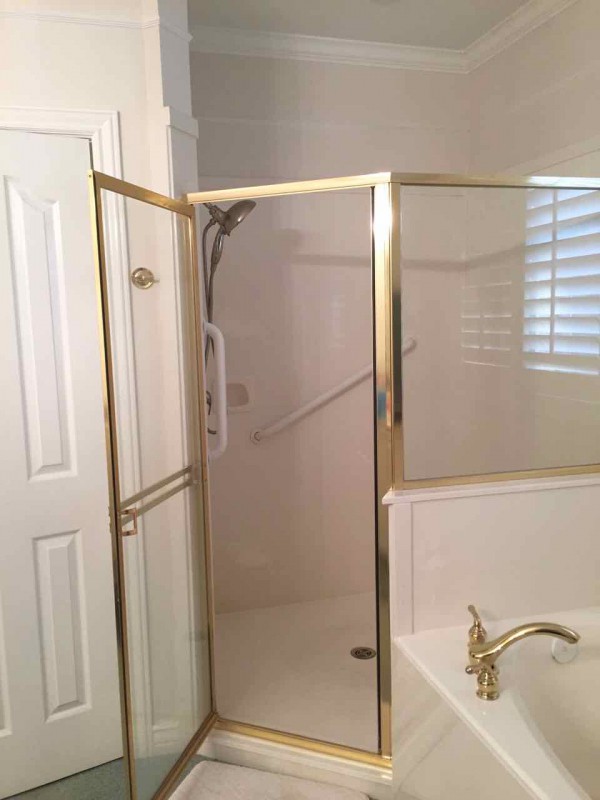
An elderly couple owned the home before us, so the grab bars in the shower were installed for safety. There was no place for the shampoo/conditioner (except on the floor) and only a small little cubby for soap.
Can you see the green carpet in the bottom left of the picture? And the thought of bodily fluids on the carpet around the toilet? Yikes, it was awful!
The list of items we removed during the remodel:
- carpet/pad/tack strips
- trim wall molding
- shower fiberglass enclosure
- dated shower doors
- pony wall/short wall between shower and tub
- grab/safety bars
- dated faucets/shower head
- toilet
- countertops
- lighting
- door handles
Let’s go over some details. Why we removed the wall trim and how I chose the paint color.
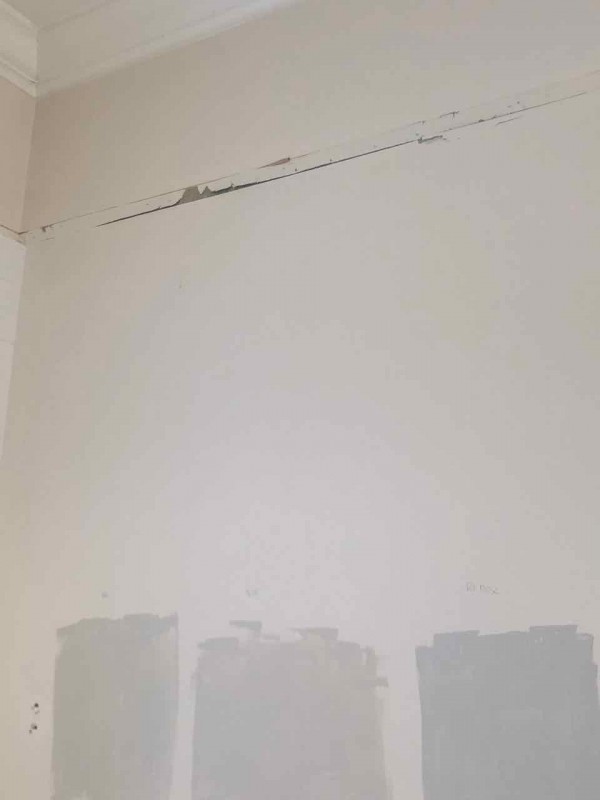
Paint samples on the wall.
We have Edgecomb Gray Benjamin Moore paint throughout our home. I wanted to go just a bit darker in this bathroom because of all the white tile, white counters, white closet doors, and white plantation shutters that was already there or that we were adding during the remodel.
I painted 3 swatches of color on the wall. Repose Gray paint color is on the far right. As you can see, it is darker and more of a cool gray. Agreeable Gray is in the middle. I do not remember the color on the left.
The paint color I went with was Agreeable Gray (SW7029) which is a warm gray.
The wall trim molding at the top of the wall (below the crown molding) was removed around the perimeter of the bathroom. You can see at the top where it once was. An x-acto knife was used to help remove the caulking and the trim. It actually was easily removed from the wall. I wasn’t sure how hard this part would be.
We are glad we removed the wall trim. It just seemed to make the room dated.
I knew I wanted to go with the frameless glass shower door also known as “Euro shower door”. I like the look without the metal borders.
Can you see the pony wall to the right of shower door and on top of the bathtub? We removed the “pony wall/half wall” and added the fixed glass side with ⅜″ tempered glass. I love how fabulous it looks. There is more light in the shower and the shower appears way bigger without the pony wall there.
Ready to see some pictures of the remodel?
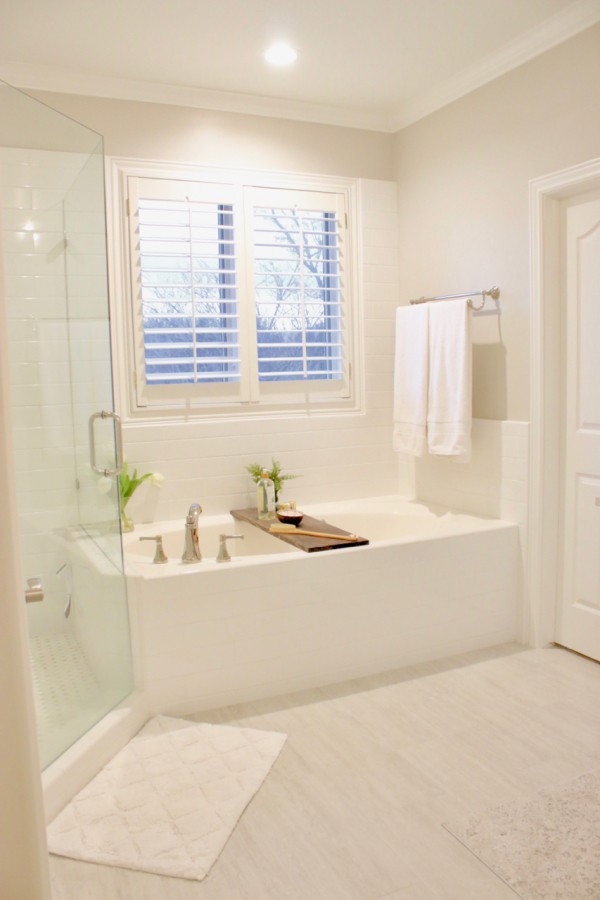
The after:
Pfister faucets totally made this space look high-end.
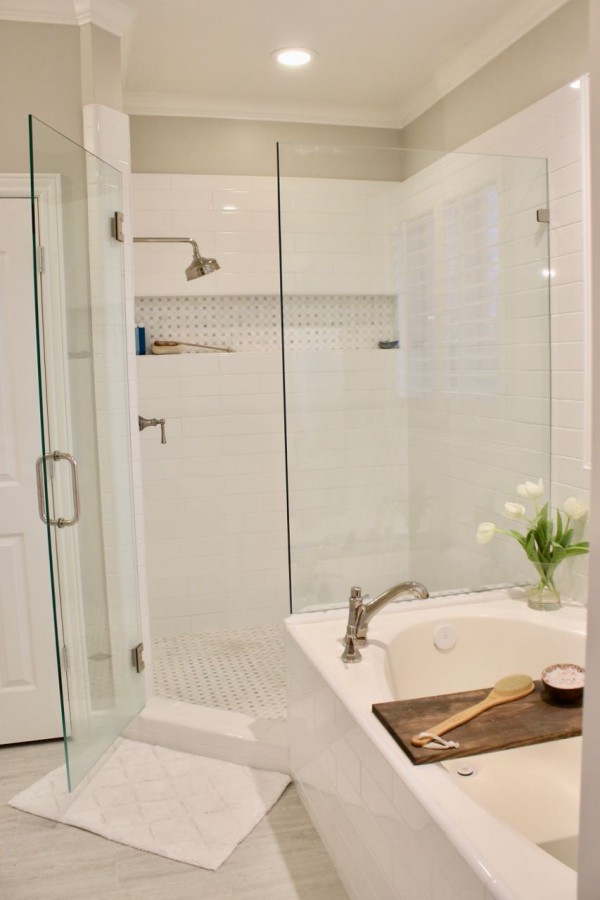
Including tax and installation, the cost for the glass door, handle, polyguard and fixed glass side was $1406. I had some other quotes and this was the cheapest. I ordered the ⅜″ tempered shower glass door and side panel. The company offered many finishes for the handle. Since I was going with polished nickel for the fixtures, I chose their polished nickel handle. I also added the polyguard which helps surfaces against water spots.
We use this shower squeegee to clean the glass every time we take a shower. It comes with a little holder so we keep the squeegee in the shower stall towards the bottom. It takes less than a minute to clean the glass with the squeegee after every shower. The glass still looks great even 6 months later. This is one of the downsides to hard water. The polyguard was $144 and well worth it. The company is Murray Glass in Utah and I was extremely happy with them.
No additional square footage was added to the shower. It looks way bigger. Do you like how Euro shower glass looks?

After receiving quotes on replacing the tub with a freestanding tub, we decided to keep the original jacuzzi whirlpool bathtub with jets. The additional costs in plumbing, removing the current tub, adding a freestanding faucet and the new tub would cost almost $4000.
Our tub works great so we kept it.
The cultured marble on the wall above the tub and the poly wall were removed. The cultured marble on the side of the tub was left in place and the tile was added directly onto the cultured marble with thinset (just like the wall). It was then grouted with regular grout.
Tiling the side of the tub (cultured marble) and wall brought it all together making it look cohesive and upgraded.
You can see the tile on the side of the tub in the image below.
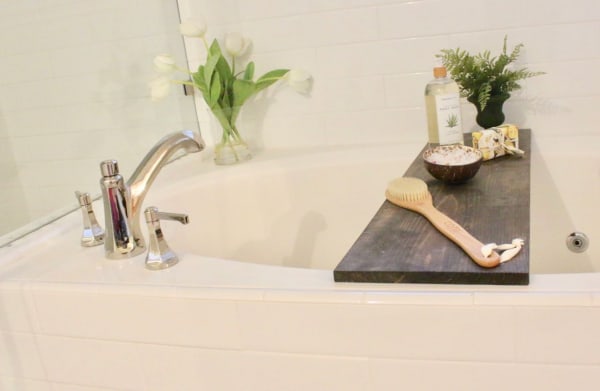
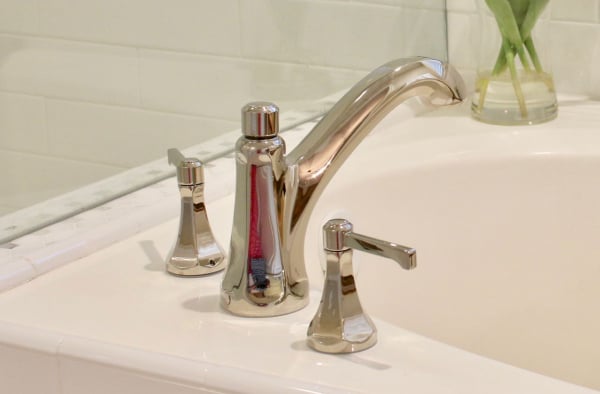
Pfister fixtures were added throughout the bathroom. I have to say the quality and heavy-duty feel of these fixtures are pretty awesome. Adding new fixtures and especially a quality like Pfister is a great way to bring a bathroom up to date.
The Pfister product line is Tisbury and the finish is Polished Nickel.
We also added matching accessories like the toilet paper holder, towel bars and towel/robe hooks. I was so impressed when I opened the box and felt the heaviness of these items. They are pure QUALITY!
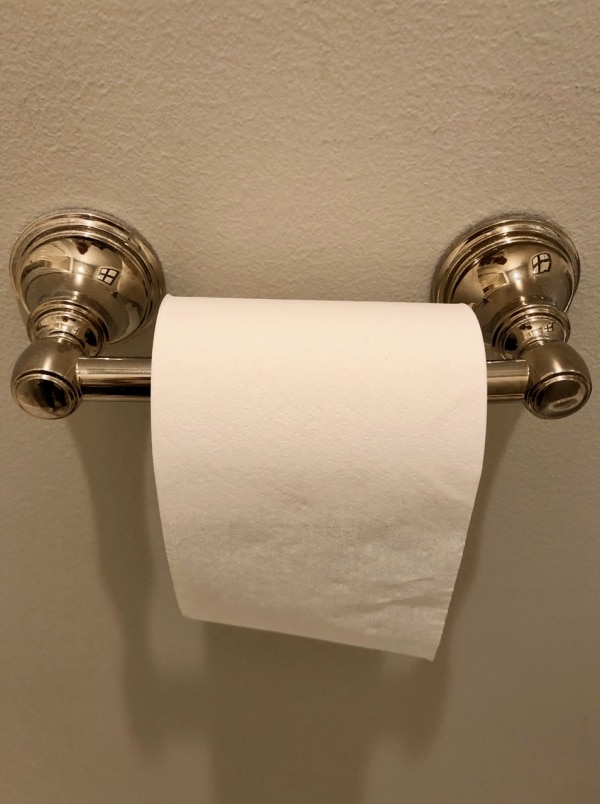
I just love the timeless design of the faucets. Each piece is made of all-brass construction with the finish in polished nickel.
Part Two of the master bathroom remodel

Ivory says
Wow, what a fantastic transformation. I love it all. Thanks for sharing
Toni - Design Dazzle says
Thank you, Ivory! I’m working on the second post. There will be more photos and ideas on the remodel!