• Skip to main content
  • Skip to primary sidebar

Design Dazzle logo

menu icon
go to homepage
  • Home
  • Home Decor / Design
  • Holidays
  • Crafts
  • All Categories
    • Facebook
    • Instagram
    • Pinterest
    • YouTube
  • search icon
    Homepage link
    • Home
    • Home Decor / Design
    • Holidays
    • Crafts
    • All Categories
    • Facebook
    • Instagram
    • Pinterest
    • YouTube
  • ×
    Design Dazzle » Kids » Summer Camp/Crafts

    Published: Jun 16, 2017 · Modified: Feb 16, 2018 by Toni Roberts · This post may contain affiliate links · 3 Comments

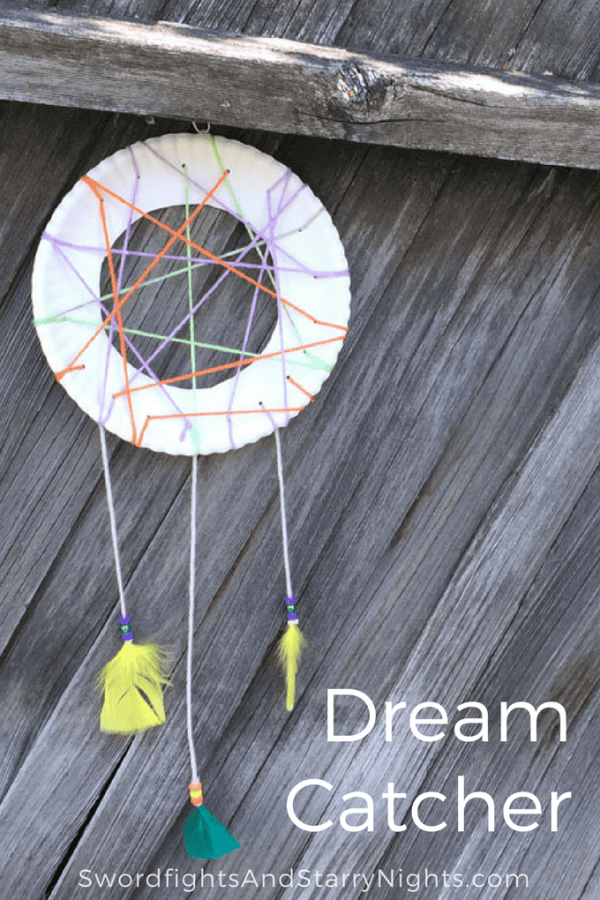
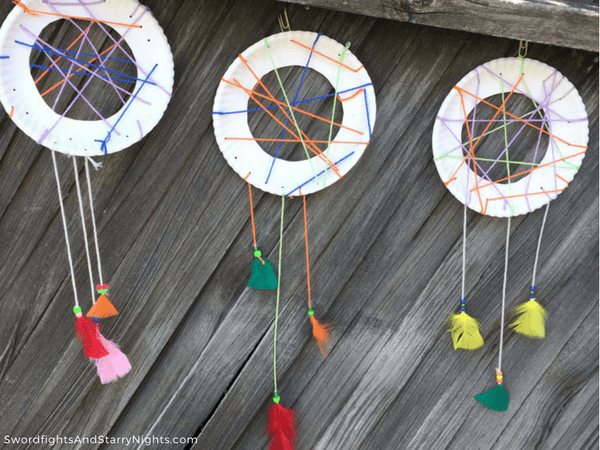
    Make your own Dream Catcher

    Making a dream catcher is a fun project for both kids and adults! All you need are a few simple supplies and you’ll be set to go!

    Hello! I’m Christine from over at Swordfights & Starry Nights where I blog about all things home, family, and DIY. Dream catchers are a favorite craft at our house.

    Making a dream catcher is a fun project for both kids and adults!


    Supplies Needed

    Making a dream catcher is a fun project for both kids and adults!

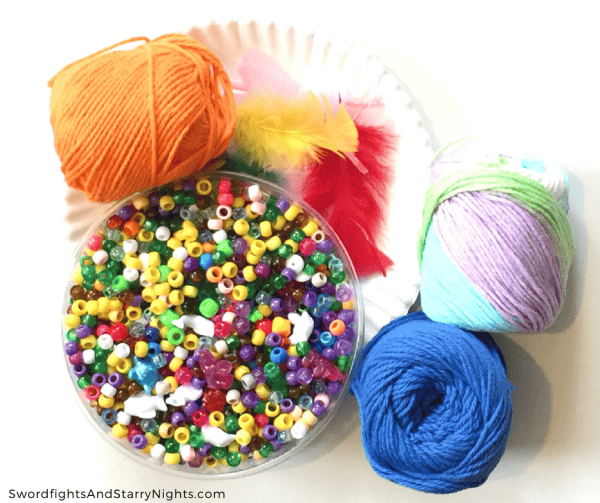
    • Plastic Beads
    • Craft feathers
    • Yarn in several colors
    • Paper plates
    • Tape
    • Scissors
    • Paper punch

    How to make your dream catcher

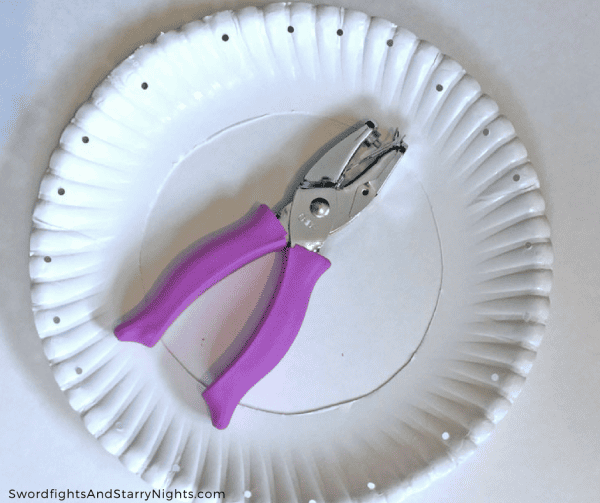
    1. Cut the center out of a paper plates.
    2. Punch 20-25 holes around the edge. Making a dream catcher is a fun project for both kids and adults!
    3. Cut a piece of yarn to 3 or 4 feet.
    4. Wrap a small piece of tape around one end of the yarn to make it easier to thread.
    5. Push the other end through one of the holes on the plate and tie a knot to hold it in place.
    6. Thread the yarn through a hole on the other end and randomly zigzag it to other holes. When you get to the end of the yarn, pull off the tape and tie a knot around the plate.
    7. Add more colors of yarn until the holes are filled.
      *You’ll need three holes at the bottom to attach the yarn with feathers. Either leave three holes empty or punch more.
    8. Add a piece of yarn at the top to hang.
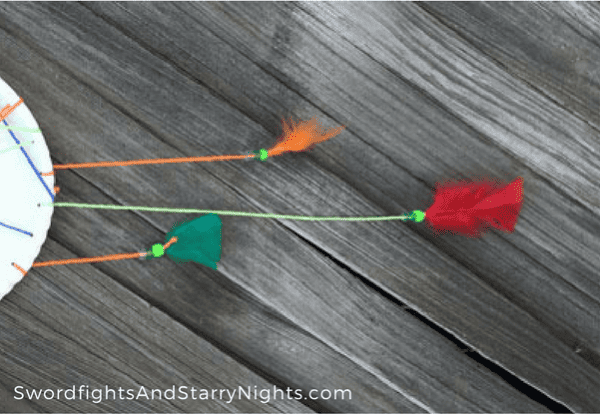
    9. Cut three lengths of yarn- (1) 12-18″ and (2) 8-10″
    10. Choose three feathers and tie one on each piece of yarn from step 9.
    11. Thread beads on above the feathers.Making a dream catcher is a fun project for both kids and adults!
    12. Tie these pieces onto the bottom three holes in the plate.
    13. Hang and enjoy!

    Making a dream catcher is a fun project for both kids and adults!

    If you’d like to see more activities for your family, check out Swordfights & Starry Nights.


    Thanks to Design Dazzle for inviting me over!

    Christine from Swordfights & Starry Nights

    Hello! I’m Christine from Swordfights & Starry Nights where I blog about home, family, and DIY.

    I’m a mom, a crafter, and collector of hobbies.

    I hope you can take a minute to look around my blog and find something to inspire,
    bring you hope, or at least enjoy the silly stuff.

    You can find me at my blog, on Instagram,
    on Facebook, on Pinterest, and on Twitter.

    Please stop on by!

    ________________________________________________________________
    Thanks so much to Christine for sharing this adorable Dream Catcher idea with us! What a fun summer activity. Be sure to check out her blog for some more cool and creative ideas!

    ________________________________________________________________

    Make sure to check out all of our fabulous past summer camp posts!


    Save

    More Summer Camp/Crafts

    • Creative Ways to Paint Rocks
      20 Creative Ways For Painting Rocks
    • banana ocean smoothie bowl
      Banana Smoothie Bowl (Ocean Theme)
    • Homemade Ice Cream Recipes
      25 Mouthwatering DIY Ice Cream Recipes For Hot Summer Days
    • Summer Fun for under $50
      The Ultimate List of Summer Fun

    Sharing is caring!

    Reader Interactions

    Comments

    1. Diana Lopes says

      June 26, 2017 at 6:47 am

      What a cute DIY! I love dream catchers and this is easier than I thought it’d be. Thanks for sharing, I’ll be trying it soon!

      Reply
      • Toni - Design Dazzle says

        March 03, 2018 at 2:49 pm

        So glad. Hope it was a fun craft for you.

        Reply

    Leave a Reply Cancel reply

    Your email address will not be published. Required fields are marked *

    Recipe Rating


    Primary Sidebar

    Toni medium

    Hi, I’m Toni! I love designing and decorating. Join me for home inspiration and creative living! More about me →

    Popular

    Spring/Easter

    • Setting an Easter Table
      Decorating An Easter Table
    • elegant recipes with rose
      Rose Petal Sweets
    • IMG 9043
      Simple Easter Table Decor
    • Edible Bunny Box with candy inside. - Design Dazzle
      It’s An Adorable, Edible Easter Bunny! D-I-Y

    Footer

    ↑ back to top

    About

    • Privacy Policy
    • About Toni

    Contact

    • Contact
    • Press & Partnerships

    Toni Roberts is a participant in the Amazon Services LLC Associates Program, an affiliate advertising program designed to provide a means for sites to earn advertising fees by advertising and linking to amazon.com

    DesignDazzle.com is protected by copyright laws. DO NOT distribute or copy the content or share multiple images or collage images without written permission. You can use ONE Design Dazzle image only if there is a link back to DesignDazzle.com. DO NOT edit, crop, or remove watermarks from any image. Please contact me at [email protected] with any questions.

    Copyright © 2024 Design Dazzle