

We’re the girls from Eighteen25 and we’re pretty thrilled to be here at Design Dazzle today.
We love when our kids make special ornaments at school. but it seems like these days, once they’re out of kindergarten, we don’t get them anymore. So, we’ve started a new tradition and we make our own at home. The kids had a blast making last year’s ornaments and they were pretty excited for this year’s too.
Self Portrait Ornaments

SUPPLIES:
- 4″ – 5″ embroidery hoop
- muslin (half a yard should be plenty)
- variety of martha stewart acrylic paints
- martha stewart stencil brushes
- fine black sharpie
- spray paint (optional)
- glue gun
- twine
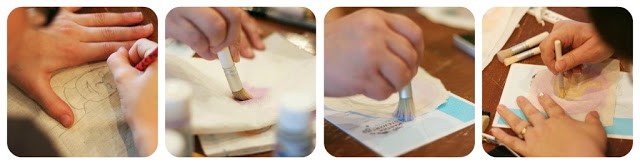
STEP ONE: trace the inside of the embroidery hoop onto the muslin.
STEP TWO: have your child draw their self-portrait with a pencil inside the circle.
STEP THREE: using a larger stencil brush, fill in the background color. tip: dip your stencil brush in the paint and then use a paper towel to brush most of it off. you’ll want a very dry brush with a soft touch.
STEP FOUR: using a smaller stencil brush, fill in the other colors. you’ll want to go out of the lines a little bit, but make sure your paint is light enough that you can still see the lines. (we mixed two colors to get a good skin color.)
STEP FIVE: trace your pencil lines with the sharpie marker then add your child’s name and year.
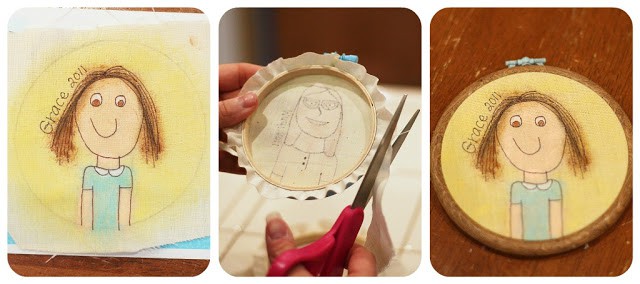
STEP SIX: you can spray paint your embroidery hoop now, if you choose to. and once that is dry, insert the self portrait.
STEP SEVEN: trim off some of the excess muslin, leaving just a little bit that you can hot glue onto the hoop.
STEP EIGHT: tie some twine (or other thin ribbon) onto the top and your ready to hang!
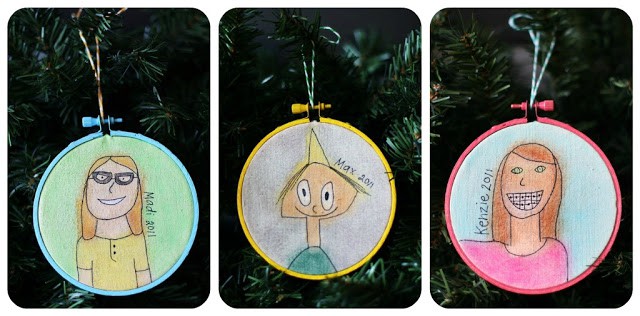
we just LOVE how each one turned out.
and as the years go by, these little treasures will be so fun to pull out of the box and hang onto the tree.
thanks for having us!!

Embroidery Hoops 4″-1 Each Of 6 Bright Colors


Martha Stewart Crafts™ Acrylic Paint Set 12pk
thanks for having us!!
Embroidery Hoops 4″-1 Each Of 6 Bright Colors
Martha Stewart Crafts™ Acrylic Paint Set 12pk
+++++++++++++++++++++++++++++++++++++++++++++++++++
Thank you to Eighteen25 for sharing such a FUN idea! This also would be a fun ornament to make at an adult Christmas party.
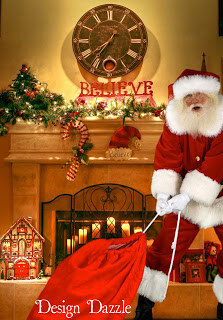
We caught Santa in our home delivering gifts last year!! He wasn’t really in our home but it sure looks like it. This is AWESOME and a must if you have kids!
To view all of our 100 Ideas of Christmas Wonderful visit here. More posts everyday until Christmas!


Cinthya says
I love, love, love the self portrait ornaments. As soon as I saw them I knew I wanted to do this except that I will probably draw portraits of my kids and hang them up in the playroom. Thanks for the great idea.
I would love if you shared this on my link at http://www.eyehearttoday.blogspot.com
Worksheets for kids says
Great work. I really loved these portraits. It looks like very innovative for me. Simple but very good.
Becky @ UCreate with Kids says
LOVE IT!!!
Heather@ Creative Family Moments says
This kind of project is right up my family's alley. So cool!
Amy B says
Thank you for this great idea. I am an art docent for my kid’s class and I am using this to go along with our lesson on Self-Portraits and Frida Kahlo. I think that the class will love it.
Toni - Design Dazzle says
I’m so glad! What a great art project. Thanks, Amy!