

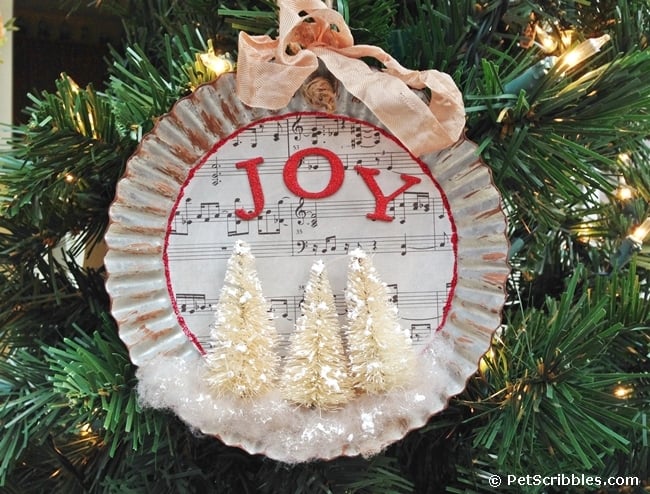
This charming tart tin ornament will give your Christmas tree a touch of vintage style! You can also use this handmade ornament as wall decor or as a sweet hostess gift.
Hi everyone! I’m Laura from Pet Scribbles, and I’m thrilled to be participating in Design Dazzle’s Christmas Wonderful series this year!
One of my favorite Christmas crafts to create every year are ornaments. Handmade Christmas ornaments can do more than simply hang on my Christmas tree. Sometimes I’ll craft a bunch to give as hostess gifts, or to decorate a gift-wrapped present under the tree. Larger ornaments also double as hanging decorations throughout our home.
How to make a charming tart tin ornament
This ornament is easy to put together, and the supplies can be found at the big craft stores. (I found most of my supplies at Michaels.)
Supplies:
- Tart tin ornament
- Brown chalky finish paint
- Sheet music paper
- Scissors
- Stickles glitter glue (red)
- Decoupage medium
- Strong clear glue (I used E6000)
- Cotton ball, pulled apart
- Ivory small bottle brush trees (3)
- DecoArt Snow-Tex
- Tiny brush (to apply the Snow-Tex)
- Adhesive-backed red glitter letters
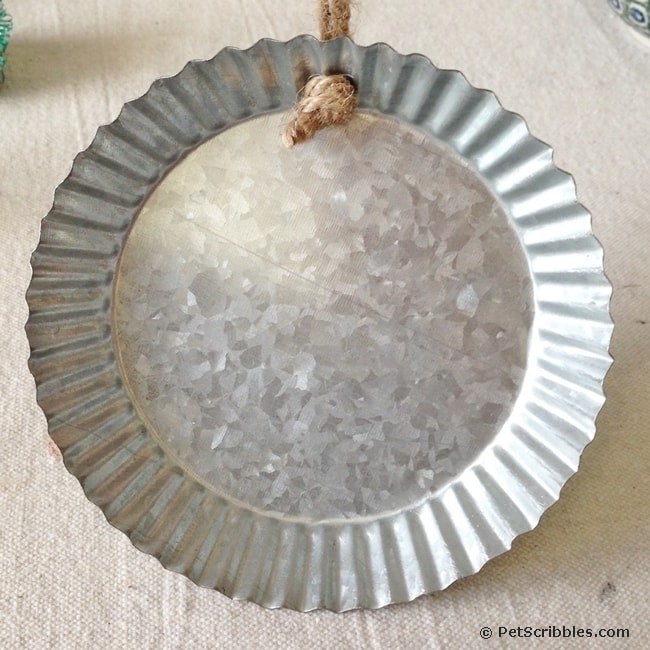
Here’s the tart tin ornament that I found at Michaels. They call it a bottle cap design, but I think it looks much more like a vintage tart tin.
Let’s begin!
Step One: Place the tart tin ornament onto sheet music paper and trace a circle around the base of the ornament. This will give you a perfect circle you can cut out for the inside back of the ornament. See how it fits and carefully snip here and there to get it just right.
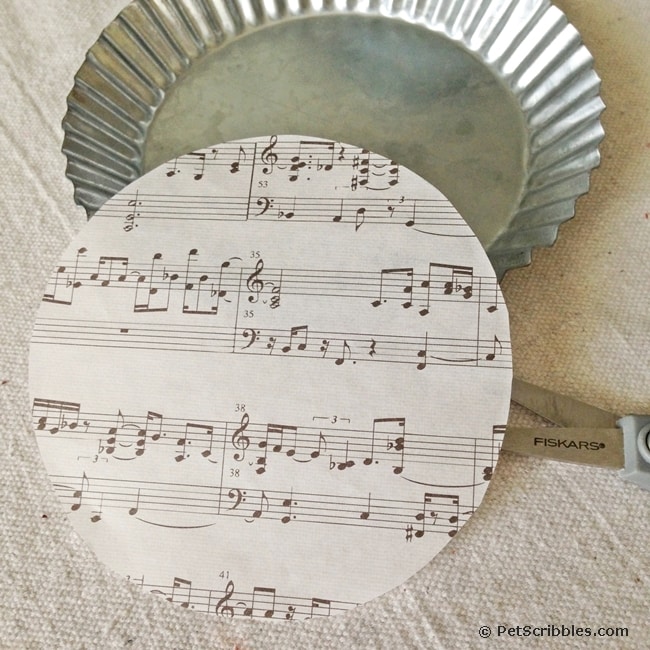
Step Two: Decoupage the sheet music circle onto the back of the tart tin ornament, making sure to keep the music aligned properly. (You don’t want any upside down music on your ornament. I speak from trial and a literal error here!) Let dry.
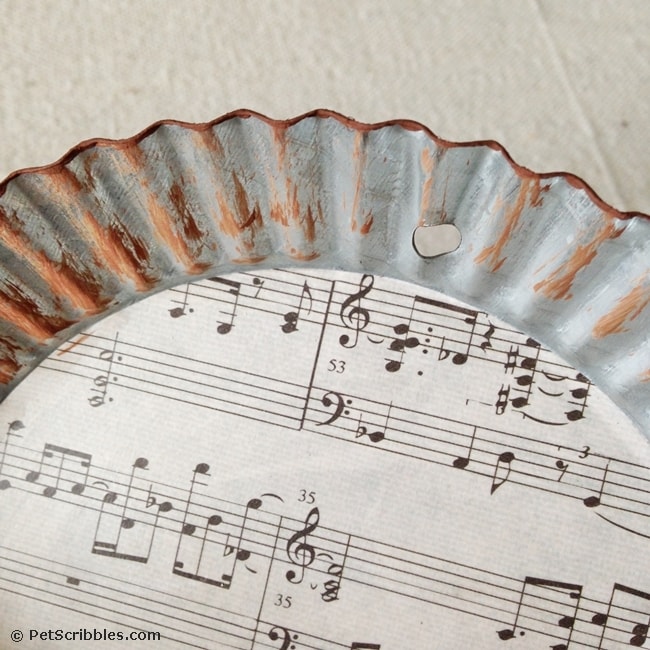
Step Three: Very lightly dry brush some brown chalky finish paint onto the ruffled outer part of the tart tin. With the tip of your brush, paint the edge of the ornament as well. Let dry.
Here is what my ornament looks like so far:

Step Four: Apply a thin line of red glitter glue around the edge of the sheet music circle, so it becomes a seam joining the ruffled tart tin area to the sheet music area.
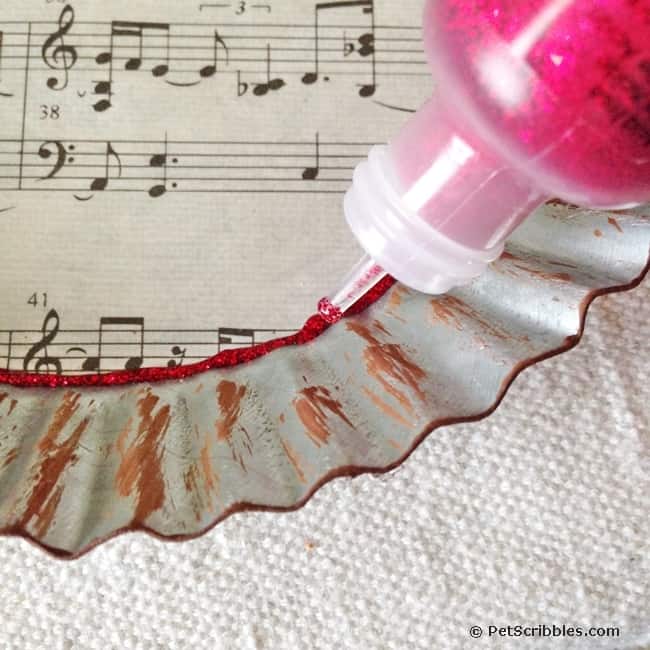
Here’s a helpful tip: I love using Stickles glitter glue, as the bottle tip openings are small, providing lots of control to get thin lines without goopy blobs. (You know what I’m talking about, right? Just when you’re at the end of the glitter glue line, and a goopy blobs squirts out, it can remove that Christmas crafting spirit in an instant!)
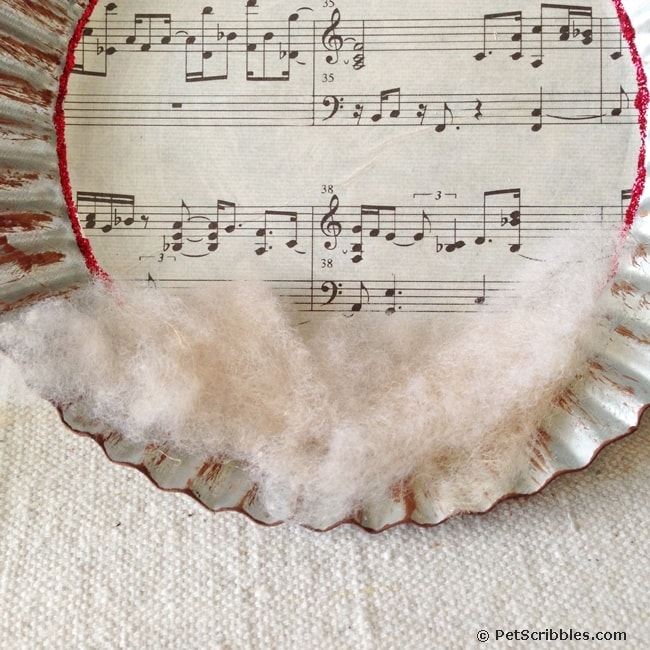
Step Five: Take a cotton ball and gently pull it apart so it becomes fluffy. This will become your snow to attach around your bottle brush trees. I quickly tea-stained mine: dunk the cotton ball into a mug of tea for about five minutes then let dry.
Attach the “snow” to the bottom area of the ornament using E6000 or a similar strong, clear glue.
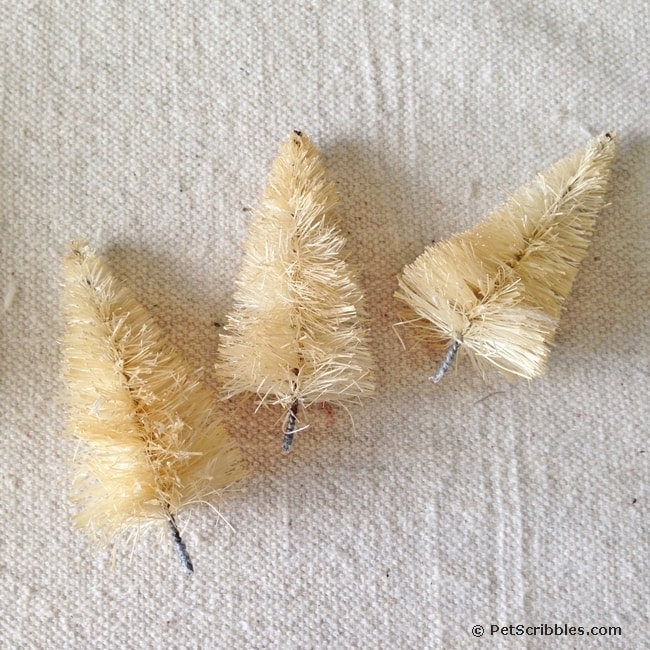
Step Six: Using E6000, attach the bottle brush trees to your ornament. I removed the bases from the bottle brush trees . . .
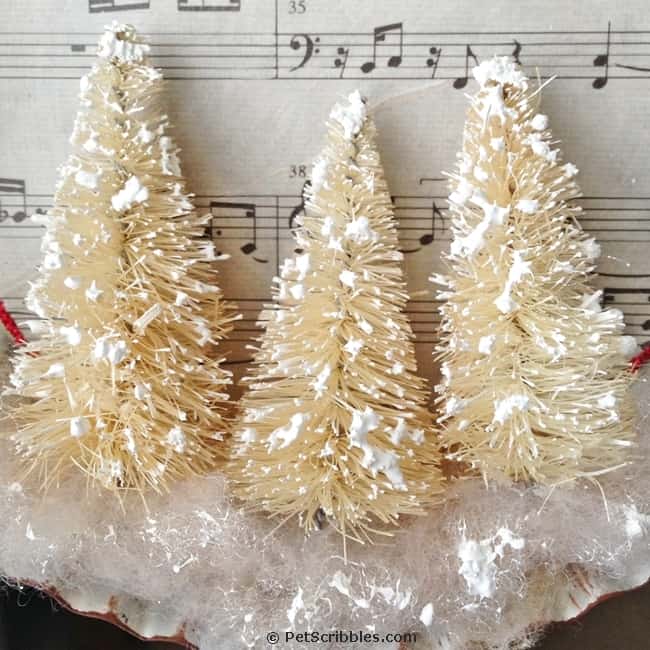
. . . then added glue around the wire “tree trunk” and to the back of the tree. Push each one gently into the cotton snow and hold in place for about 30 seconds before adding the next tree. Let the glue dry thoroughly to make a strong bond and your trees will be secure!
Step Seven: Add fake snow to the bottle brush trees and to the cotton “snow” base. I like to use DecoArt’s Snow-Tex. I find it’s easiest for me to use a tiny stencil brush and gently tap the snow onto the branches and anywhere I want the look of snow. (Love this stuff!) Let dry.
Step Eight: Attach the letters J-O-Y onto the sheet music above the bottle brush trees. Place the O directly in the center underneath the ornament hanger hole, then attach the J and Y onto either side. (Just an easier way to ensure proper placement of the word.)
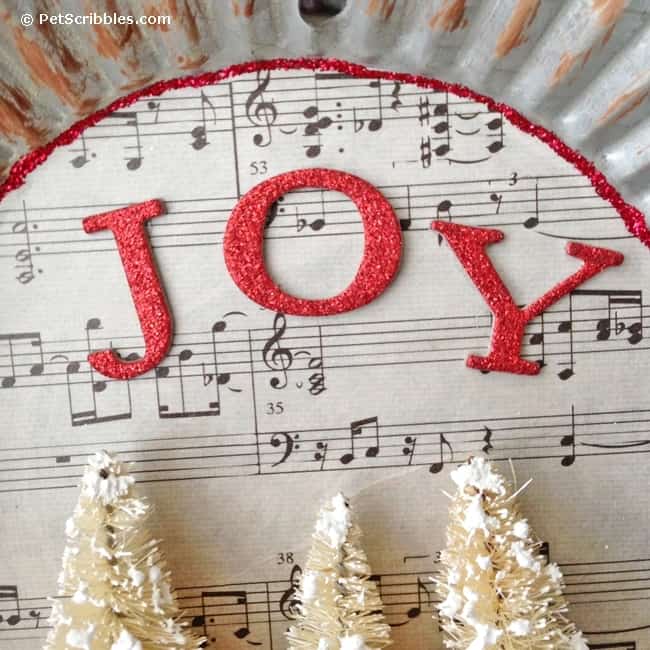
Here’s a little trick: Sometimes adhesive letters don’t stick as well as I’d like, so more often than not I add some extra glue to each one before attaching to my projects. (Having a letter fall off is another Christmas crafting spirit zapper!)
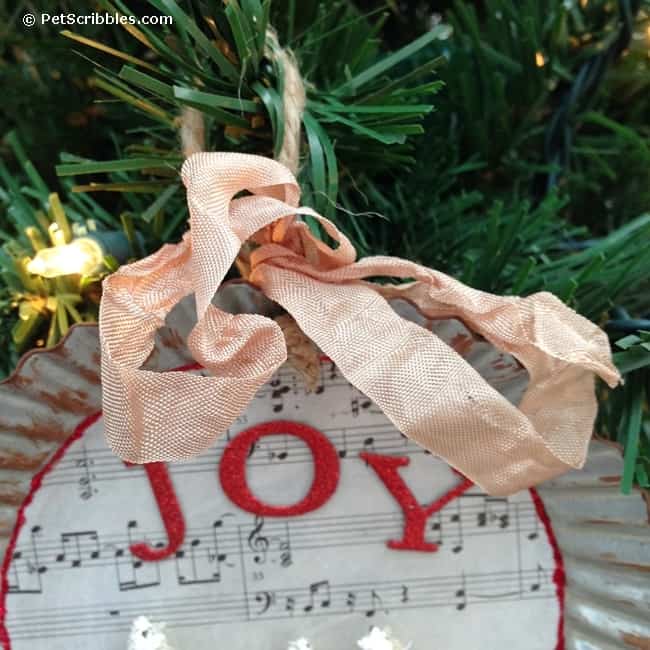
Step Nine: Attach rope or ribbon to your ornament. I kept the rope hanger that came with the ornament, then tied a strip of vintage seam binding from my own collection to make a shabby bow.
And now you have a charming tart tin Christmas ornament!
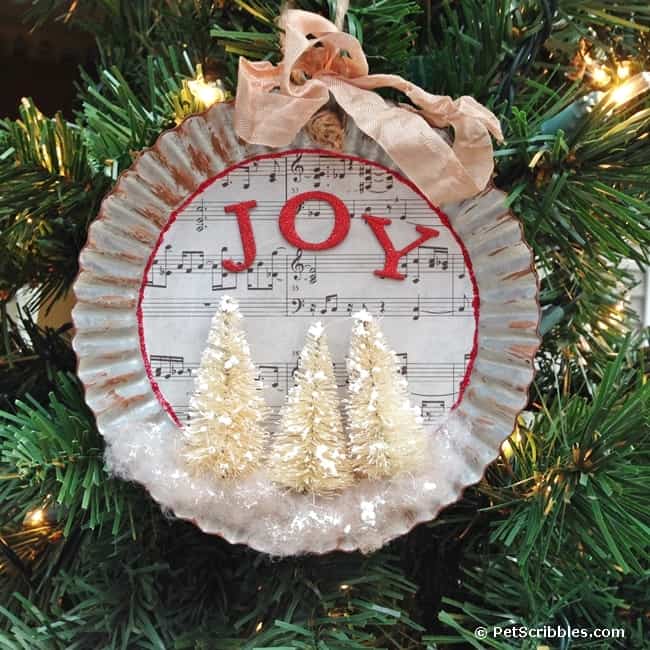

This is an ornament you can easily personalize depending upon the supplies you choose. Swap out decorative Christmas paper for the sheet music, swap out the ivory bottle brush trees for green ones, and choose a different word to spell out. You can create something meaningful for you, your gift recipients or your home decor.
I’d love for you to drop by my blog to see more of my Christmas ornament tutorials. You can find me at Pet Scribbles (my blog) sharing crafty DIYs and gardening ideas plus occasional pictures of my cats! And I hope you’ll join me on Instagram, Facebook, Twitter and Pinterest.
Thanks to Toni for inviting me to join in this year!
Happy Christmas crafting!
~Laura
![]()


Leave a Reply