Hello! I’m Mariah from Giggles Galore and I’m thrilled to be back again as a camp counselor for the Summer Camp series. Last year I showed you how to make a Naturally Fun Bucket to enjoy the great outdoors and the year before that I shared my Lemonade Stand Kits, a summertime favorite. This year I thought I revisit some old fashioned fun and show you how to make your own DIY fishing pole.

My kids love exploring and being outdoors, even during the blazing hot summer months. Recently while feeding the ducks at our neighborhood pond my kids saw someone fishing and asked when they could go fishing and of course light bulbs went off for a DIY project.

All you need to make your own fishing pole are a few supplies and soon you’ll be reeling in the big ones.
Supplies:
- ½ ” 5 ft. Bamboo rod
- 6 #212 x 5/16 Screw Eyes
- Fishing Line
- Fishing Bobber
- Barrel Swivel
- Removable Fishing Weights
- Fishing Hooks
- Fishing Lure or Bait
Start by marking 4 spots equal distance on your bamboo pole beginning ½″ from the top and pre-drill a tiny hole at each marked spot (I used a Dremel tool for this part) through one side of the bamboo pole. Next, mark 2 spots to the right side of the pole (for right handed fishermen) at 3″ and 7″ below the lowest previously drilled hole. Pre-drill your holes again.

Carefully put a screw eye in each pre-drilled hole. Thread your fishing line from the top down and tie to the lowest screw eye on the side. Wrap as much line as you like around the bottom two screws on the side.

Now complete your fishing rig with your bobber, swivel, weights and hook by following the instructions on the back of the hook package. Your all set for a fishing adventure with your DIY fishing pole.

Don’t forget to pack bait and a lunch! I packed our lunch in a metal bucket and of course add a little extra special touch with darling fish printables from A Blissful Nest.


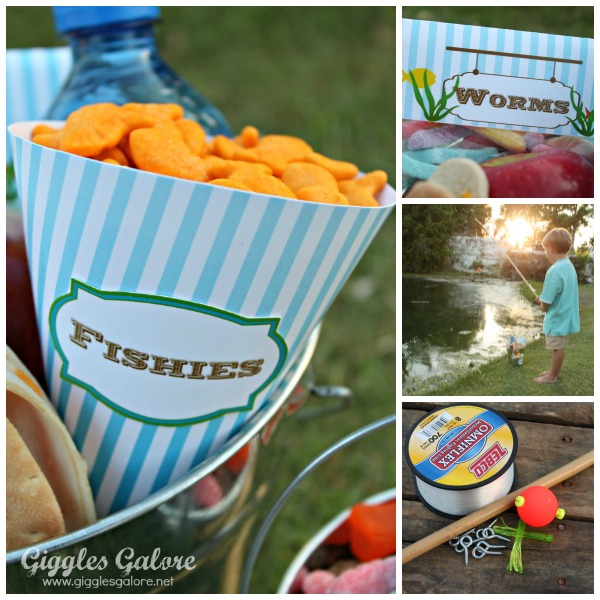
I promise this is an easy and inexpensive way to keep the kids entertained this summer, so get out there and enjoy an adventure with your little ones! Oh, and if you catch a “Big One” with your DIY Fishing Pole we’d love to see it, so make sure you pop on over and share with us on Facebook or Instagram. And don’t forget to follow us on Pinterest and visit our blog where we share lots of inspiration for making the ordinary EXTRAORDINARY one creative project at a time!


Be Inspired PR says
This DIY fishing pole is too cute! Such a perfect activity for summer! Love the pails of fishies and bait too 🙂
Toni - Design Dazzle says
Yes, this is too cute! Mariah did a great job with all the details.
Carissa says
Where did you get your bamboo rods?
Toni - Design Dazzle says
They can sometimes be purchased at a hardware store like Home Depot or Lowes.
Shan Cox says
Do you think a different sized screw eye would work! We are planning on building these at our cub scout campout this spring and are looking for the most economical way to built 30-35 of these! Thanks for the great plans!
Toni - Design Dazzle says
I would experiment BEFORE you have a bunch of these made. What a fun idea for cub scouts. I’m not sure what would work to test it out beforehand. Good luck!