

You can’t have a fairy party without fairy wings! Bedazzled fairy wings and fairy headbands are the perfect party favors for little girls to enjoy while partying and at home for weeks to come. These inexpensive, fabulous fairy wings and fairy headbands were the perfect additions to this AMAZING fairy tea party I created for under $100. Stay tuned for more tutorials and other details to complete your fairy party on the cheap!

image by Jenisse Forbes of Jenisse Photography
When planning a party on a budget, the first place to go is the dollar store. These adorable fairy wings and fairy headbands were made and glammed up for less than $3 for each set of one headband and pair of wings.
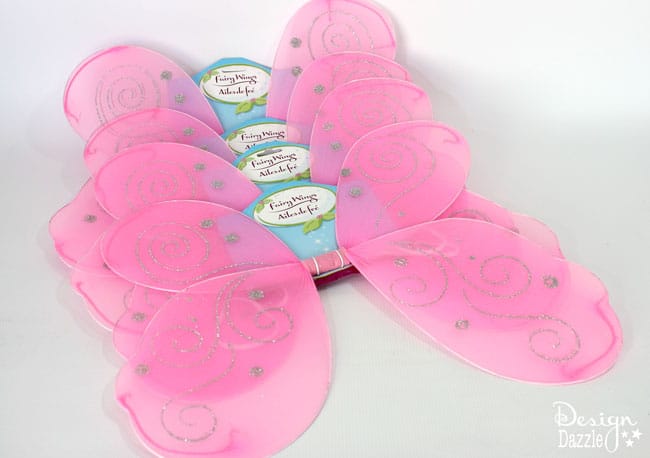
These fairy wings were purchased at the dollar store and haven’t been glammed up yet.
Supplies to upgrade your fairy wings:
- fairy wings from the dollar store (I bought 4 for this party)
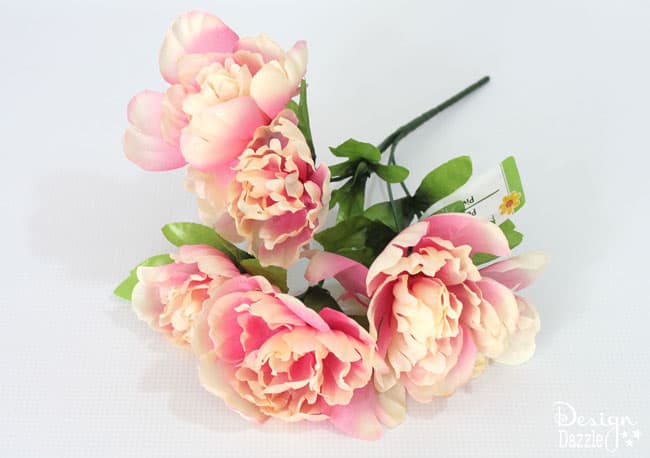
- 1 bunch of pink peonies from the dollar store (one bunch has 6 flowers on it. You will need 2 flowers for the wings and 2 for the headband)
- 1 roll of sheer pink or cream ribbon from the dollar store
- gold glitter
- elmer’s glue or tacky glue of any kind
- glue gun
Step 1: Prep the glitter flowers.
Pull all the flowers off of the stem. Heavily brush the petals with tacky glue. Before the glue dries, sprinkle on the glitter. Make sure to shake the flowers out to remove the excess glitter. Let the flowers sit until completely dry.
Keep that glue and glitter handy to beautify the wings!
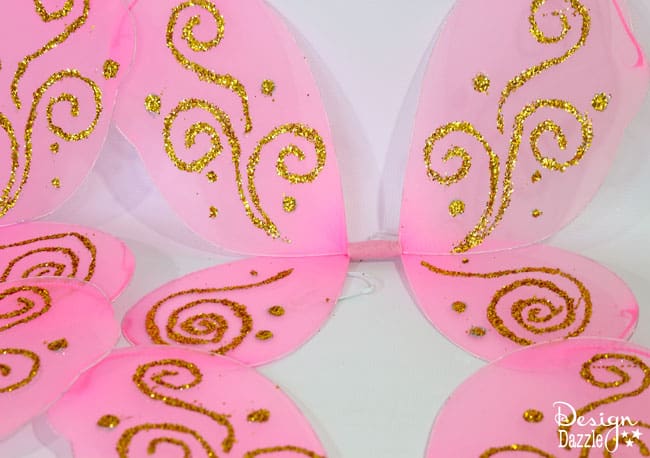
Step 2: Glitter your wings.
These wings already had silver glitter swirls, but they weren’t very noticeable and I wanted them to be bold. I also wanted the glitter to be gold to match the rest of the theme. Using the existing glitter design as a pattern, trace over with glue and sprinkle on gold glitter. Shake off the excess glitter and let dry.

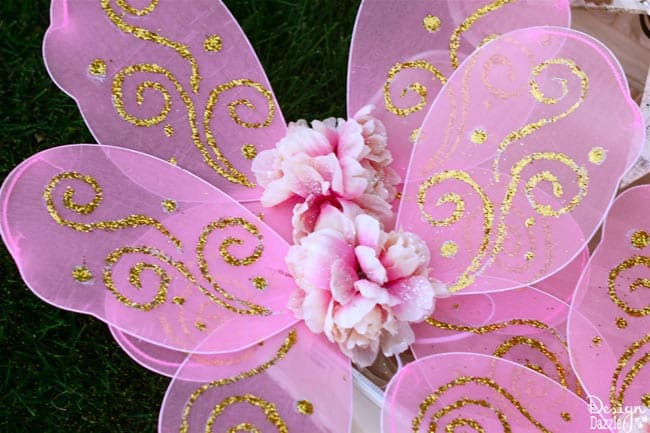
Step 3: Finishing Touches.
Once the glitter on the wings and flowers have dried, cut the sheer ribbon into inch strands. To attach the ribbon, either tie or hot glue them onto the center of the wings. Lastly, hot glue two or three flowers onto the center of the wings over the ribbon.
The wings are not only inexpensive, but also very quick and convenient to make. It takes about thirty minutes to make one (not including drying time). You will have glittering fairy wings in no time!
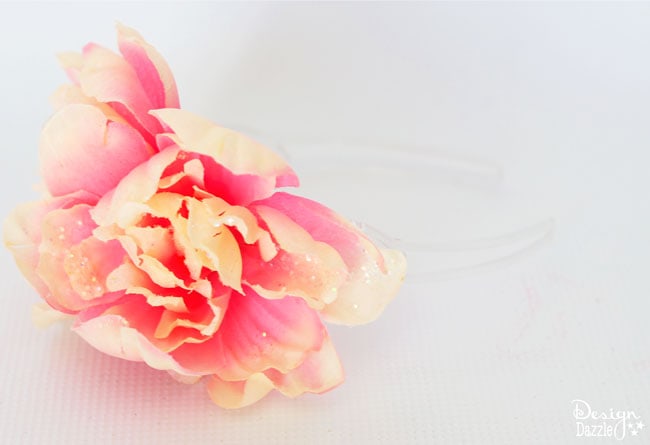
Fairy Headbands
Fairy headbands are quick and easy to make. All you need are the glittered peonies from the fairy wings tutorial (see step 1), a plastic headband, and a glue gun.
Simply follow Step 1 of the fairy wings tutorial to glitter the flowers. Once the glitter has dried, hot glue two flowers onto a headband.
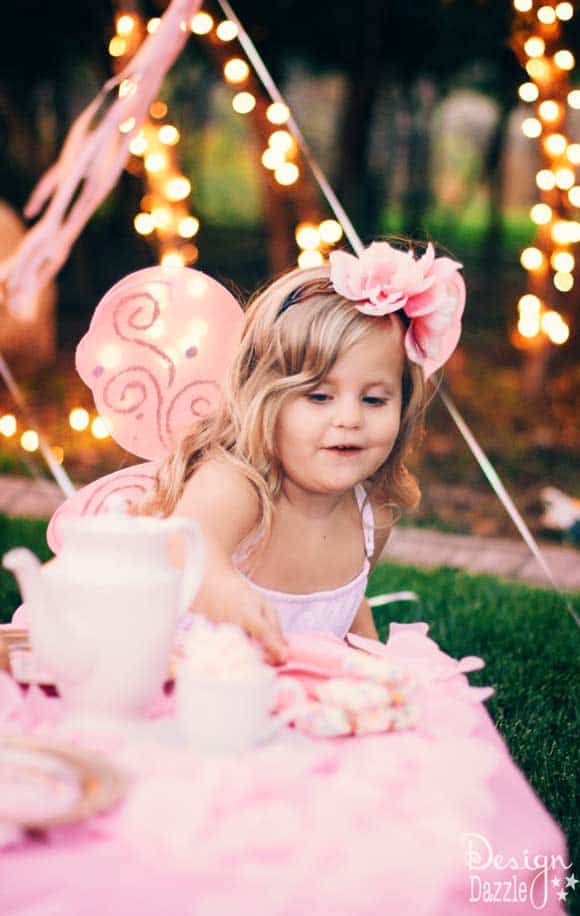
image by Jenisse Forbes of Jenisse Photography
Who knew that with a little bit of work and a few sprinkles of glitter, dollar store fairy wings and fairy headbands are so fabulous!


Kristin says
Thank you for the wonderful idea- I’m trying this for a party…wish me luck! Quick question- it looks from the pictures like a white or translucent glitter on the flowers…is this what you used, or did you use the gold on both? Thanks!
Toni - Design Dazzle says
Kristin,
Thank you for your sweet comments. Make sure you start early on adding the glitter so it has time to dry ; ) I used the opalescent glitter on the flowers for the headbands. The Dollar Store wings already had silver glitter on them (but it looked kind of cheesy). Gold glitter was added to the wings to cover the silver. I would love to see your pictures!
Enjoy!
Naz says
Hi Toni,
These are AMAZING! I love how they are over the top beautiful AND easy. Many pf the diy wings and headbands are beautiful/too much work or easy/cheap looking. Thank you for sharing. I think I can do this. Did you get the headbands at the dollar store too? Thank you again ( :
Toni - Design Dazzle says
I can’t remember where I purchased the headbands. If not the dollar store, check Target or Walmart. I definitely purchased the flowers at the dollar store and glittered them. The glue gun was perfect to attach the flowers to the headband.
Enjoy!!