• Skip to primary navigation
  • Skip to main content
  • Skip to primary sidebar
  • Home
  • Blog
  • About
    • Contact
    • Press & Partnerships
    • Copyright/Disclosure
    • Links/Parties/Giveaways
    • HOI Friends
      • Toni Roberts
      • Tauni Everett
      • Tammy Mitchell
      • Randi Dukes
      • Michelle Stewart
      • Mariah Leeson
      • Mandy Beyeler
      • Lindi Haws
      • Kim Byers
      • Ashley Johnston
      • House of Ideas
  • Videos
  • SHOP

Design Dazzle

Inspiration for kids rooms, baby nurseries, and kids parties

  • My Home
    • Home Tour
    • Christmas Home Tour
  • My Projects
    • My Projects
    • Companies I Have Worked With
    • Michaels Makers
  • DIY/Decor
    • top tutorials
  • crafts
  • celebrations
    • parties
    • christmas
    • halloween
    • thanksgiving/fall
    • New Year’s
    • Valentine’s Day
    • St. Patrick’s Day
    • Easter/Spring
    • mother’s day
    • father’s day
    • patriotic
    • School/Teacher/Graduation
    • Gift Ideas
    • weddings
    • best ideas
  • Recipes
    • Meals
    • Instant Pot/Crock Pot
    • Desserts
    • Treats & Snacks
  • travel
  • free printables
  • Lifestyle
    • organization
    • Preparedness
    • Healthy Living
  • kids
    • kids parties
    • kids rooms
      • cool bedroom ideas
    • summer camp/crafts
You are here: Home / crafts / DIY Paper Towel Roll Turned Paper Ruffle Garland

September 29, 2014

DIY Paper Towel Roll Turned Paper Ruffle Garland

Use craft paint and paper towels to make a pretty pink ruffle garland! #fairyparty #diy Design Dazzle

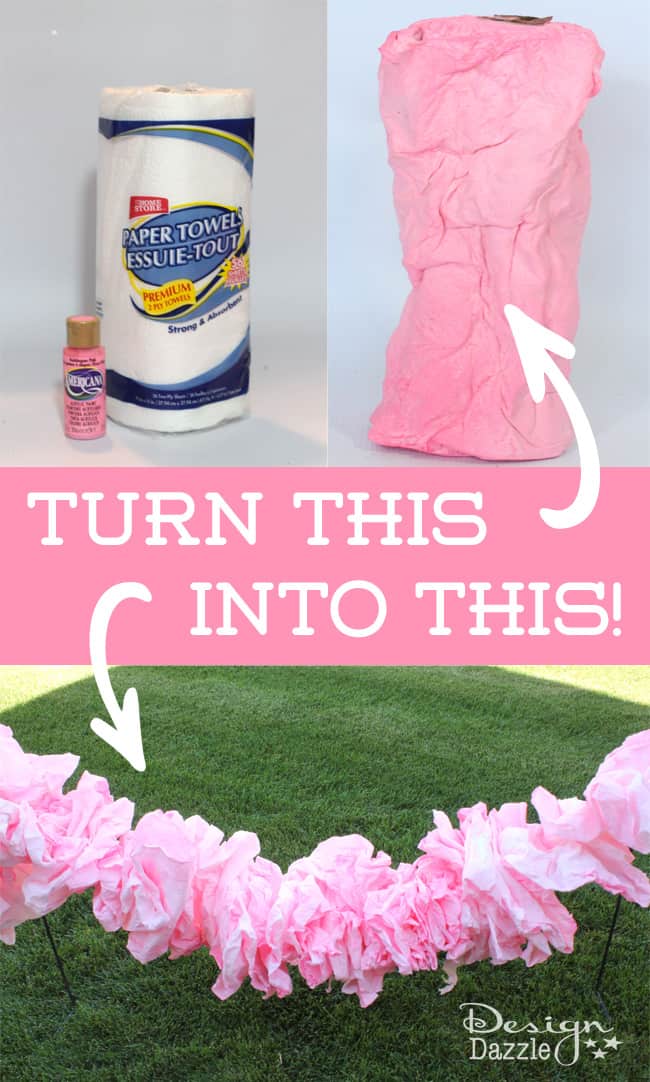
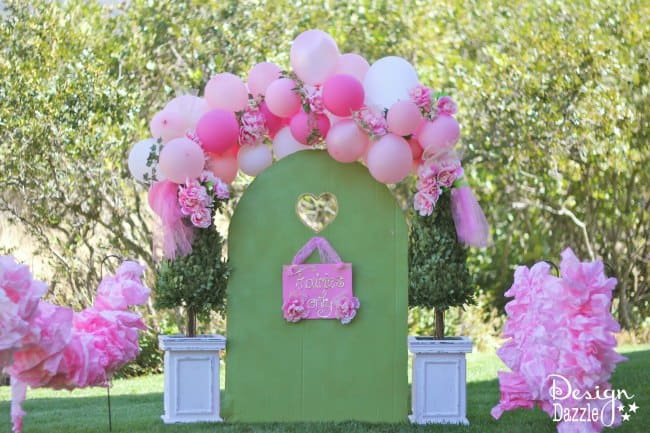
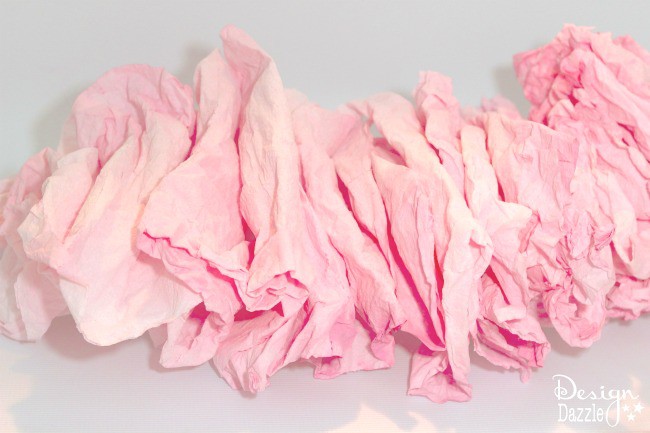
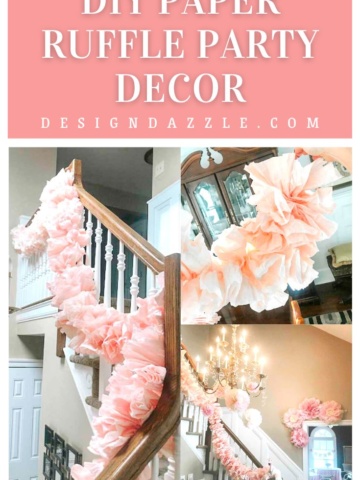
When planning a magical party, it’s all about the details. A beautiful balloon arch over an enchanted fairy door is perfect to greet little fairies to their fabulous fairy tea party. Add an oversized, pink paper ruffle garland and the perfect entryway is complete! You will be shocked to see how simple this fabulous ruffle is to make!

Make an oversized party ruffle out of a roll of paper towel! Resourceful, cheap, and darling!!! Easy tutorial on design dazzle.com! #fairyparty #DIYpartydecor

Make sure to start this project early! Although it is very simple and quick to make, you have to do this at least a couple days before an event. It will very much depend on the weather on how long it takes to dry but other than that, it’s easy peasy and adds the perfect touch to a beautiful fairy entrance.

DIY a fabulous paper ruffle garland from a roll of paper towel!! A simple, quick detail that will make all the difference! Tutorial on design dazzle.com! #DIYfairyparty #DIYpartydecor #papertowelgarland

Believe it or not, this fabulous ruffle garland was made from a roll of paper towel. It’s almost unreal that this fabulous decoration was made from something so simple as a roll of paper towels!

Step-by-step tutorial of how to transform a roll or paper towel to a fabulous paper ruffle garland on designdazzle.com! #DIYfairyparty #DIYpartydecor #papertowelgarland

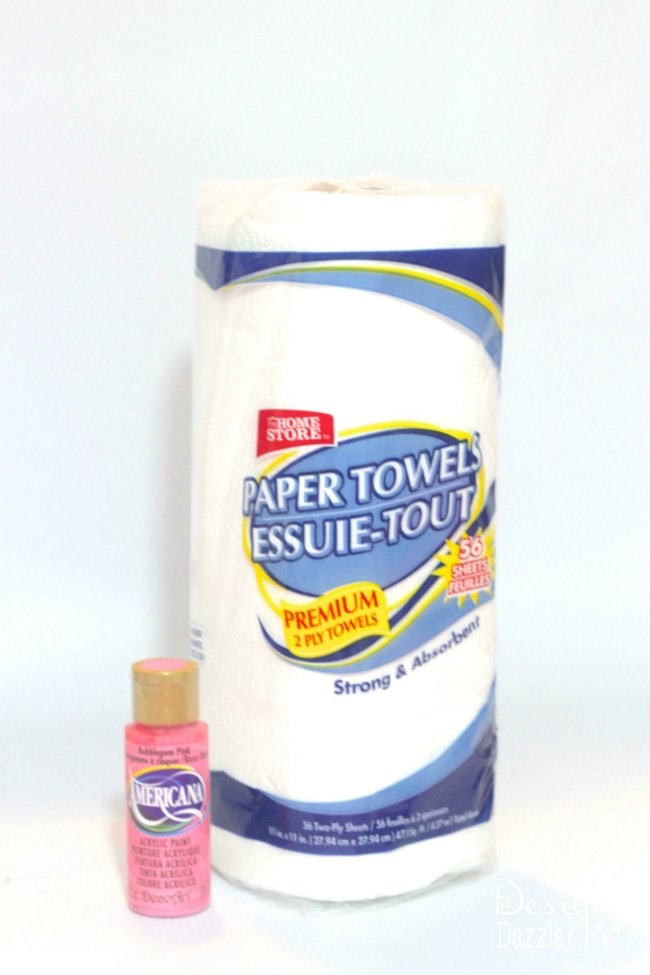
Supplies to make a Paper Ruffle Garland 

  • roll of paper towel (I used two  to make two ruffles) from the dollar store
  • cheap craft paint
  • water
  • baking pan
  • darning needle and yarn

Step-by-step tutorial of how to transform a roll or paper towel to a fabulous paper ruffle garland on designdazzle.com! #DIYfairyparty #DIYpartydecor #papertowelgarland
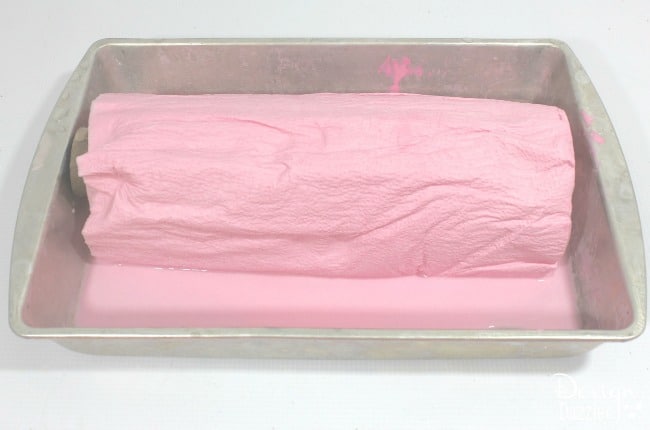
Step 1: Mix about one tablespoon of the craft paint with enough water to make it the right, runny consistency and to fill about an inch or two of your baking pan. Roll the paper towel roll in the mixture until it is covered, for just a few minutes.

Transform this roll of paper towel into a fabulous party garland ruffle! Tutorial on design dazzle.com #DIYpartydecor #fairyparty

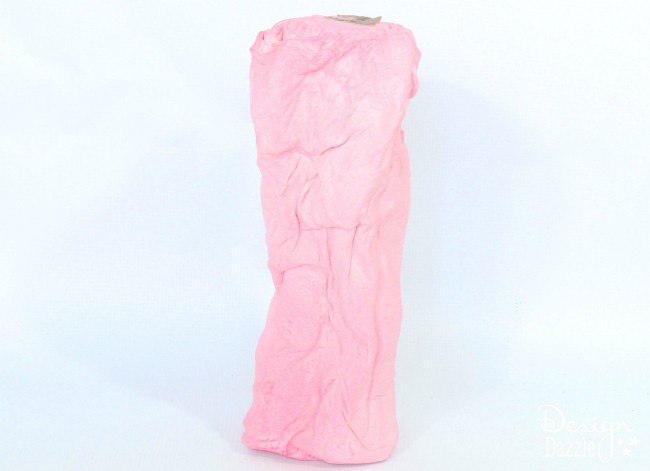
Step 2: After the paper towel is completely dyed, take it out of the mixture and squeeze the roll very tightly until all of the excess paint is out. It will look like this.  Set the paper towel roll outside to dry in the sun for a day or two, until it is mostly dry.

*Another possibility to drying the paper towel, is to preheat the oven for a little bit. Then turn off the oven and when it is off and slightly cooled, put the paper towel roll in to dry. Since I didn’t do it this way, I’m not sure how it long it would take to dry.

Step-by-step tutorial of how to transform a roll or paper towel to a fabulous paper ruffle garland on designdazzle.com! #DIYfairyparty #DIYpartydecor #papertowelgarland

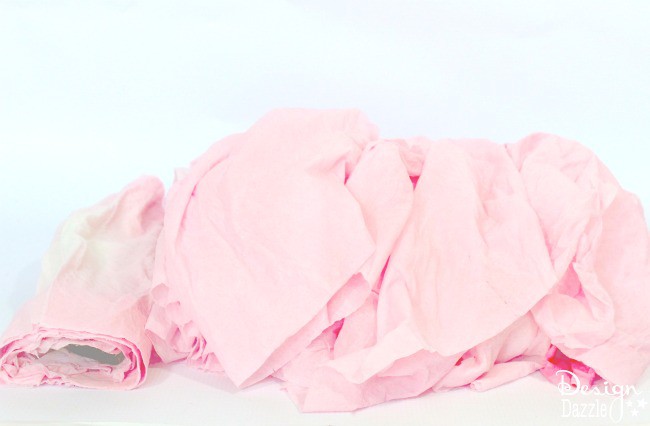
Step 3: In the photo above, the paper towel is still pretty damp. Unroll it, and let it finish drying.

Step-by-step tutorial of how to transform a roll or paper towel to a fabulous paper ruffle garland on designdazzle.com! #DIYfairyparty #DIYpartydecor #papertowelgarland

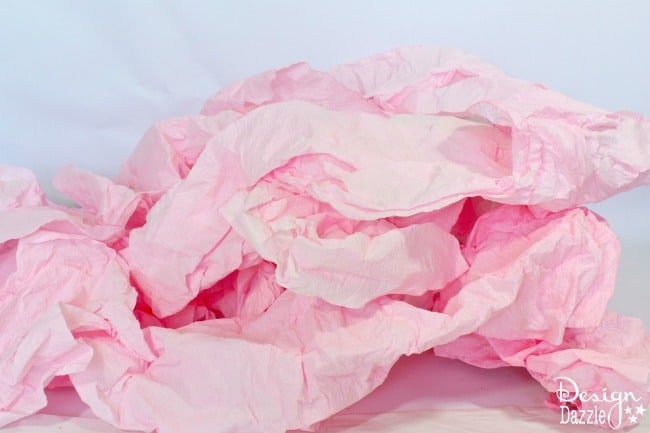
Step 4: This is what the paper towel will look like when it is more dry. Crinkle it a bit to give it some texture.

Step-by-step tutorial of how to transform a roll or paper towel to a fabulous paper ruffle garland on designdazzle.com! #DIYfairyparty #DIYpartydecor #papertowelgarland

Step 5:  Gather the paper towel together, almost in a pleated ruffle.

Step-by-step tutorial of how to transform a roll or paper towel to a fabulous paper ruffle garland on designdazzle.com! #DIYfairyparty #DIYpartydecor #papertowelgarland

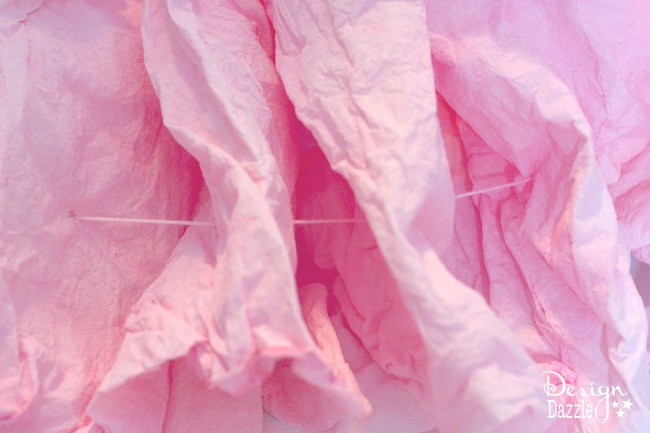
Step 6: Once you have your pleats made, sew them together with yarn and a darning needle (larger than a regular sewing needle). Tie a knot at one end and thread the yarn through, all the way to the other end. Tie a secure knot on that end as well.

DIY a fabulous paper ruffle garland from a roll of paper towel!! A simple, quick detail that will make all the difference! Tutorial on design dazzle.com! #DIYfairyparty #DIYpartydecor #papertowelgarland

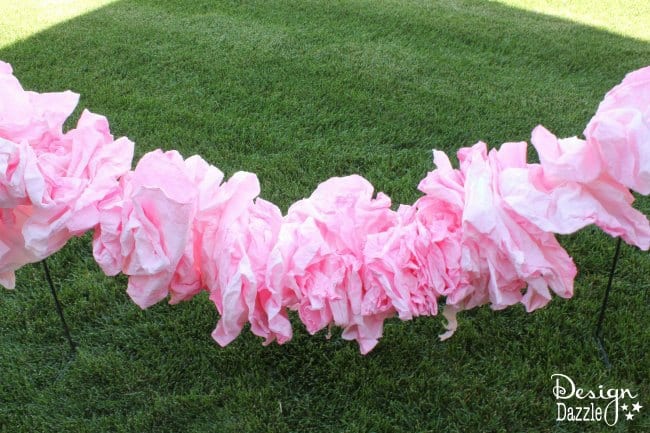
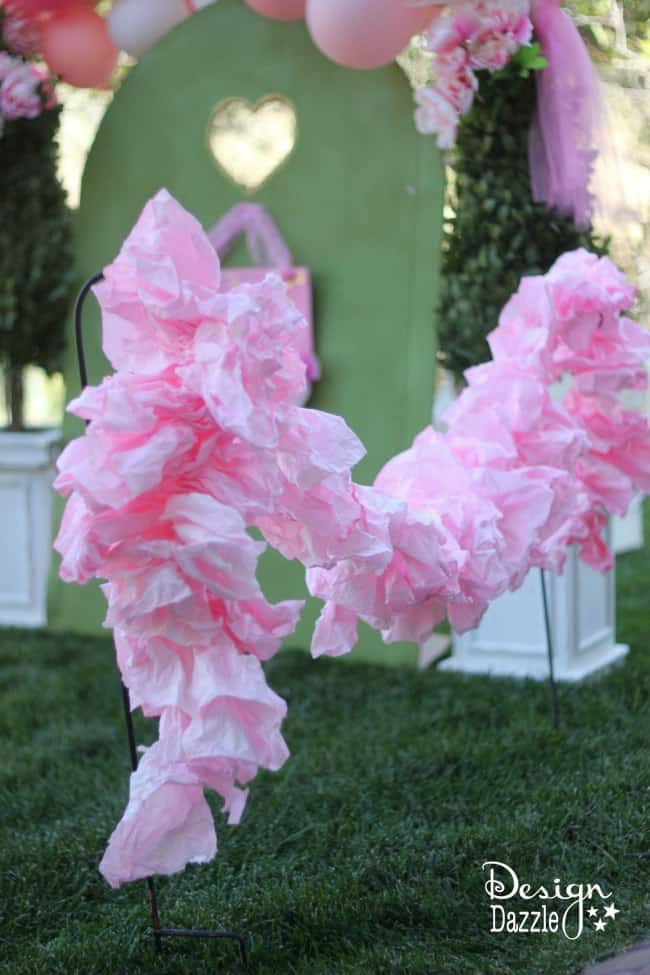
Step 7: Put the finished garland up on posts and admire your work!

Make an oversized party ruffle out of a roll of paper towel! Resourceful, cheap, and darling!!! Easy tutorial on design dazzle.com! #fairyparty #DIYpartydecor

This paper towel roll turned ruffle is a quick and easy way that’s sure to make the fairy entryway perfectly enchanted!

This ruffle garland was part of the Balloon Time $100 party challenge I’m participating in. If my party gets enough votes, Operation Shower (the charity I chose) will receive $5000. Their mission is to provide joyful baby showers for military families to ease the stresses of deployment. I appreciate the sacrifices made on our behalf by the nations military and their families (especially expectant wives!).

fairy 10626625_10152363697118568_5201035747115746869_n

You can vote here for my party.

signature_toni.jpg

Related Posts


Fall Paper Leaf Garland


Easy Valentine Craft – Paper Heart Garland with Cricut


Cutest Thanksgiving Banner: Paper Plate Pie Garland


DIY: Paper Rosettes


DIY: Easy Paper Christmas Tree


Dream Tree: Toilet Paper Roll Christmas Ornaments


DIY Paper Lampshade Decor


DIY Paper Straw Wreath


Free Paper Doll Printables


DIY Scrapbook Paper Bow

Article Rating:
No rating
Author Bio
Article Info
Popular Posts
Reagan Favreau

Reagan Favreau

Editor at Design Dazzle
    Power Bio Box by HOI
    You are here: Home My Projects DIY Paper Towel Roll Turned Paper Ruffle Garland
    Title:
    DIY Paper Towel Roll Turned Paper Ruffle Garland
    Authors:
    • Reagan Favreau
    Categories:
    • crafts
    • DIY/Decor
    • kids
    • kids parties
    • My Projects
    Mentions:
    paper garland, ruffle garland
    Keywords:
    paper ruffle garland
    Last Updated:
    August 1, 2020
    • Tips for Styling A Summer Front Porch + Summer Welcome Free Printable
    • Family Room Reveal Before and After
    • Our Complete Exterior Home Remodel!
    • Parade of Home Ideas - Wasatch County
    • Mrs Claus Cottage Christmas Tree
    • Super Bowl Party Activities for Kids
    • A Letter to Kids: Santa is Real
    • Make Faux Birch Logs Using Pool Noodles
    • Paper Plate Peppermint Tutorial
    • DIY Embroidery Kit Using The Cricut Machine!
    • Vintage Snowman
    • Minnie Mouse Party Ideas

    Sharing is caring!

    Disclaimer

    This post may contain affiliate links, which means that if you click on a product link, we may receive a commission (at no extra cost to you). See my full disclosure for further details.

    Reader Interactions

    Comments

      Leave a Reply Cancel reply

      Your email address will not be published. Required fields are marked *

      Recipe Rating


    1. Tina says

      September 5, 2015 at 7:04 pm

      That is seriously cute! I will be Doing this for an upcoming baby shower, Thanks!

      Reply
      • Toni Roberts - Design DazzleToni - Design Dazzle says

        September 14, 2015 at 3:13 pm

        Tina,
        Thanks! Just to give you a heads up – make these well in advance. Weather is a big factor in drying time. This isn’t a last minute project. They are super easy to make. Have fun!

        Reply
    2. Christina linnenbrink says

      July 1, 2018 at 8:21 am

      How did u find colors?

      Reply
      • Toni Roberts - Design DazzleToni - Design Dazzle says

        July 2, 2018 at 11:48 pm

        I used white paper towels. The post explains how they are colored.

        Reply
    3. Sandie Rabena says

      January 21, 2019 at 5:29 pm

      I just made this paper towel ruffle garland and it came out just like yours! Im thrilled with it! SO PRETTY! Thank you for the inspiration and the instructions!

      Reply
      • Toni Roberts - Design DazzleToni - Design Dazzle says

        January 29, 2019 at 6:26 pm

        Oh I’m so happy!! Cheap and impressive way to make a ruffle garland!! Glad it turned out so pretty for you.

        Reply
      • Katue says

        April 28, 2020 at 5:08 am

        Do you have an idea of what the length of your Garland was with the one paper towel roll you uaed? Trying to get an idea of how many rolls I will need for my party. Thank you for the great idea!

        Reply
        • Toni Roberts - Design DazzleToni - Design Dazzle says

          May 2, 2020 at 4:18 pm

          If it’s not written in the blog post, I’m not quite sure. But I think it might have been 1 roll for about 6-10 feet (depends how fluffy). For sure do this ahead of time and practice. Have fun it will turn out great!!

          Reply
    4. Kay H. says

      June 27, 2020 at 12:28 pm

      I am making decorations for a granddaughter’s tie-dye themed birthday, and I think I will try this with some rubber bands and 2 to 4 paint colors. Fingers crossed! I love your idea!

      Reply
      • Toni Roberts - Design DazzleToni - Design Dazzle says

        June 30, 2020 at 9:05 pm

        What a fabulous idea! You can also just do different sets of colors and add them together after they’ve dried for a multi-color look. Make sure to do in way in advance so it can dry. I would love to see pics when you’re done.

        Reply

    Primary Sidebar

    Img 0422

    Hi, I’m Toni! Welcome to my blog Design Dazzle. I love being a designer, DIYer, traveler, crafter, holiday lover, and memory maker. Read more.

    Toni Roberts is a participant in the Amazon Services LLC Associates Program, an affiliate advertising program designed to provide a means for sites to earn advertising fees by advertising and linking to amazon.com

    DesignDazzle.com is protected by copyright laws. DO NOT distribute or copy the content or share multiple images or collage images without written permission. You can use ONE Design Dazzle image only if there is a link back to DesignDazzle.com. DO NOT edit, crop, or remove watermarks from any image. Please contact me at toni@designdazzle.com with any questions.

    About | Contact Us | Privacy and Legal

    © 2017 Design Dazzle · All Rights Reserved. | Hosted by House of Ideas