


Would you like to create a weathered rustic wood wall with new wood? Make this for your home without paying extra for distressed wood (which is expensive) or waiting for it to weather naturally. Here is your solution! With a few simple steps and some inexpensive materials, you can have the weathered rustic feel you are looking for!
I was working on adding a brand new bathroom in our basement. The style? Farmhouse Modern! I wanted to create a bathroom that felt homey yet modern -so I decided farmhouse style. One of the first things I needed to do was create an old looking wall. Creating a weathered rustic wood wall is pretty easy.
Create A Weathered Rustic Wood Wall With New Wood
Materials:
- New western red cedar fence boards (as many as needed). Purchased from Home Depot.
- Desired color of “Minwax” wood stain (we used dark walnut and classic grey)
- Scrap cloths (Old hand towels, t-shirts or even socks) or painter’s rags
- Gray paint (water will be added to make a diluted paint/water solution)
- HINT: Disposable gloves are helpful. Stain is very messy and true to it’s name… It stains things! Including your skin. Coconut oil can be useful in the removing stain off the skin.

STEP 1:
Lay down a drop cloth and lay out the picket fence boards that you will be staining. There is no need to sand the wood perfectly because a “rustic look” is desired, but you can sand lightly if you wish. Wipe down the boards to remove any sawdust or dirt and prepare them for staining.
STEP 2:
Dip scrap cloths/rags into the stain and wipe the grey stain onto the wood. Cover each board completely. The wood will absorb the stain quickly. (We did our first layer with the grey and then layered the walnut, but you can experiment to see which order/effect you like best).

STEP 3:
Take a new cloth and start applying the walnut stain onto the light grey stain. you do not need to wait for the first layer to dry before you start to apply the second. Having both stains wet will help them blend well and create the weathered look we are going for. If after applying the second color you want a little more of the first layer to show through, you can take a clean cloth and scrub off some of the top layer while still wet.
STEP 4:
We then watered down gray paint to add an even more distressed look to the wood. Take a new cloth or a paintbrush to apply the paint/water solution. Keep in mind that the solution should be about 60%water and 40% paint. After the gray paint is applied, immediately wipe as much off as you would like with a clean cloth. If the paint is to heavy, add more water to the paint. This is an easy process.

You can see the gray watered down paint added on top of this stained board.

Here the paint is wiped onto the boards. Remember just remove as much of the paint for the desired color you are wanting. I have a spray bottle nearby if I want to add more water you can. Just spray it on to dilute the paint.

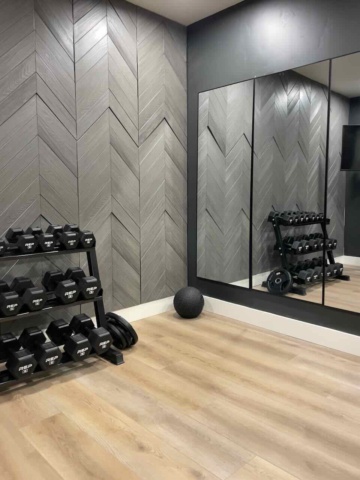
This is the wall where the weathered wood will be installed. Painting the wall black before installation will help with any cracks showing where the wood doesn’t line up perfectly after it’s installed. You don’t want white cracks showing through so the black is perfect to prevent this.

Here is the wall in progress. The boards were cut with a circular saw and attached with a nail gun. That was it. The boards just spaced themselves no need to do any special spacing.

There you have it! A few simple steps to create a beautiful and unique look in your home! Check back for the full reveal – how I styled a farmhouse modern bathroom using a lot of IKEA products.
Would you like to see the rustic farmhouse bathroom all finished? I love how it turned out.


Esmeralda says
What was the total cost of this project? Did you nail them into the studs In tbe wall? Or the drywall? It turned out amazing! Can’t wait to give this a try !
Toni - Design Dazzle says
The boards were around $2.15 each. I used a can of stain that was approximately $12. So it depends on how many boards you need on the total cost. We nailed them to any studs that were in the wall and the other nails just went into drywall. It didn’t need much support because only lightweight items would be hung on the wall. The wood sits stacked on top of eath other. So it supports itself a bit.
Have fun.