

Hello from Ritzy Parties! I’m Christie, and I’m delighted to bring you this whimsical Snow Globe Wreath project today, as part of the Christmas Wonderful collection on Design Dazzle.

It’s so much fun to craft up a pretty project for the holiday season, and this snow globe wreath can be customized in so many ways. Since I’m using a candy theme this year, this theme was selected in a palette of dusty teal, red and pink. Of course, you could make this in any theme or colors.
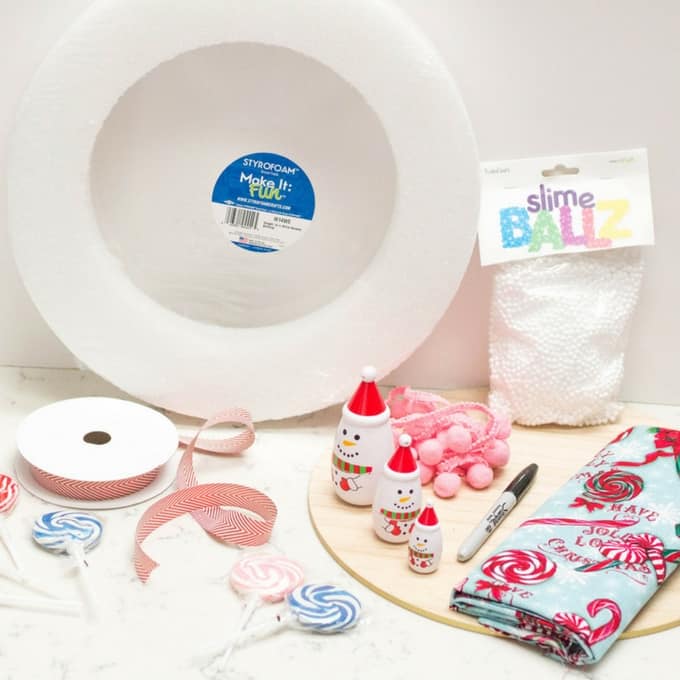
Here’s What You’ll Need:
- 10″ Make it Fun Styrofoam Wreath Form
- 1 yard of patterned fabric
- 1 10″ round wood disc
- Sharpie marker
- 1 bag Floracraft Styrofoam Ballz
- 1 yard Pink Pom Pom Trim
- Christmas Figurine or Ornament for placing inside the snow globe wreath
- Assorted trims and embellishments
- Scissors
- Hot Glue and Glue Sticks
Create a Ribbon from Fabric
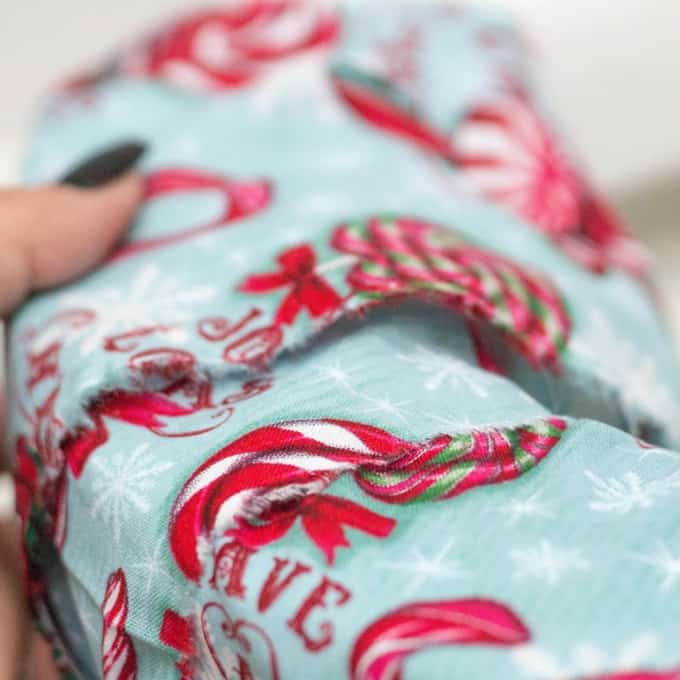
This snow globe wreath will be wrapped with the patterned fabric, so for the first step, you’ll need to cut strips of the fabric. To do this, just lay the yardage out flat, and notch a 4″ width, then tear! I love the frayed edge that this creates, but if you like a smoother look, just fold it over ¼″ and press with a hot iron. You’ll be creating five of these strips; then glue them end to end to create a very long ribbon.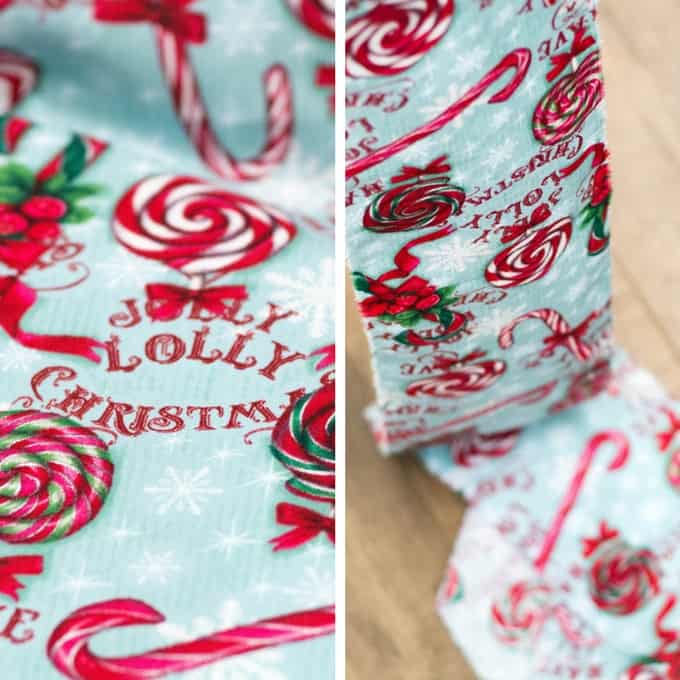
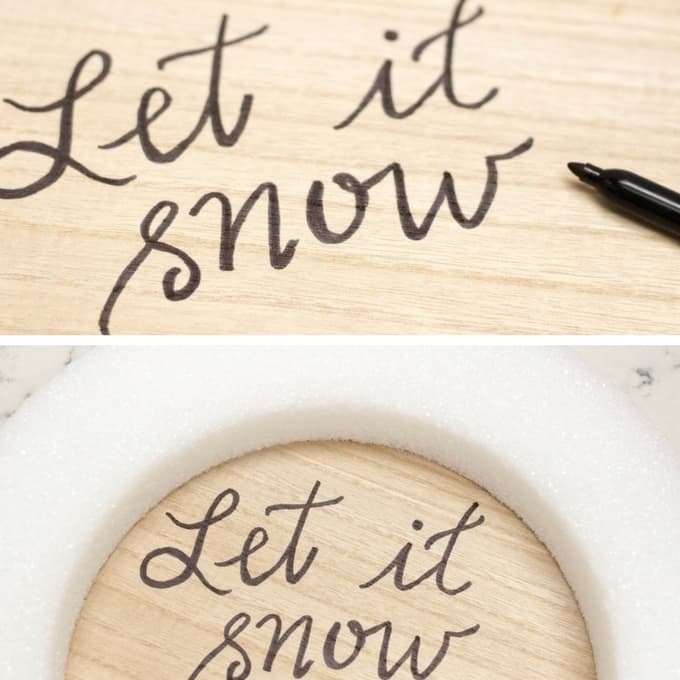
Hand Letter a Message
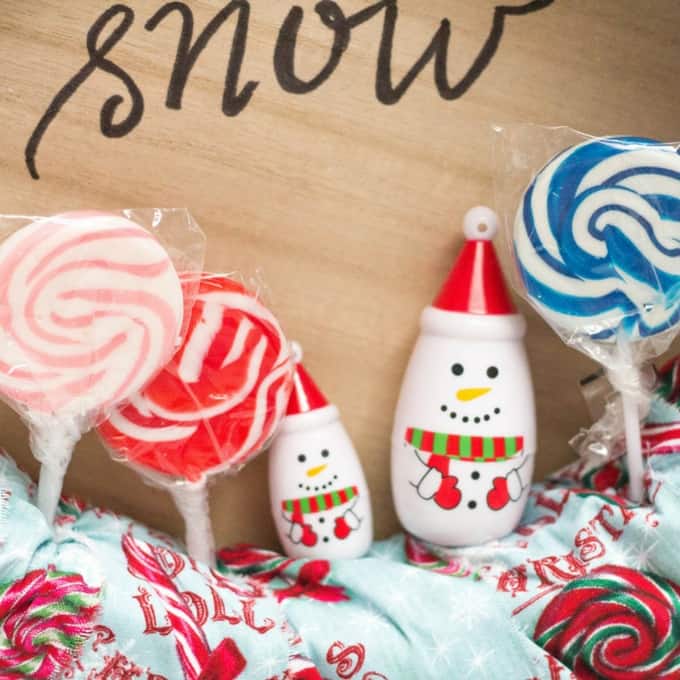
Using the Sharpie marker, add a message of holiday cheer that will be visible from outside your snow globe wreath. I chose the phrase, “Let it Snow”, but you can use any cheery sayings you like. If hand lettering isn’t your forte; never fear, you can also use pre-cut adhesive letters for this step.
Become a Wrap Artist
Starting at the back of your wreath form, add a dot of glue and adhere one end of the fabric “ribbon” to secure. Now, start wrapping! It seems like a lot of fabric, I know, but you’ll wrap the entire surface by just looping it around the wreath form until the ends meet up. I like to tuck in and glue any loose spots for a nice, tidy look.

All About That Base
Glue the wrapped wreath to the wood base, ensuring that it does not obscure your written message. Be sure to glue very thoroughly so that a good seal is created all the way around.

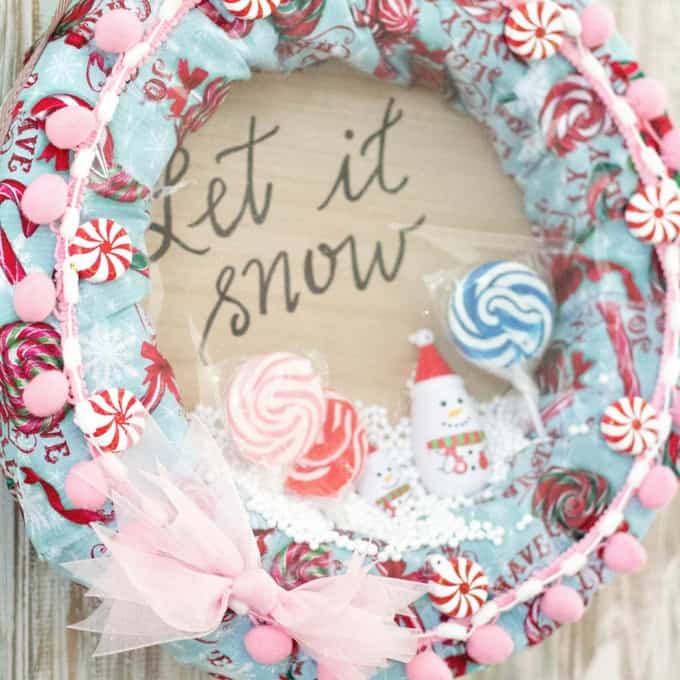
Make a Scene
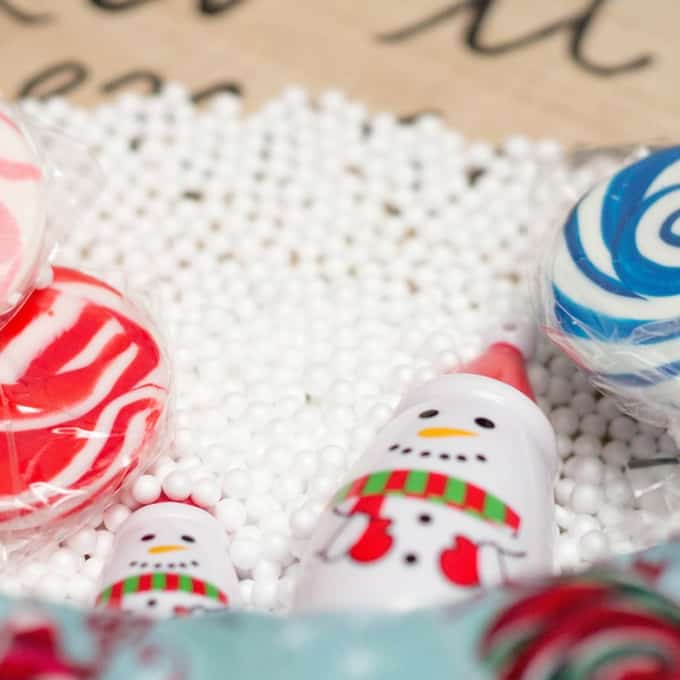
It’s now time to add your scene! Glue in your decorative elements. For my design, I chose some small snowman figurines and colorful lollipops to echo the theme from the fabric. I love the combination of pink, red and blue together for Christmas, don’t you?
Let it Snow
With the wreath laying flat, add about a half cup of FloraCraft Styrofoam Ballz to the center of the piece. These little snowballs really bring the piece to life. You could also opt for small pom poms, if you prefer.
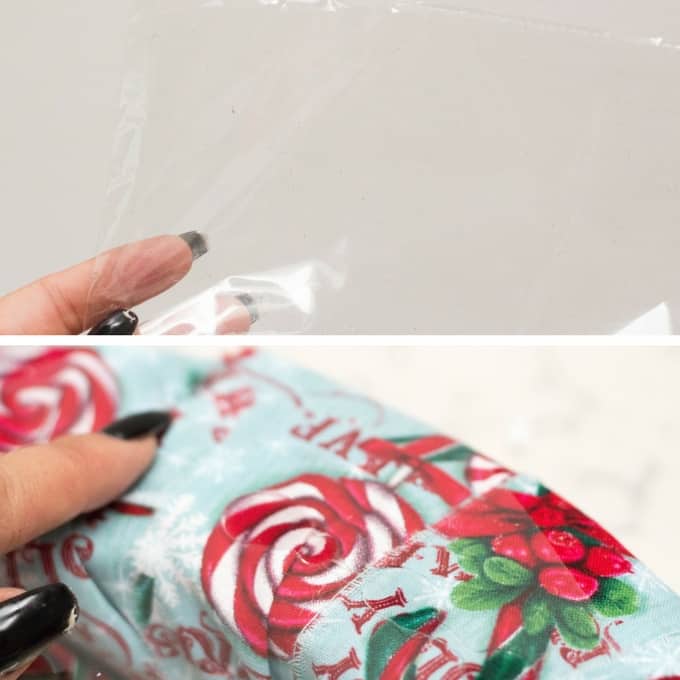
Clearly, Cellophane!
Using a piece of glassine paper or thick cellophane wrap, glue in a circle around the front perimeter of the wreath. The goal is to trap the snowballs inside so that when you stand the wreath up, no tiny snowballs escape! (Trust me, you don’t want this to happen; ask me how I know.)
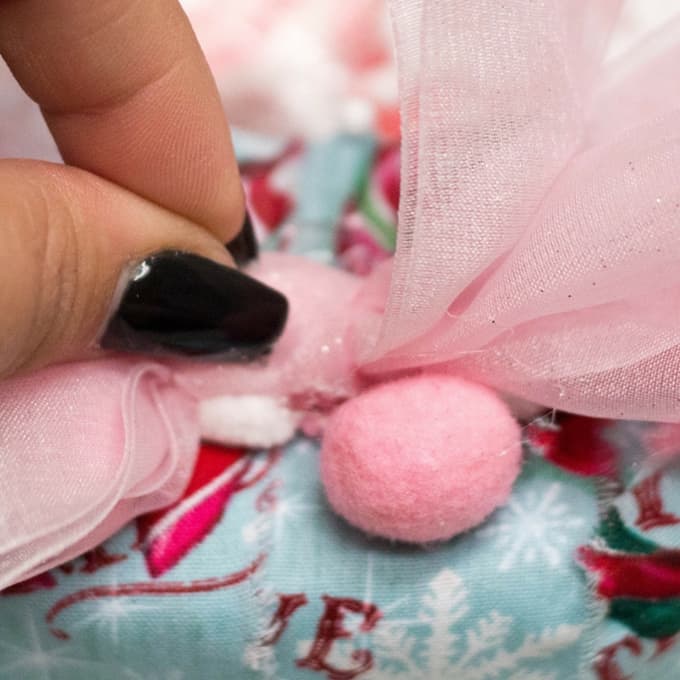
Tis the Season for Trimmings
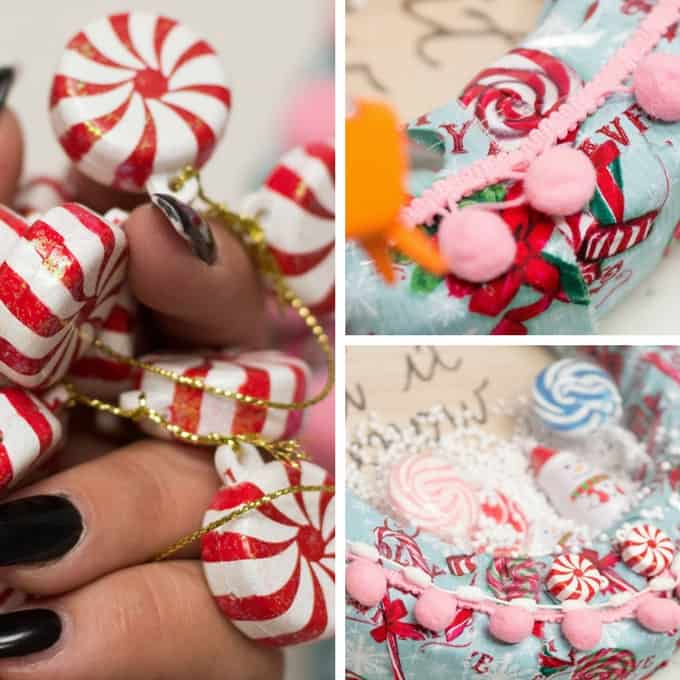
Add Pink Pom Pom trim to the outer perimeter to conceal the edge of the cellophane. I happened to have some cute peppermint ornaments from a previous Christmas in my supply stash, so I trimmed off the strings and added them, too!
Put a Bow on It
While you don’t need to add a bow, I always like to! For my last step, I added a sheer, glittery pink bow, and then glued on a ribbon to hang the finished snow globe wreath from. Non wired ribbon is your best bet for this step, as it will create a nice smooth line when suspended from a door or as wall decor.
The finished snow globe wreath turned out so cute! I want to make them in all kinds of themes and color schemes now. Thanks for reading along on this fun project. I hope you have found some inspiration here! Hopefully, as the busy holiday season ramps up, you’ll find some time to create your own whimsical snow globe wreath!
_______________________________________________________________


Toni - Design Dazzle says
Christie, this wreath is absolutely gorgeous! Thank you so much for doing such a fabulous job! We have loved having you be a part of our Christmas Wonderful Series!