

Hello Design Dazzle readers, I’m Monica of The White Bench blog. Nice to see you again!
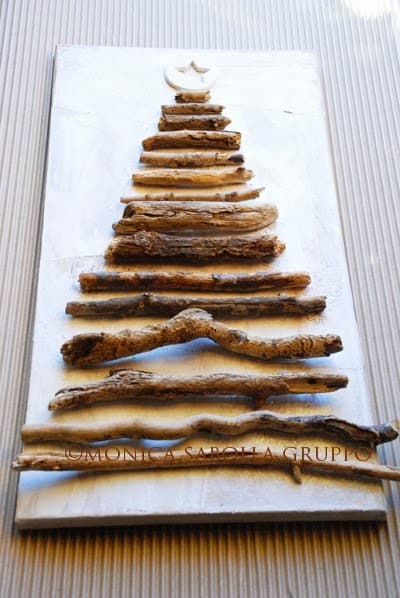
For 100 Ideas of Christmas Wonderful, this year I thought of showing you how to make a mixed media canvas to display in your home or give as gift. The finished result is this… mind you, the gorgeousness of the mixed media layers can be better appreciated in person!
Tools and materials:
– a canvas (stretched or flat)
– hot glue gun and sticks
– scraps of paper (scrapbook or vintage or book pages etc)
– palette knife or plastic card
– gesso
– hairdryer
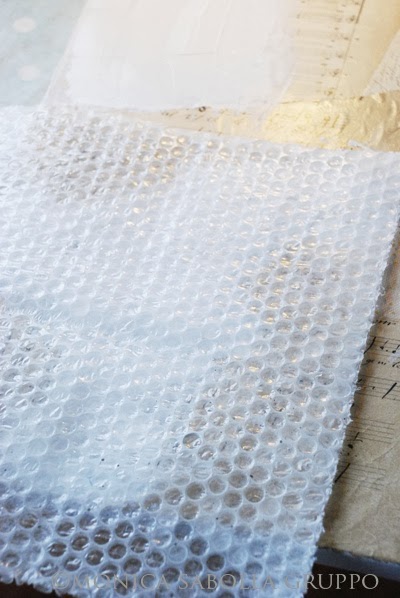
– a piece of bubble wrap
– PVA glue
– an old brush
– spray glue
– clear glitter
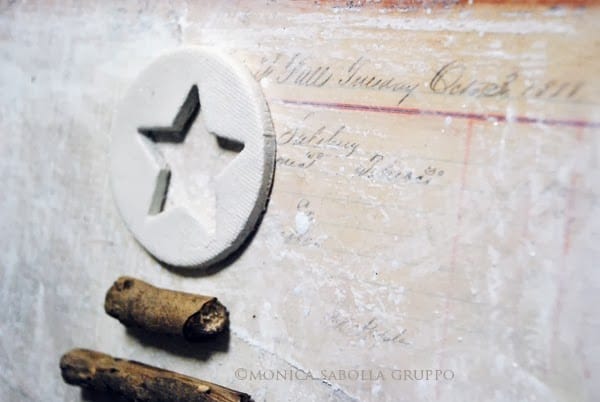
– air dry clay
– rolling pin
– cookie cutters (round and star or just star)
– book page
– scissors
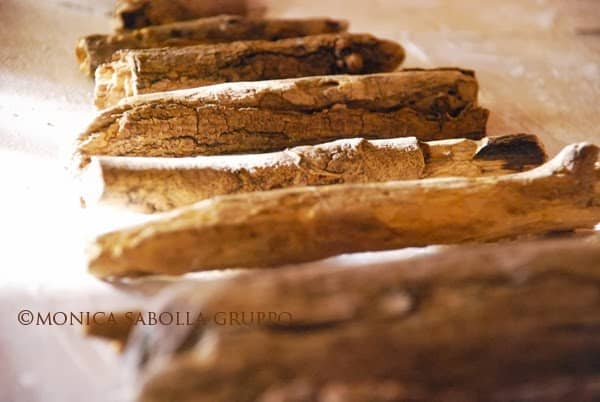
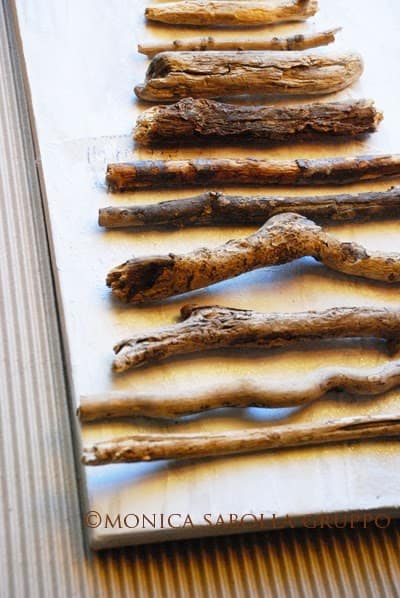
– driftwood/branches/sticks assorted in size
1. First of all you have to collage scraps of (vintage) papers on a blank canvas.
Use whatever strikes your fancy, also scrapbook paper works great.
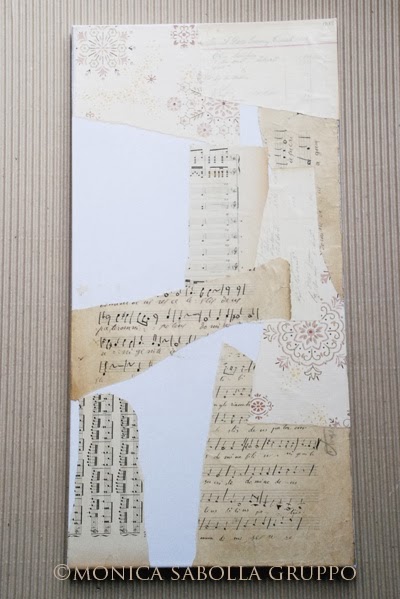
2. Apply PVA glue or vinyl glue generously, and adhere the scraps of paper, leaving some “space” to still be able to appreciate the textured finish of the canvas.
Do not worry if the paper shrinks a bit, it usually becomes flat again when completely dry.
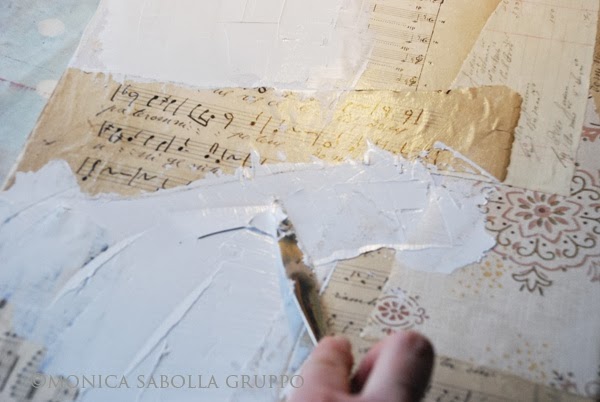
3. Apply glue also on the surface of the collage- it helps protecting the paper from being damaged by the layers of paint and gesso we’re going to apply later on.
Let air dry overnight or dry well with a hairdryer.
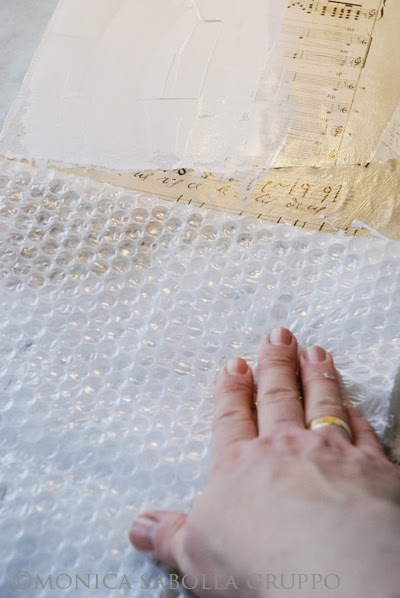
4. With a palette knife (or simply a plastic card or even your fingers!) apply gesso to some areas.
5. While still wet, imprint bubbles in it, using a piece of bubble wrap.
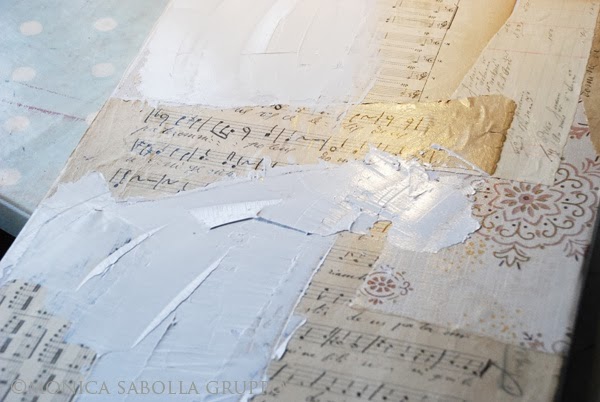
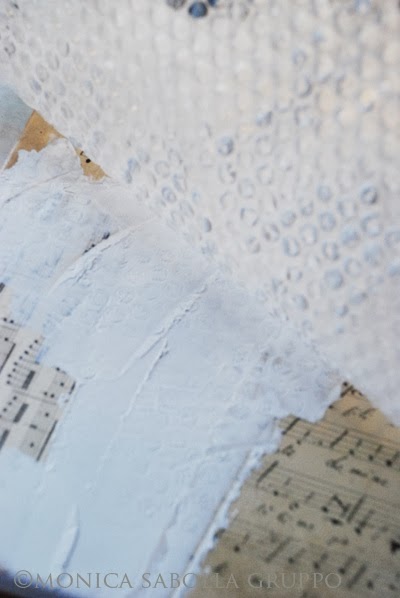
6. At this point, let dry or speed up the process with the hairdryer.
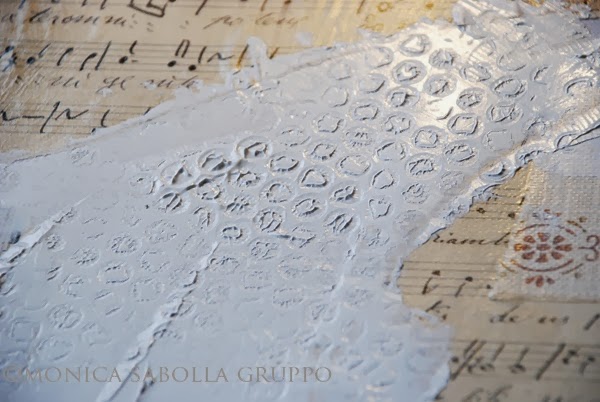
7. Now apply paint in whatever color- shades of white as I did here, reds, greens, red and greens, whatever you like, leaving some areas free to still appreciate the beauty of the papers underneath. Do it very freely with a paintbrush, plastic card or your fingers. We do like to get messy, don’t we 🙂
8. Then when all is dry, spray with glue and dust generously with glitter.
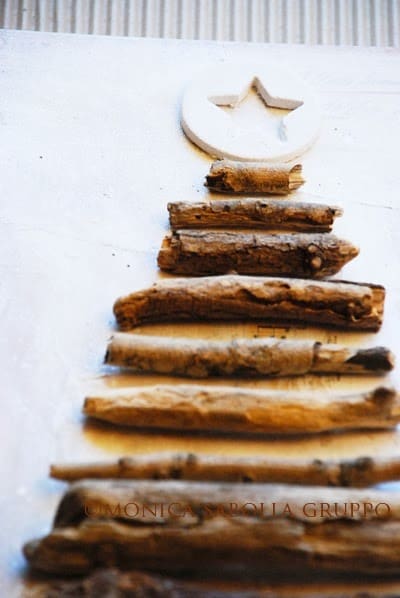
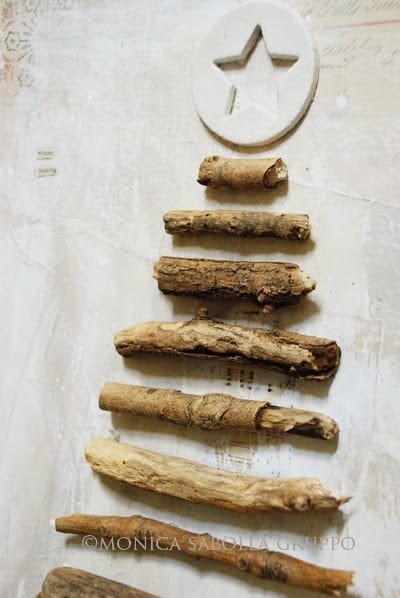
9. Next, glue down the sticks with the help of a glue gun, assembling them in the shape of a Christmas tree.
10. Finish the tree off with a clay tag made rolling clay and cutting it with cookie cutters. You can prepare these in advance and make a batch for gift wrapping purposes, too. They need about one week to dry, faster if put on the radiators.
11. In the end, add text, cut out from a book page. You can skip this step should you fancy.

Thanks Toni for having me over, and have a wonderful Holiday Season everyone! May it be filled with love and laughter, and peace for all.
Monica x
Monica is a full- time artist, product designer and photographer.
Learn more about her at monicasabollagruppo.com and read her blog, The White Bench.


Leave a Reply