


I’ve been asked to be a part of the Michael’s Holiday Dream Tree Challenge mentioned here yesterday. For this challenge, the artificial green tree I received from Michael’s I decided to paint a linen color. Yes, you read that correctly. You can also see in the picture Buffalo Iridescent Snow Flakes on the branches (Mod Podged on). I’m going for a vintage, wonderland feel of a tree and needed to do something about it. So for less than $10 I completely changed the look of my tree.
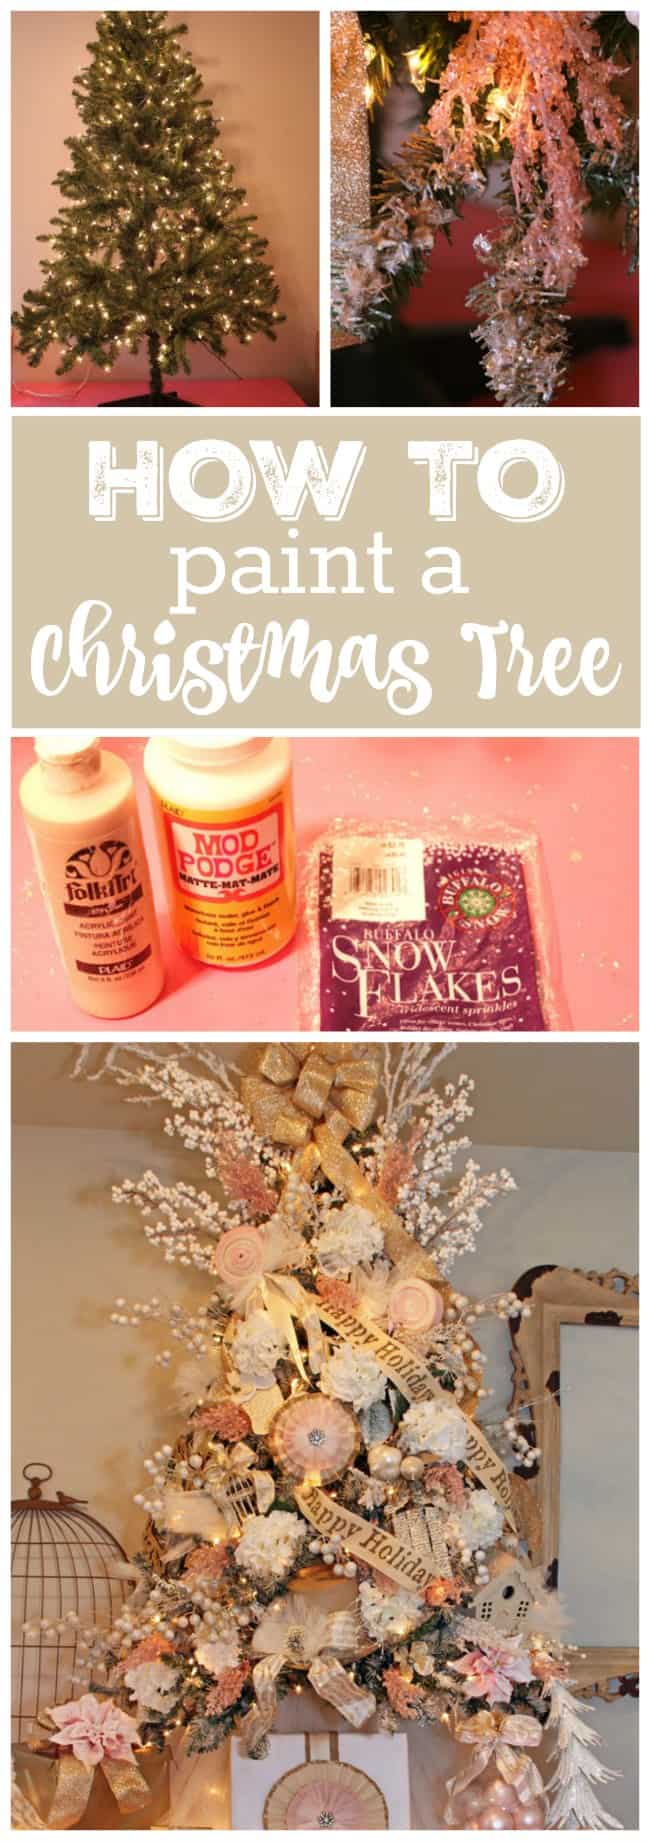
How-to to paint and glitter an artificial Christmas Tree…
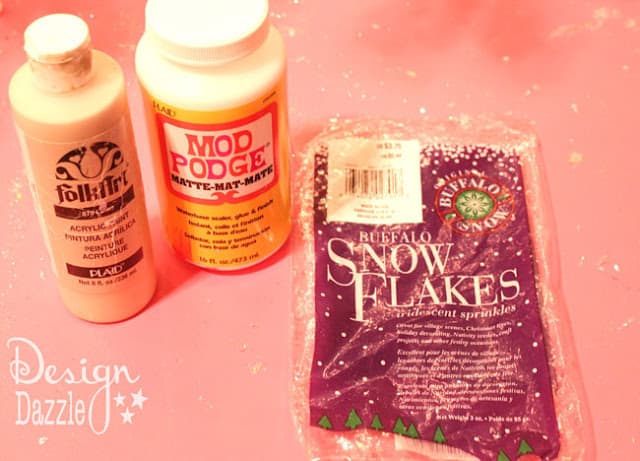
Supplies needed:
- linen color craft paint
- Mod Podge
- Buffalo Iridescent Snow Flakes (1-2 packages depending on the look)
- foam brush

Step 1: Set up your artificial pre-lit Christmas tree. Michael’s has great prices on their trees. It took all of 15 minutes to set up and properly “fluff”.

Step 2: Paint the artificial Christmas tree using a foam brush and craft paint. It took about 40 minutes to do this part. We mainly focused on the edges of the branches and were careful painting around the light bulb. However, we did paint some of green electrical cords. With a damp cloth wipe off any paint that ends up on the bulbs (before it dries).
We didn’t wait for the paint to dry for the next step. However, some of it might have been dry by the time we got the entire tree painted.
We didn’t wait for the paint to dry for the next step. However, some of it might have been dry by the time we got the entire tree painted.

Close up of the branches after painting. The sprinkles haven’t been added yet.
Step 3: Paint a heavy coat of Mod Podge on the branches you just got finished painting.
Step 4: Quickly sprinkle Buffalo iridescent Snow Flakes over the branches.
The tree looks very vintage. It took two of us about an hour to paint, Mod Podge and sprinkle. I love it!!! The tree reveal will be this Tuesday.
Here is a how-to on one of the decorations used in the challenge…

To get started with my Christmas tree, I made some ornaments with all of my supplies I got at Michael’s and got to work! Perhaps my favorite ornament I’ve made so far is the paper and fabric rosette. It’s simple to make and adds so much flair to a christmas tree! Here’s how I did it:
- Take a piece of cardstock and cut it into 3 equal strips horizontally. Crimp each strip accordian-style, and then glue each end to the next to make one long, crimped strip.
- Glue the final, unconnected edges together (it should look like a lampshade, refer to picture above) and let dry, clipping together with paper clips to secure it for now.
- Flatten the rosette by pushing the top of the “lampshade” into the center to make a circle, then hold it down with something heavy. I used a bottle of modge podge and called it good!
- Leave it there until the rosette lays flat.

To decorate the rosette, I topped the rosette with string-tied tulle and accordian-crimped paper, then added a small decorative brooch/button I got at Michael’s. Then, I glittered the edges by painting the edges with modge podge and pouring glitter on top.
I love how this ornament turned out, it’s definitely one of my favorites!
Disclosure: Michael’s provided me with a tree and a lovely gift card in exchange for my participation in this challenge. All thoughts and opinions are my own.


Mariah says
So neat, I would have never thought of painting a tree. I can't wait to see it all come together!
DesignDazzle.blogspot.com says
Thanks, Mariah! I really love the look of the painted and glittered tree.
Ben@Nuevo Living says
Wow!!so pretty and thanks for sharing…
Bisani says
I've gone through the whole post and found it very informative exactly upon my liking, Thanks a lot for this wonderful post i will come again soon..Nokia, Samsung, HTC, Iphone, Blackberry, LG Mobile Rates
Cheryl says
Thank you so much for sharing how you transformed this plain tree into a beautiful “wonderland” tree! I was wondering how I would get this affect and Ta-Da! you showed us all how to do it! Thanks again for the inspiration! I’m off to Michael’s!!!
Sani says
That is a beautiful tree you put up i am ecstatic you shared it.