

Hello, all you incredible Design Dazzle Readers! I’m Ashley from The Handmade Home, and I am so thrilled to be here today to share with you! Toni was so sweet to have us, and we are excited to be a part of this brilliant series!
So, let’s jump right in, shall we?
If you’re anything like me, you’re probably getting geared up for the season, and looking for some fun {and affordable} decor options. Handmade Christmas Letters!

I was ready for something a little different in the decor department, apart from the usual stuff. As you can see, I needed something in my dining room to take me from summer and fall, and straight into christmas. So, I decided to make a little something for our home. Rather than the traditional wreath, I thought this was a little different, and it was super fun for the kids to help me with, as well.


Want to know how we did it? Here’s what you’ll need.
• Basic straw/plastic wrapped wreath {easily found at your local craft store}
• Large pieces of cardboard according to what size you plan on doing {you can purchase large cardboard boxes from your local home improvement store}
• Optional: piece of paper with letter printed and already cut, ready to trace and use as your template, OR a transparency with your word printed, and a projector. {You can go larger with the projector option} Side note on projectors: I borrowed mine from my hubby’s workplace. Ask around, because they can be easy to find if you think about it-and are oh so helpful! You can also purchase one online or at your local office supply store, for a little moolah, if you plan to do more projects like hand painted signage, etc. around your home.

• Exacto knife or box cutter
• At least 8 oz of glitter in a color your choice
• Super 77 adhesive or basic glue
• Spray poly {see left can, above}
• Thick ribbon for hanging
• For the wreath: fabric of your choice, cut + torn into strips with a ragged edge, hot glue gun, + embellishments of your choice. {I used peacock feathers + an old broken sparkly ornament}

To create the letters, I measured the area that I thought would work for a size. I decided on 24″ tall, but you could easily adjust yours for whatever size you need. {Please ignore the stars + the junk on the floor in the back room that I realized was there after the fact. Hurray for real life!}
So here’s where the printed letter as a template, or the overhead projector comes in handy: {You could do either one, and then purchase a wreath according to your size needs.} But I simply chose a font, and a word, and printed them on a transparency. {Score your own free version of Captain Howdy, here. It just looked super festive to me.} I then traced, and using my knife on a safe surface, cut it out. The kids had fun making shadow puppets on the wall while I worked!

Next, was the fun, and/or super terrifyingly messy part {Most of the time, I go with the latter} A drop cloth will most definitely help with the glitter control, or if the weather is mild enough, outside is ideal. But I sprayed the letter with my Super 77. {Please use this in a well ventilated area away from your children…it stinks to high heaven, but I chose to use it because it provides a thin, permanent adhesive, works fast, and I knew I could layer it.} I then sprinkled my glitter on generously. The kids loved this part. Beware of super stinky, sticky fingers.

A side note about this glitter: It was more of a different shape than your typical flat, octogonal glitter shape, so I recommend that for a fun effect in these letters, you go for a funky, vintage-y, versatile glitter. When the first layer was dry, I sprayed super 77 again, for a dense second layer. When those were dry, I went over each one generously, with a top layer of poly. Each letter ended up with two layers of glitter + super 77, and topped off with 2 layers of poly. This keeps shedding under control, and to a minimum. That way, you’re not cursing my name one year later as you’re still trying to suck it from your carpets. ;}
After that, I simply added some hot glue to the back of the cardboard, and joined a thick ribbon to it. I then cheated, with a small, additional dabble behind the actual letter, and directly to the shelf. Test your surface first, but when you’re done, it should pop right off, and keep it from hanging crookedly. This treatment would be perfect for a window, as it peels right off of glass.
For the wreath, I used some old fabric I had from an old project, but this was from fabric.com and is called Premier Prints Annie Blend Eaton Blue Kelp fabric. I simply cut a small beginning strip, and then tore it into strips, for that selvedge edge look. I wrapped it around, securing it with hot glue at the end. Add your embellishments…and tada! You’re ready for one rockin’, not-so-typical christmas.

To hang it all straight, we started with the wreath, and went outward. It helped center the word on the shelving. Again, with a dabble of hot glue at the top.

I had a lot of fun switching up my decor colors this year, and this peacock blue was the perfect springboard for me, in doing that.


Thanks again for having us, Toni! What projects will you be tackling this wonderful holiday season? Let me know if you try this or have any questions! Happy Holidays to everyone!
—
Ashley Mills
::creating a haven for the everyday::


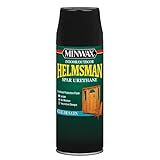
Satin Spray Poly

I hope you are enjoying our 100 Ideas of Christmas Wonderful series. We have many more blog posts with lots of creative ideas shared by some very talented bloggers. Keep checking back daily for new “Christmas Wonderful Ideas”.
Our link up party is going on now! Please share your awesomeness with us!!


Karena says
Ashley this is so beautiful!! A great holiday project!! I see you made stars as well!
Toni thank you for featuring Ashley!
Please Come and enter in My 12 Days of Holiday Giveaways. There are so many exciting & special Gifts! Tis the Season!
xoxo
Karena
Art by Karena
Lee-Ann says
Wow that is such a lovely decorating idea. I love the bulb centerpiece and the little "Joy" letters. Thank you for sharing!
DesignDazzle.blogspot.com says
Thanks Ashley for sharing such a great holiday project. I have a thing for glitter!
ashley @ the handmade home says
WHEW! A little late leaving a comment, but just wanted to thank you again for having me, Toni! Love your blog!