

Welcome back! It’s day 3 of our Halloween Bash blog hop and we hope you’re having a fun time seeing everyone’s creative projects and gathering some new ideas of your own…I know we are!
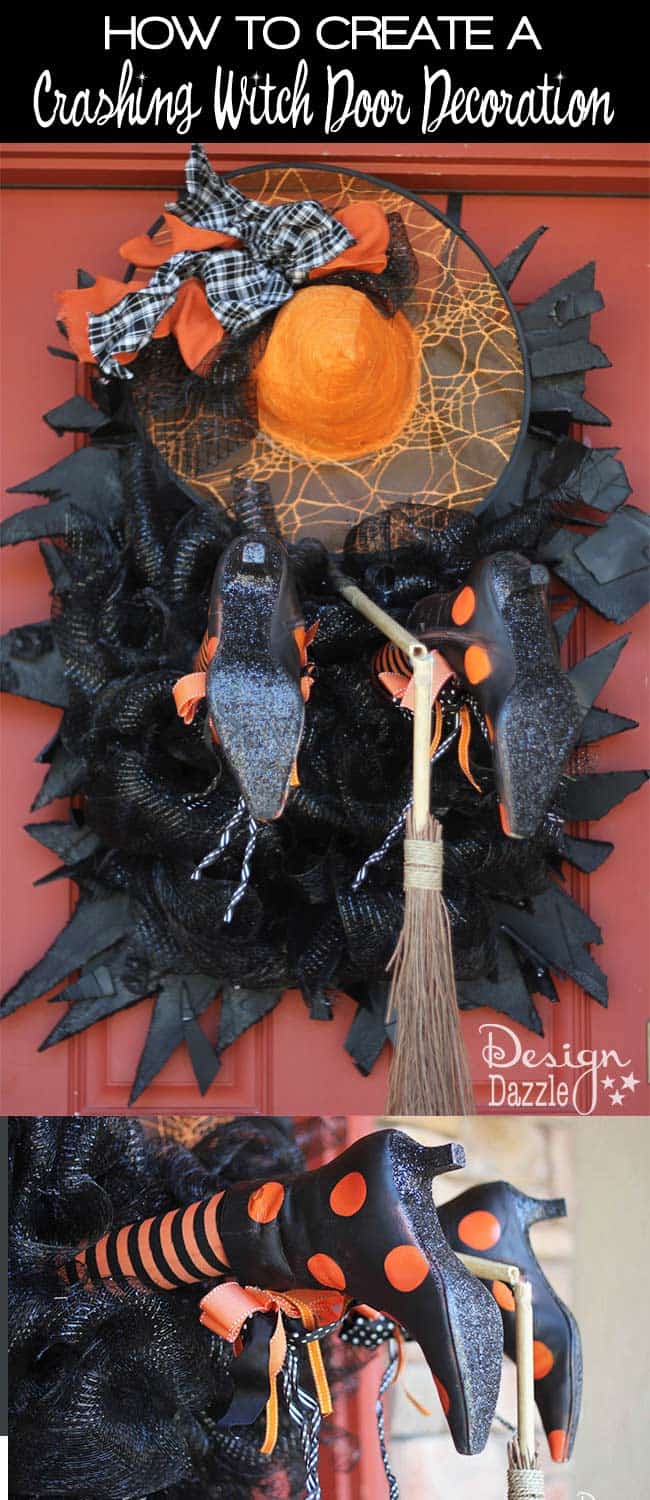
Ding Dong the witch is dead! Watch out, she crashed into your front door! It looks like she left a fabulous mess. Today I have a really fun Halloween Witch Crashing Door Decoration to share with you. I guarantee you’ll get compliments from all of your neighbors once you’ve installed your crashing witch!
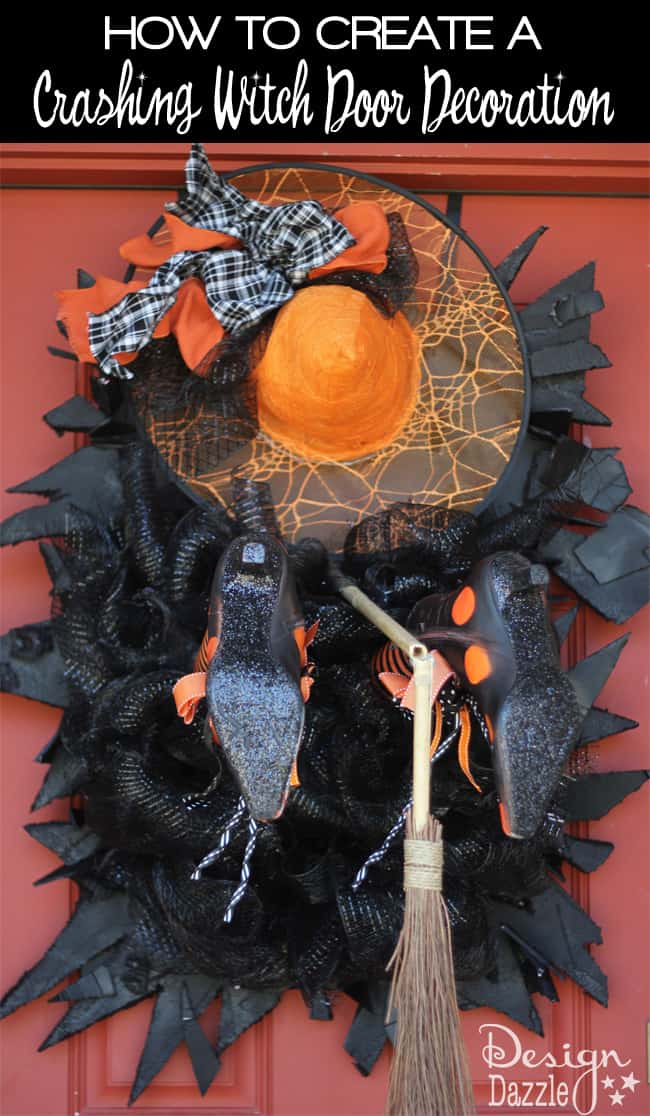
This project requires some patience, a lot of hot glue, and just a touch of magic. This spooky witch is perfect to greet your trick-or-treaters this year!
This project has quite a few steps, so I divided it into two sections: how to build the base and how to decorate your witch.
Supplies needed to make the base:
- 2 black dollar store wreath hangers
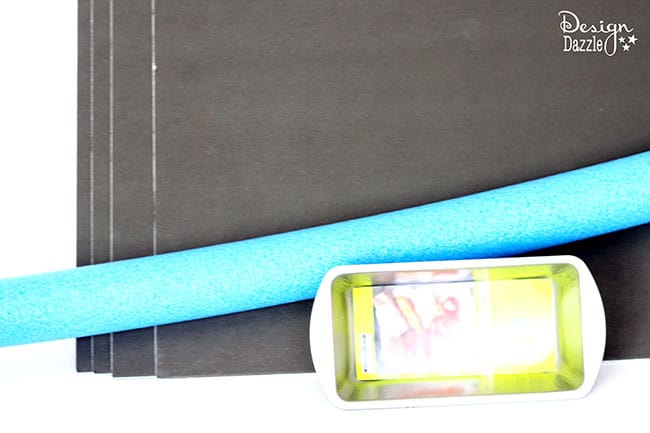
- 7 or 8 sheets of black dollar store foam board
- 1 4×8 sheet of rigid foamular insulation board found at Home Depot
- 1 pool noodle
- halloween tights
- 2 dowels
- 1 dollar store baking pan
- hand saw and scissors
- wire
- electric drill
- hot glue gun
Additional supplies needed to decorate the witch:
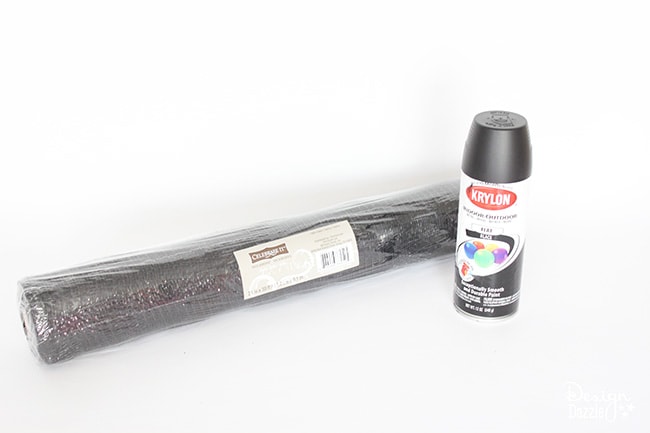
- krylon flat black spray paint
- wide mesh ribbon
- dollar store broom stick
- witch hat
- stuffing or newspaper
- ribbon
- pipe cleaner
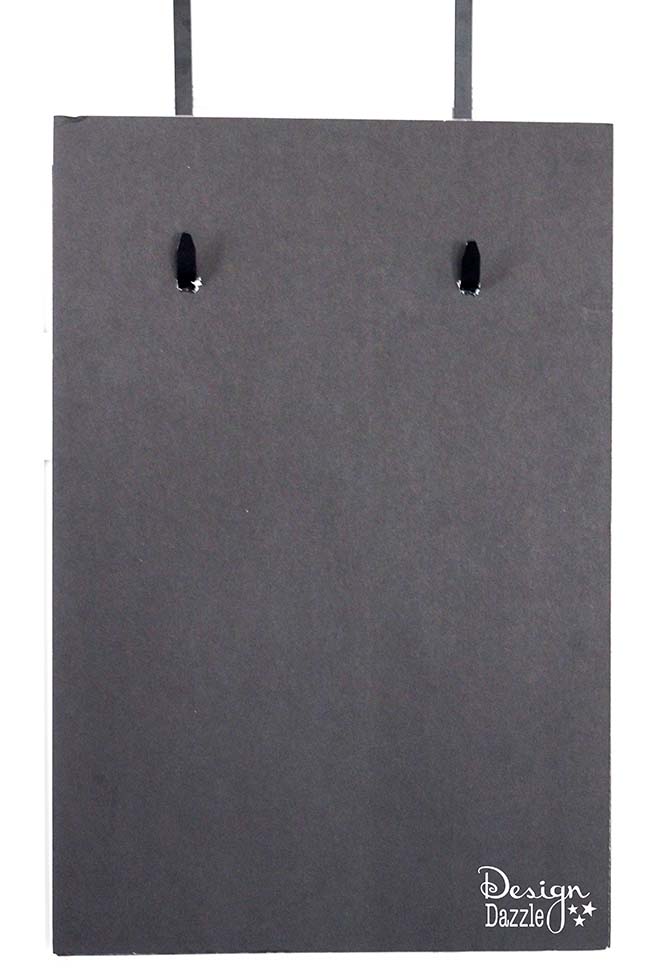
Step 1: Hot glue 3 sheets of the foam board together. Use hot glue heavily and line the sheets up evenly. Then, center the board and using the wreath hanging hooks, make two holes where you want the boards to hang. I poked my holes about 4 inches down.
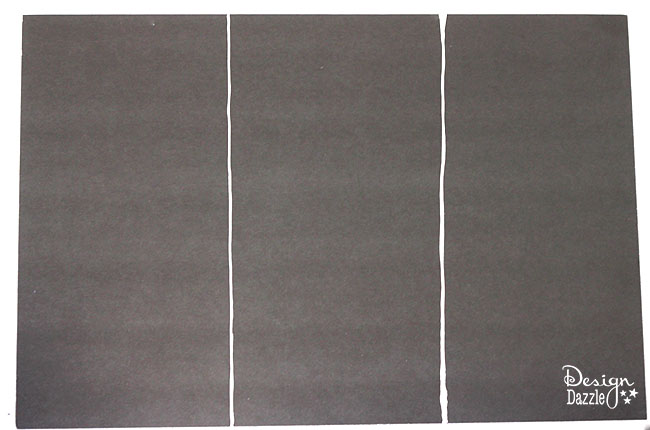
Step 2: Take another sheet of foam board and measure it into three sections. Draw lines with chalk or something that you will still be able to see on the black paper. Cut with the hand saw or scissors along these lines, and you will now have three separate pieces of foam board. Hot glue these three sheets of foam board on top of each other. Repeat this step with 2 more sheets of foam board, so that in the end you have 3 stacks of thick foam board.
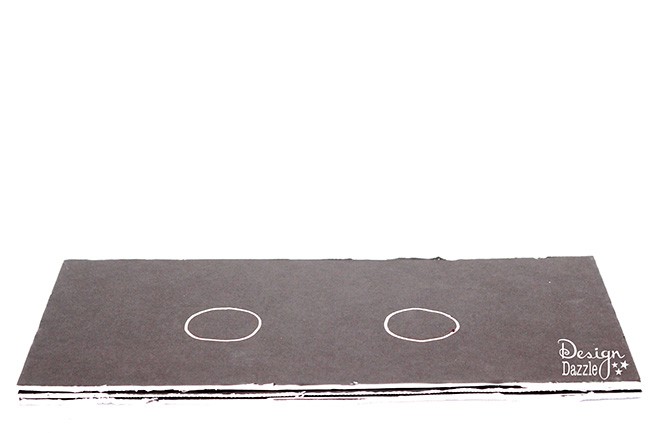 Step 3: Using the pool noodle as a guide, trace 2 circles on the first stack of foam board. Make sure that the noodles are centered before you trace- this is where the pool noodle legs will go. For the next foam board stack, trace the circles ½ inch higher than the first circles. For the third foam board stack, trace the circles ½ inch higher than the second. By raising the circles by ½ inch on each stack, you will create the angle that the legs need to be at.
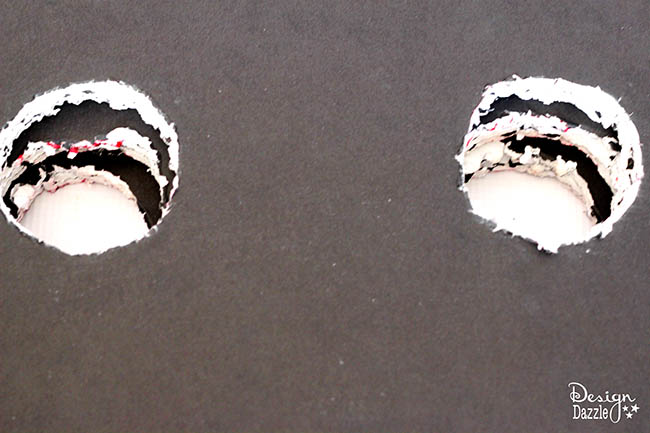
Step 4: Using scissors, carefully cut out the circles you traced. Once all of the holes are cut out, hot glue the 3 stacks of foam board together, to make a very thick stack of foam board. You will notice a ½ inch difference between where the holes meet up, like in the photo above.
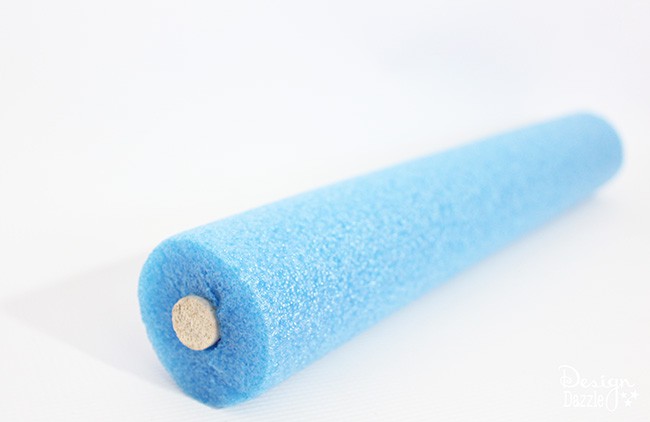
Step 5: Cut the pool noodle in half (or shorter) so that you have two equal lengths. Then, put dowels in the middle of the pool noodles to give them some extra reinforcement.
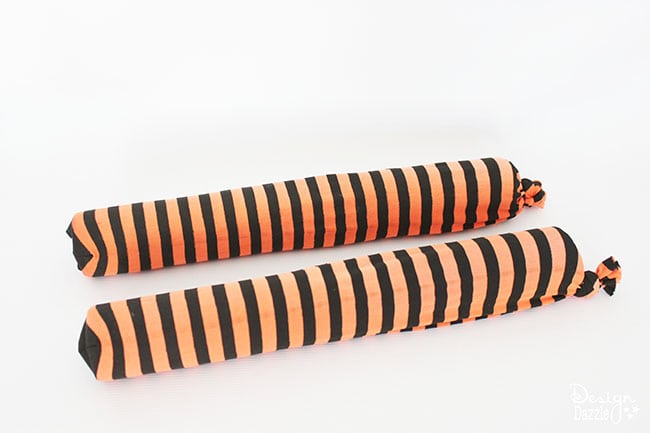
Step 6: Put Halloween tights on the noodles. Cut and tie the tights to the right length. These will be the witches legs!
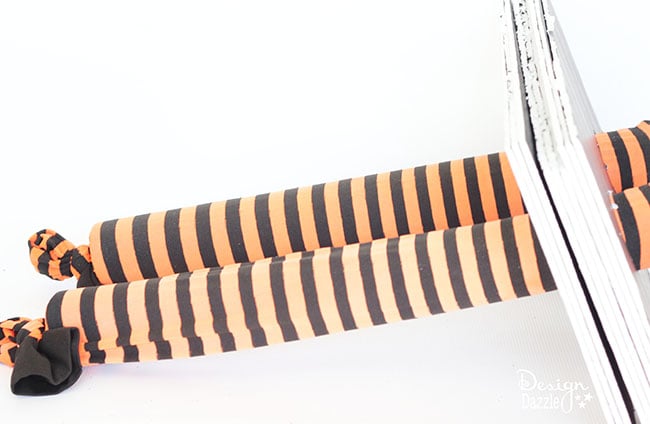
Step 7: Put the witches legs through the holes in the foam board stack. It will be tight. That is good! You want them to be stiff and secure.
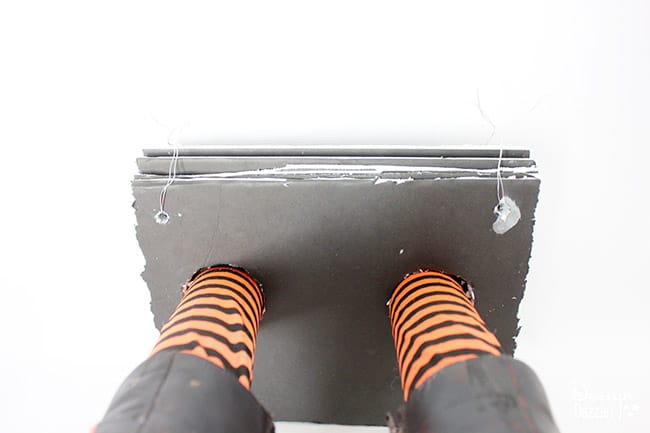
Step 8: Cut the foam board stack down, so that it won’t be the same as the width of the base. My original base was 20 inches wide, so I cut down 4 inches on each side to make it 12 inches wide. Then, about an inch from the top corners, make holes with an electric drill. String long wire, doubled over, through the holes. This wire will be used to attach the legs to the base later on.

Step 9: Now that the legs are very secure, it’s time to start decorating the base. Using scissors, cut out triangles and fragments of an extra foam board- or from the scraps of the pieces you cut. Using the hand saw, cut zig zags, triangles, and random pieces of the foamular insulation. Hot glue these pieces around the base, creating the illusion of a broken door. The insulation will start to melt slightly with the hot glue. Apply a big glob of hot glue and attach it immediately to the base. Hold it down for about 15-20 seconds so that it will stay securely.
*Notice my chalk markings on my base. I put down my legs and their stack of foam to measure how high I wanted them. I decided to go with the highest marking, about 8 inches down from the top. Having these markings before you glue on the insulation and foam board fragments is helpful because then there will be no overlapping.
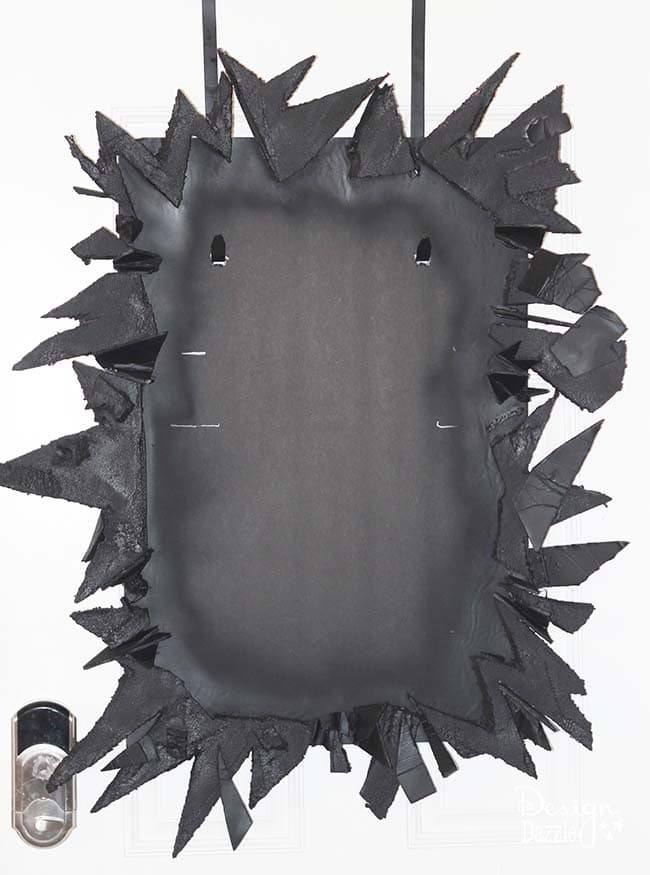
Step 10: Spray paint the insulation and foam fragments with flat black krylon spray paint. This spray paint does not “melt” the insulation or foam.
Additional supplies needed to decorate the witch:
- krylon flat black spray paint
- wide mesh ribbon
- ribbon
- pipe cleaner
- stuffing or newspaper
- dollar store broom stick
- witch hat
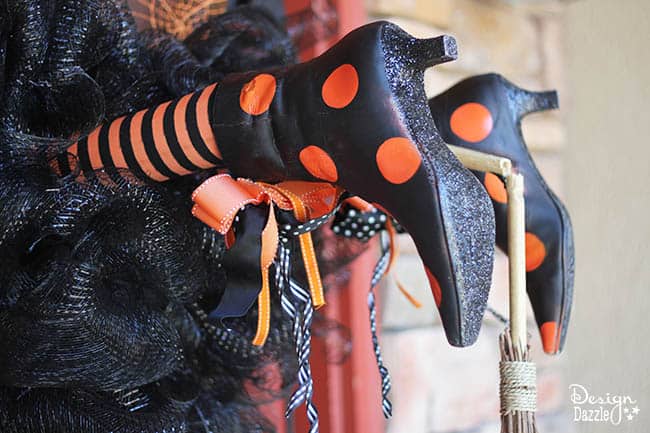
- witch boots
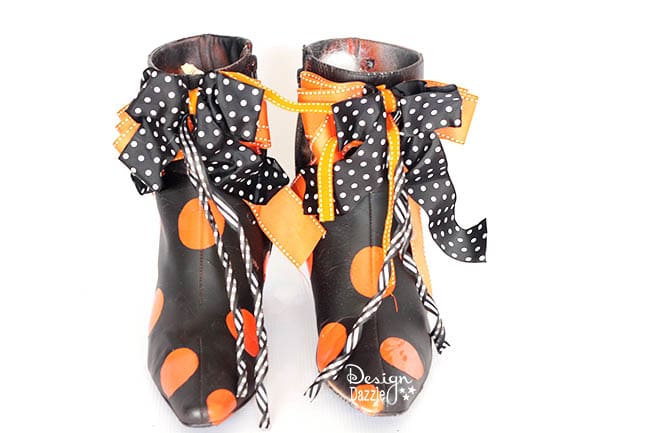
Step 11: These are my witch boots, I had them from an earlier project. If you’d like to create your own, check out this blog post how to decorate witch boots. Once I put the boots on my witch legs, I put a little bit of extra stuffing in around the ankles to make sure they were tight and secure.
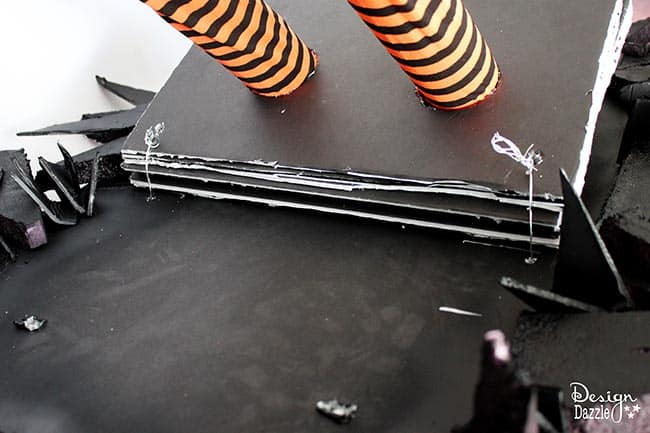
Step 12: Once the spray paint is dry, drill or cut two holes into the base on the markings (about 8 inches down. Use the wire to attach the legs to the base. This should feel very secure. Once the wire is tightened, take the baking pan and hot glue it under the legs to provide additional support. The opening of the pan will be secured to the base.
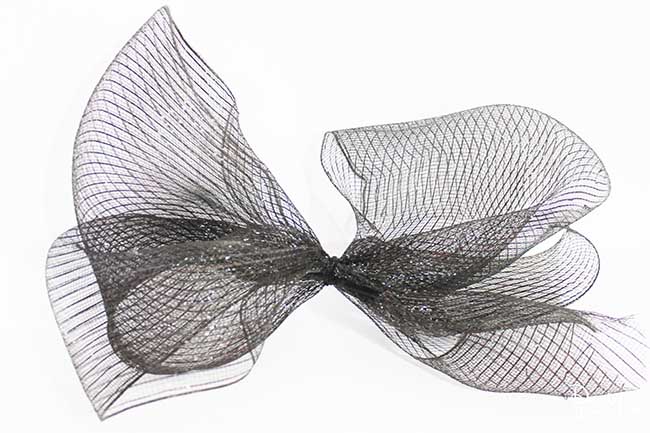
Step 13: Cut the mesh ribbon into many small sections (not too small). Gather it loosely together and tie it in the middle with pipe cleaner. Repeat this until you have enough to make the witch skirt. I used just about the entire roll.
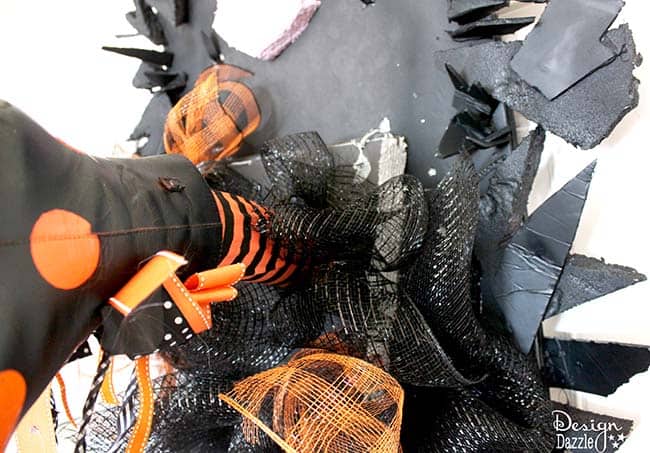
Step 14: Hot glue the “bows” you made all around the legs, until you can’t see the base or the pan. Be VERY careful hot gluing these on, and use a spoon to push them down. Do not glue much of the mesh ribbon up on top, because that is where the witch hat will be.
*Using the hot glue for this part was very difficult. Afterwards, I thought using floral picks or something like that might work better than hot glue to attach the ribbon.
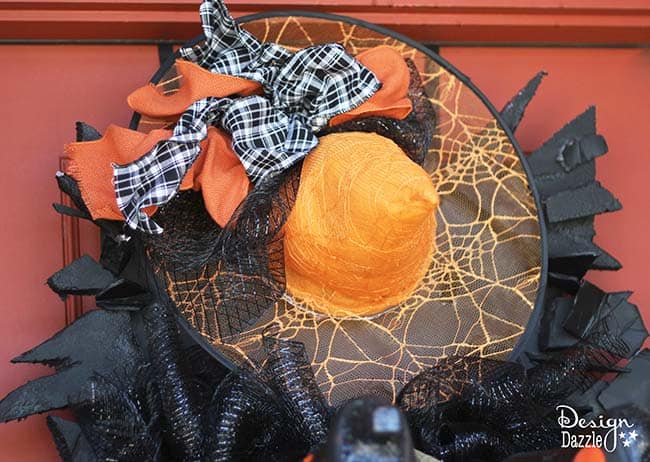
Step 15, Finishing Touches: Finally, the witch hat! Stuff the hat with stuffing or newspaper. I glued an extra piece of foam to the opening of the hat to keep the stuffing in. This also made it easier to hot glue the hat to the base. Attach a big, cute Halloween bow to the brim of the hat. Don’t forget to snap your broom in half! Make sure to leave it in tact in just a small part, or put some tape underneath. She really did crash! Attach your broom by making a hole in the foam base just big enough to hold the broom.
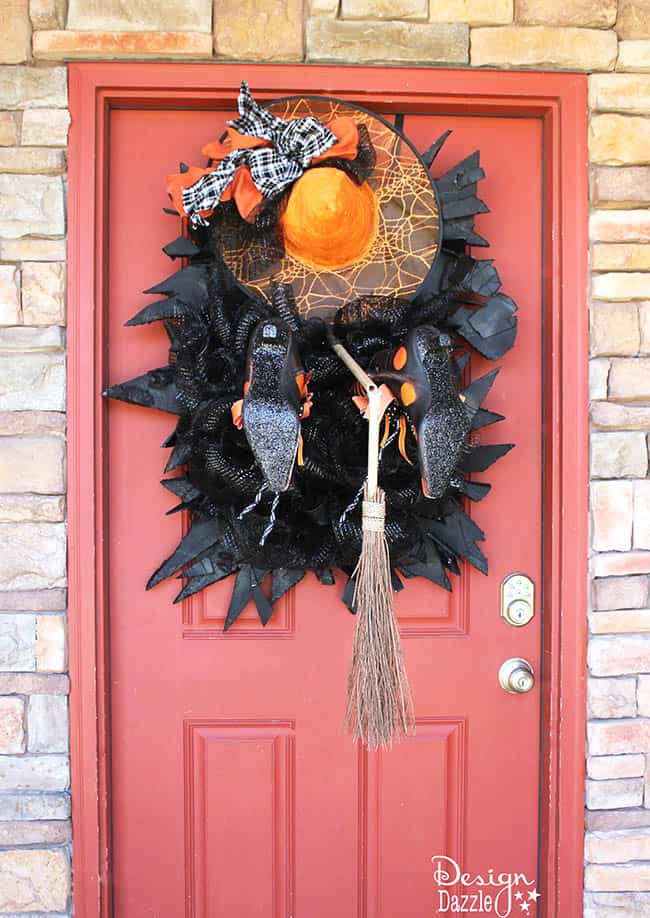
This spook-tacular witch is sure to be your most fabulous Halloween guest!
Are you ready for lots more creative Halloween ideas and projects??
Come participate in our blog hop! Simply click on each of the links below, for the Halloween projects you’d like to see in more detail and it’ll take you right to that post with additional information and photos on how to create it. Have fun and pin away!
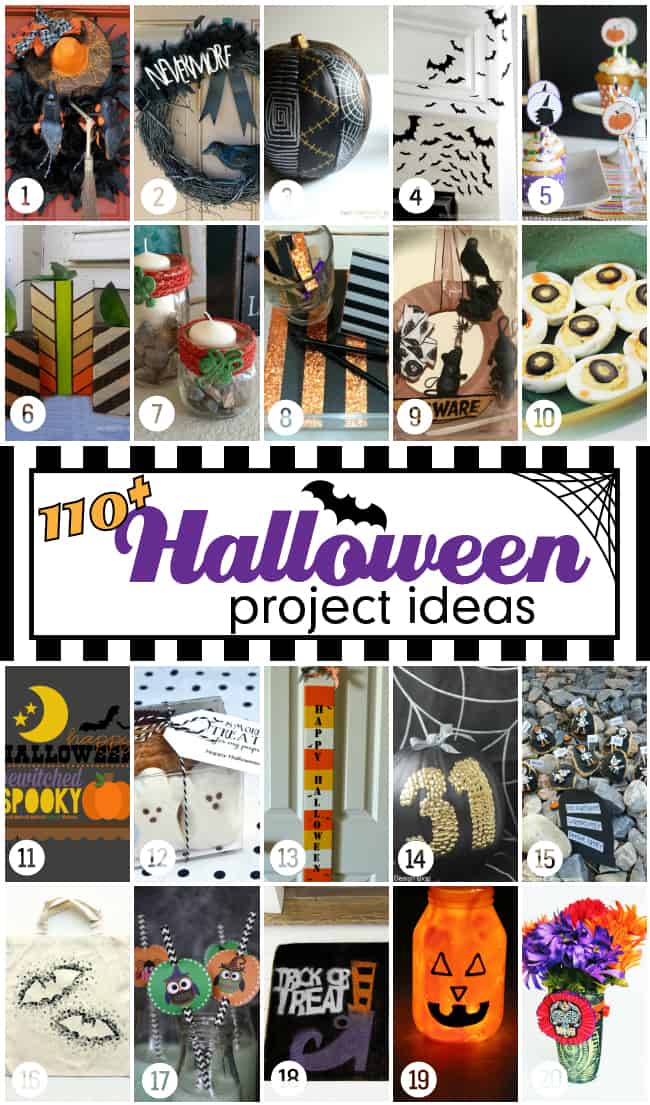
1. Halloween Witch Crashing Decoration
2. Quoth the Raven, “Nevermore” Wreath
3. DIY Sharpie Pumpkin
4. Flying Bat Silhouettes
5. Halloween Cupcake Wrappers & Toppers
6. Easy Geometric Wooden Pumpkins
7. DIY and DYE Autumn Burlap Jar Candles
8. Easy DIY Halloween Tray
9. CreepyCritter Halloween Wreath
10. Blood Shot Paleo Deviled Eggs Eyeballs
11. Free Halloween Subway Art Printable
12. S’more Treats
13. Candy Corn Halloween Sign
14. Thumb Tack Pumpkin
15. Halloween Fun Decorating Sugar Cookies
16. Eraser-Stamped Trick-or-Treat Bag
17. Free Printable – Halloween Gift Tags
18. DIY Halloween Trick or Treat Door Mat
19. Pumpkin Mason Jar Luminary
20. Dia De Los Muertos Flower Vase
Follow our Fabulous Halloween Ideas Pinterest board for even more inspiration!
Follow Design Dazzle’s board Fabulous Halloween Ideas on Pinterest.
Be sure to come back tomorrow for another 20 awesome Halloween ideas!
Thanks to all 110+ fabulous bloggers participating! We’d love for you to visit their blogs and see what else they’re up to!
100 Directions || 365daysofcrafts || a girl and a glue gun || A Prudent Life || Addicted 2 DIY || Albion Gould || Ashlee Marie || Atta Girl Says || Bakerette || BD Design || BellaGrey Designs || Black and White Obsession || Bloom Designs Online || Blue i Style || Bombshell Bling || bumblebreeblog || C.R.A.F.T. || Celebration Lane || Clean and Scentsible || Clearsnap || Confetti Sunshine || Crafts by Courtney || Creations by Kara || Creative Juice || Cutesy Crafts || Design Dazzle || Dress It Up Crafts || Echoes of Laughter || Everyday Party Magazine || Eye Candy Creative Studio || Fairfield World || Fearlessly Creative Mammas || Five Heart Home || Fizzy Party || Free Time Frolics || Frenchie || FrugElegance || Glued To My Crafts || GreatStitch || Happiness is Homemade || Here Comes the Sun || Home Maid Simple || Honeybear Lane || hoopla palooza || Hydrangea Hippo || I Dig Pinterest || ICE Resin || inkhappi || Insitefull Living || It’s Sew Lorine || Jaco’lyn Murphy || Jen A. Street || Just My Little Mess || Just Us Four || Katarina’s Paperie || Kiki and Company || Laura Kelly’s INKlings || Let’s Eat Grandpa || Let’s Go Junking || Liz on Call || Love The Day || Made by a Princess || Made From Pinterest || Made to be a Momma || Major Hoff Takes A Wife || Make Life Lovely || My Craftily Ever After || My Daylights Blog || My Insanity || Nature’s Knockout || Not Just A Mommy || One Creative Mommy || Organize & Decorate Everything || Our Thrifty Ideas || Paleo Priests || Persia Lou || Pink Cake Plate || PinkWhen || Play. Party. Pin. || Practical Parenting || Reclaim Yourself Retreat || See Vanessa Craft || She’s Crafty || Simple Sojourns || Simply Designing || Soiree Event Design || Sowdering About || Splendid Design || Stuffed Suitcase || Super Simple with Terri O || Suzys Sitcom || Sweet and Simple Magazine || Swish Printables || Sypsie Designs || That’s What Che Said || The Benson Street || The Cards We Drew || The Gunny Sack || The Happy Scraps || The Life of Jennifer Dawn || The Scrap Shoppe || The Things I Love Most || Tikkido || Two Thirty~Five Designs || Wait ‘Til Your Father Gets Home || Walnut Hollow Blog


Cynthia says
Give Toni a pool noodle and there’s nothing she can’t make!
Toni - Design Dazzle says
Thank you, Cynthia! Wait til you see what I did with my Christmas decor and pool noodles : )
Funky Junk Interiors says
Haha, that is so cute! I love the name in itself… the crashing part cracks me up!
Toni - Design Dazzle says
It’s a good reminder Donna : ) Thank you!
Susan @ Oh My! Creative says
So fun! I love the glitter soles on the shoes!
Toni - Design Dazzle says
Thank you Susan! It’s a fun added touch!
julia jennings says
I need to make one of these!
Toni - Design Dazzle says
it’s a cute one for sure!