I was in charge of a Christmas party for my church, with the theme of “The Grinch Who Found Christmas” . We had so much fun with this party, and it was just as fun to make the cute decorations straight out of Whoville. One of my favorites is this Grinch-inspired paper cone Christmas tree made out of tomato wire cages and paper cones. This is probably one of the simplest larger props I have made but it takes a bit of time. One of my favorite things is that it’s an incredibly budget-friendly project! Most of the people I know all have tomato cages. Since it was Christmas time no one was using them. So all the tomato cages were borrowed. The cardstock was purchased at Michaels Store for 4 packages for $10 – great deal at only $2.50 each. Most of the other supplies I already owned and you probably do too!

Supplies:
- 2 packs lime green cardstock
- 2 packs pink cardstock
- 4 tomato wire cage or plant support cages – I borrowed all of the wire cages
- zip ties
- paper covered wire
- wide decorative mesh ribbon
- scotch tape
- duct tape
- green plastic table cover
Paper Cone Branches

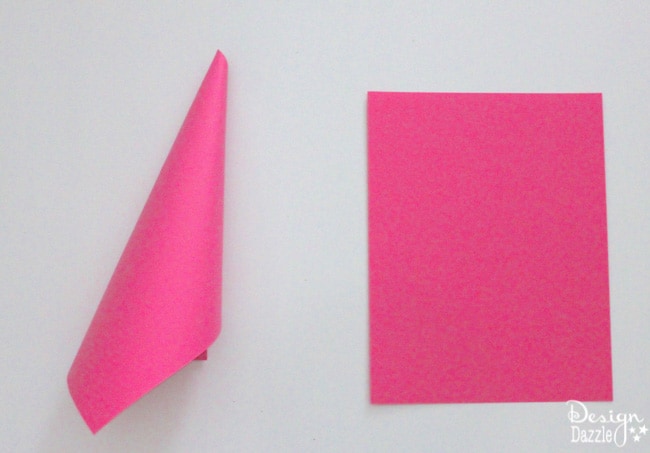
Step 1: Take one sheet of paper. Roll it towards the upper right corner. Do not fold or smash it. Tape the seam with scotch tape (Stapling would also work well!). Make 10-12 of this color to make a layer on your tree. Repeat this step for the different colors and layers of the tree.

Step 2: Poke two holes in the top of the cones so that you can thread wire through. Then, thread the wire through. I used paper-covered wire I found at Michaels- I love that stuff! Soon, you will have a whole string of paper cones. Spread them out evenly so the cones lay flat.
Construction

Step 3: Stack a few layers of tomato wire on each other, leaving about 8-10 inches between each layer. It depends how tall you want your tree to be- I wanted mine about 7 feet tall. Bend the top of the wire to the side to look like a tree straight out of Whoville. Then, zip tie the layers together. It helps if you have two people for this part- one to hold in place, and one to zip tie!
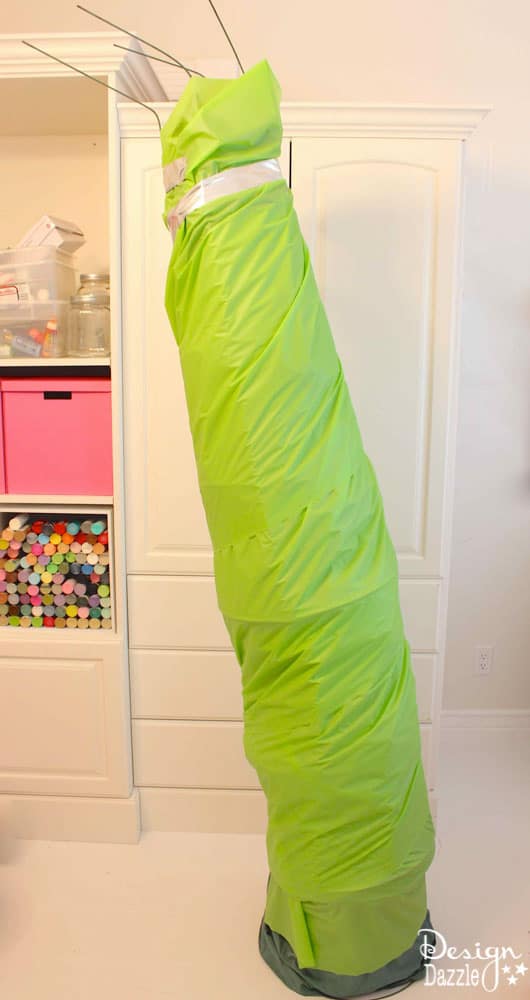
Step 4: Cover the wire with an old sheet, table cloth, plastic sheet- whatever. I started to cover mine in an old sheet but then decided to cover it in with a plastic table cover on a roll since the color fit with my tree better. Simply start at the bottom and wrap towards the top. I used duck tape at the top to finish it off.
Step 5: Tie the strings of “paper cone branches” onto the tree. Start at the bottom and work towards the top. Position the string of cones so the top of each layer is covered by the bottom tips of the layer above it. Use darker layers on the bottom and lighter at the top to create an ombre effect. I used green ombre and pink ombre. I love how these colors look together!
Over-Sized Bow

Step 6: To create an oversized bow to complete the whimsical look, simply bunch large loops of the mesh fabric ribbon in your hands. I did four loops of hot pink mesh ribbon and four loops of bright green mesh ribbon. (Do one ribbon at a time!) Once I had the four loops together, I wrapped them tightly. Use wire or pipe cleaner. I then made the other four loops. Once they were all secured, I wrapped them together with wire. I then used wire to secure them to the top of the tomato wire to cover up the exposed wire and finish the tree.
Are you transporting it somewhere? If so, wait to add the paper cones at the new location. Make sure to make them and place in a sturdy box. Wrap around and tie on the paper cones “empty paper cone tree” when at the new location. This way no paper cones get damaged when moving it around.

Do you like how this whimsical tree turned out? It was the perfect way to greet our guests at the entrance! This is a simple craft to make. I rnjoy making the paper cones while I watch my favorite show. The best part about this fun, big tree is that it only only cost me about $10 – $15 (I happened to have several items and borrowed the tomato cages) ! You can’t beat it. What’s a Grinch party without a few whimsical trees!


Leave a Reply