


To make this banner, you will need:
- Deco Foil Transfer Sheets Gold – I used Thermoweb brand
- Card Stock Paper
- Laser Printer (NOT an ink printer)
- Banner
- Iron
The great thing about using foil transfer sheets is you can use an iron to transfer the foil to fabric, paper, etc.
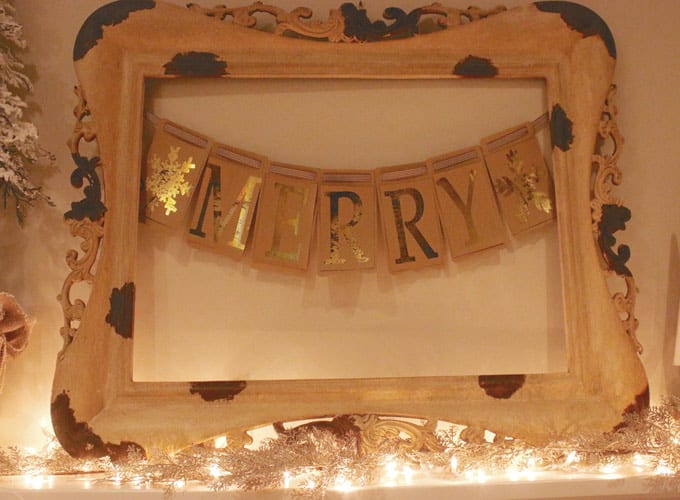
1. Choose which word or saying you would like to put on your banner. “Merry” was the word chosen for this one. Print out on a LASER printer. Since the Thanksgiving banner used for the project had seven letters, but the word, “merry” only has five letters, snowflake tags were added to the ends of the banner. You can add symbols or shapes such as Christmas trees, stars, reindeer… whatever sings “Christmas” to you! Print out your letters to the desired size. There is no way getting around using a Laser printer. These letters used on this banner are about six inches tall.
2. Read the directions on the foil transfer sheets packaging for all the details and instructions. Place the foil sheets with the gold, or colored side, face-up on top of your printed pieces of paper. Place a sheet of parchment paper on top of the foil.
3. Heat your iron the highest heat. To iron on the foil, the best results come from using high heat, constant movement, and pressure. Always iron with a piece of parchment paper, or another thin material, on top of the foil.

4. Wait to remove the foil until the paper and foil are completely cooled off.
5. Once your letters have all had the foil added, cut each piece of paper to fit your banner. Simple ribbon was used to hang the the banner. Place the banner in your home for all to see and admire. Take a step back yourself, and enjoy your masterpiece!
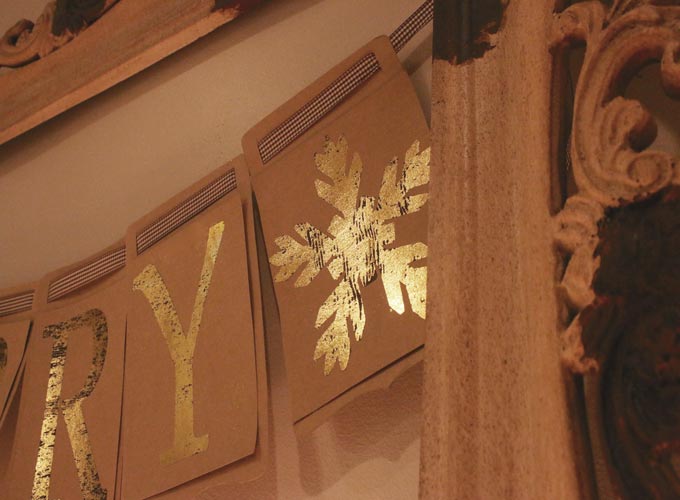
It is important to remember that the foil does not stick if you pull off the foil, and try heating it onto the paper again. So, make sure that you heat the entire surface thoroughly the first time! The foil does not completely stick to the paper. If you want a “perfect” look it doesn’t really work with this. My look is a vintage look – so it works for me.

I love the look of my Christmas decor in the evening. The gold foil shines when just the right spot is hit with light.
TIPS on working with Deco Foil Transfer Sheets:
A good quality paper will help have a more clean transfer. Not as much black ink will show under the foil.
It is important to remember that the foil does not stick if you pull off the foil, and try heating it onto the paper again. So, make sure that you heat the entire surface thoroughly the first time! Once your letters have all had the foil added, cut each piece of paper to fit your banner. The foil does not completely stick to the paper. If you want a “perfect” look it doesn’t really work with this. My look is a vintage look – so it works for me.
If you have a Laser printer that is only for black ink, this will work better than a printer that is for both color and black ink. A quality Laser printer will produce better results than an inexpensive home printer.
I hope you have enjoyed my Christmas mantle! I definitely love decor that is more neutral in color, even for Christmas!


Leave a Reply