• Skip to main content
  • Skip to primary sidebar

Design Dazzle logo

menu icon
go to homepage
  • Home
  • Home Decor / Design
  • Holidays
  • Crafts
  • All Categories
    • Facebook
    • Instagram
    • Pinterest
    • YouTube
  • search icon
    Homepage link
    • Home
    • Home Decor / Design
    • Holidays
    • Crafts
    • All Categories
    • Facebook
    • Instagram
    • Pinterest
    • YouTube
  • ×
    Design Dazzle » Celebrations » Christmas

    Published: Nov 12, 2013 · Modified: Aug 7, 2020 by Toni Roberts · This post may contain affiliate links · 1 Comment

    Cookie Cutter Clay Christmas Ornaments

    Hi, I’m Rachel, and I’m happy to be sharing a fun Christmas tutorial with you all here at Design Dazzle. I blog over at Lines Across where I share all sorts of crafty tutorials from gift boxes, to handmade bracelets, to pipe cleaner animals, to free iPhone wallpapers. I especially love sharing Christmas tutorials like this one.

    If you haven’t worked with Polymer clay before, then you’re missing out. It is much simpler than I had expected, and there are so many possibilities. I shared beginners’ tips for working with Polymer clay when I first “discovered” it last year.

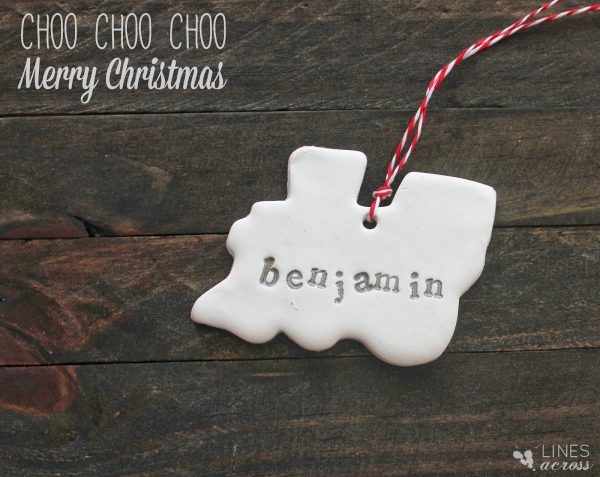
    I wanted to make some gift tags/ornaments to put on Christmas gifts this year. I know that you can make ornaments like this out of salt dough, but I wanted them to be smoother and sturdier so I used Polymer clay. I made this train ornament for my son Benjamin who is obsessed with trains.
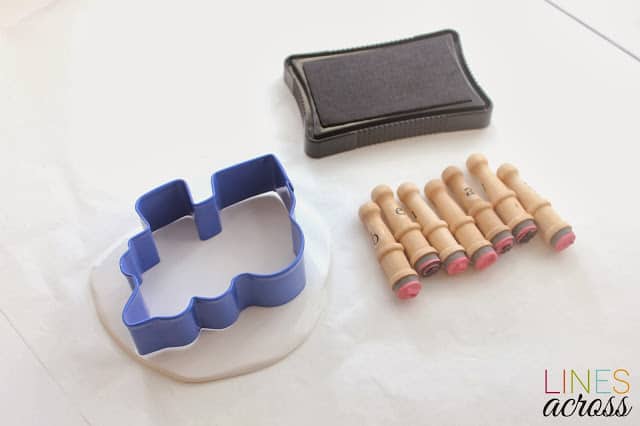
    Cookie cutter clay Christmas ornaments

    What you need:

    1. Polymer Clay

    2. Cookie Cutters (Don’t use them on food after you’ve used them with your clay!)

    3. Alphabet Stamps

    4. Stamp Ink

    5. Twine or Ribbon

    What you do:


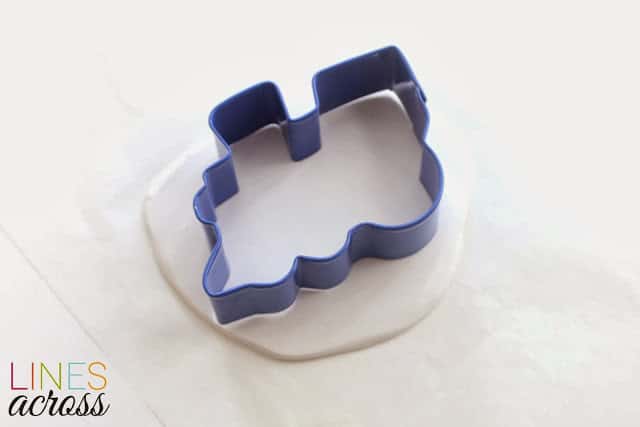
    1. Knead your clay until it softens. It can be really tough at first. Roll it out to a thin flat layer. Place your cookie cutter onto the clay and push it down a little bit so that there is an outline left on the clay.

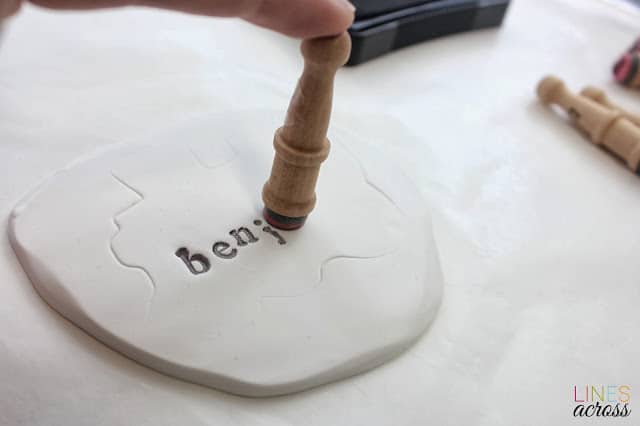
    2. Gather your stamps for all of the letters you will be using. Make sure they are clean. I used black stamp ink. It lightens a little bit when baked, but it still is nice and dark against the white clay.

    3. Dab each letter on your stamp pad, making sure that you don’t get any ink around the edges of the stamp. If you do, it will show up as a circle around your letter. Gently press down on the stamp into the clay until the top of the stamp reaches the surface of the clay. Don’t press any further. It may be worth it to test/practice a few times on a little piece of clay before you start.


    clay Christmas gift tags

    4. Use a straw to punch a hole in the top of your ornament. Then line up your cookie cutter again right over the creases from before and punch all the way through. Just like a cookie, move your clay ornament to a baking sheet and bake according to the instructions on your clay (different brands of clay have slightly different baking times and temperatures.)

    5. Let it cool fully before doing anything else. Add ribbon or twine. You can make them just as ornaments, or also use then as gift tags that double as ornaments.

    Cookie cutter clay ornaments


    Thanks Toni for including me in this fun series! Stop by Lines Across for more Christmas tutorials, or follow along through Facebook, Twitter, Pinterest, or Google +.Making clay Christmas ornaments with kids

    More Celebrations

    • Adult Harry Potter Party Entrance
      Ultimate Ideas For an Adult Harry Potter Party
    • Christmas Cookie Decorating Party for Kids
      Host a Christmas Cookie Decorating Party for Kids
    • 17 Perfect Fall Cakes
      17 Impressive Fall Cake Recipes
    • Chocolate and caramel dipped apples
      Chocolate Dipped Apples + Caramel

    Sharing is caring!

    Reader Interactions

    Comments

    1. Mily says

      November 19, 2013 at 5:50 pm

      hi Rachel,I love your tutorial.
      what brand name r ur letter stamps? thanks

      Reply

    Leave a Reply Cancel reply

    Your email address will not be published. Required fields are marked *

    Recipe Rating


    Primary Sidebar

    Toni medium

    Hi, I’m Toni! I love designing and decorating. Join me for home inspiration and creative living! More about me →

    Popular

    Spring/Easter

    • Setting an Easter Table
      Decorating An Easter Table
    • elegant recipes with rose
      Rose Petal Sweets
    • IMG 9043
      Simple Easter Table Decor
    • Edible Bunny Box with candy inside. - Design Dazzle
      It’s An Adorable, Edible Easter Bunny! D-I-Y

    Footer

    ↑ back to top

    About

    • Privacy Policy
    • About Toni

    Contact

    • Contact
    • Press & Partnerships

    Toni Roberts is a participant in the Amazon Services LLC Associates Program, an affiliate advertising program designed to provide a means for sites to earn advertising fees by advertising and linking to amazon.com

    DesignDazzle.com is protected by copyright laws. DO NOT distribute or copy the content or share multiple images or collage images without written permission. You can use ONE Design Dazzle image only if there is a link back to DesignDazzle.com. DO NOT edit, crop, or remove watermarks from any image. Please contact me at [email protected] with any questions.

    Copyright © 2024 Design Dazzle