

Hello Design Dazzle Readers! My name is Jenn and I blog over at Clean and Scentsible. I am a Mom of two boys and work part time as a pediatric physiotherapist. In my down time, I enjoy decorating, crafting, organizing and sharing all of my adventures through my blog. I loved Toni’s Christmas series last year and am so excited to be a part of it this year! Today I am going to be sharing our Christmas Wish List Ornaments with you.

Both of my boys love pouring through the Christmas wish books and advertisements looking for their favorite toys to add to their wish lists. I always find it fun looking back over the years to see what the boys wanted – it really shows their growth and gives a little snapshot of what they enjoyed at each age.
MATERIALS
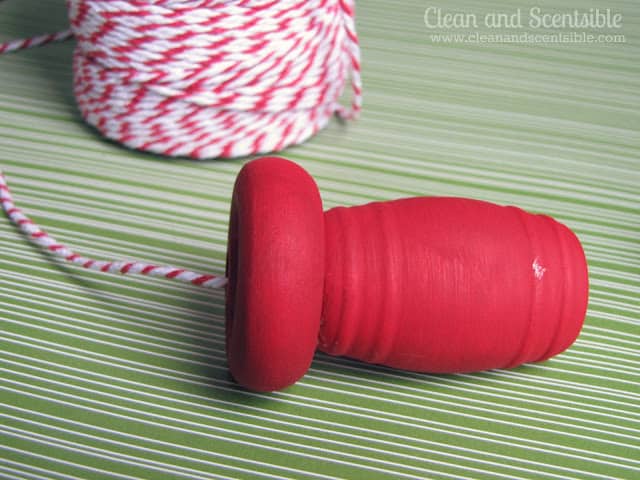
- You could use a wooden spool for this project but I could not find one in the size that I wanted. I did a little improvising and ended up using wooden pieces that can be found at most craft stores – 1 pickle barrel (1 ⅝ inch) and 2 wood circles with a hole in the middle {1 ⅜ diameter}
- Acrylic paint {I used red}
- Paper Trimmer
- baker’s twine
- double sided scrapbook paper {optional}
- white office paper or cardstock
- glue {you will need glue that can bond wood – I used Quick Grip}
- printable {find it here} or write your own
- glue stick
- brown ink {optional}
- double sided tape {I found this easier but you could just use a glue stick}
- jingle bells
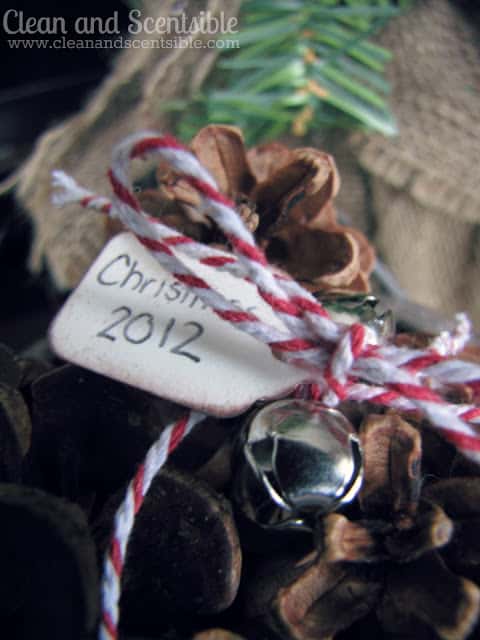
- small tag {you can find these at Staples or other home office supply stores or just make up your own}
TO MAKE
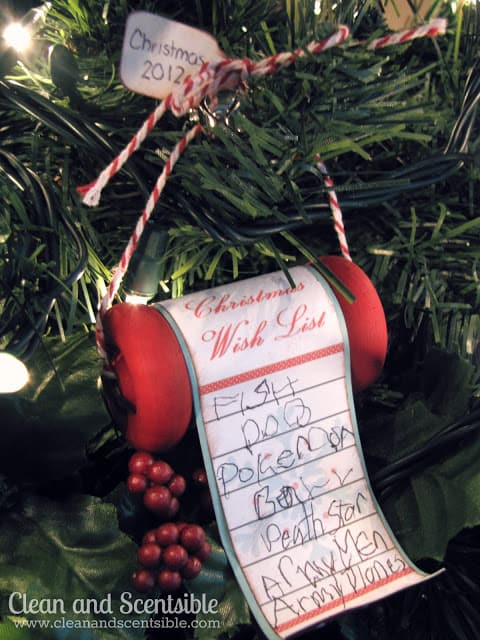
- Paint your wooden pieces red.

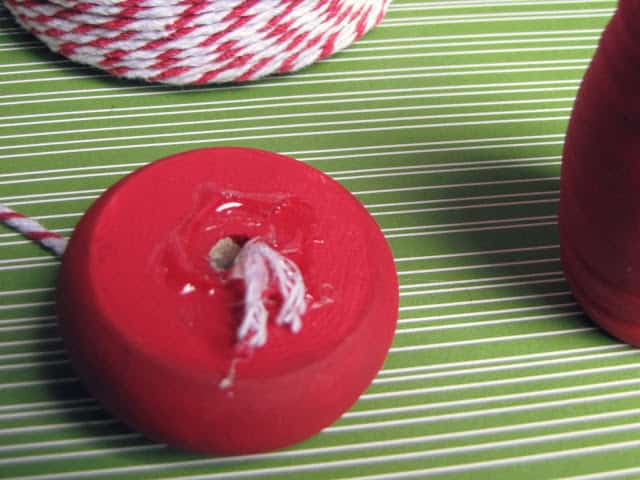
- Cut two pieces of twine {approximately 6-7 inches long}. Thread through the hole on each of the circle pieces and glue down on the inside using the Quick Grip {you could also use tape for this as well} Using the wood glue again attach the barrel to each end. You don’t have to be too worried about how it looks on the inside as this will be covered up in the end.
- Download the printable and print it out as an 8×10 {rather than full page}. If you are going to be using some scrapbook paper like I did for a matting, just print this out with standard office paper. If you are not going to be using a matting, print it out on cardstock so it has more weight to it.
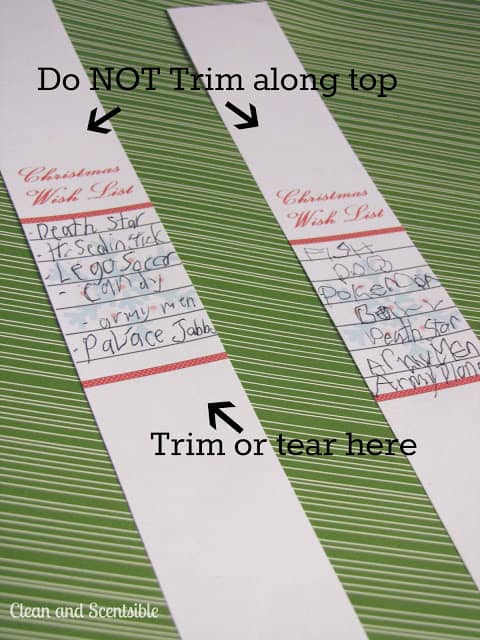
- Trim the printable down. If you are going to be using matting, trim it down so that the width is flush with the black lines {you will trim a little of the red off}. If you are not going to be using a matting, trim it down so that the width is approximately flush with the red lines. Do NOT take any length off on top of the printable. Trim the bottom off so that there is approximately 1-2 cm of white paper below the bottom red line. {It also looks kind of neat if you tear the paper on the bottom rather than using a straight line} Get your children to make their lists.
- If you are going to be adding some scrapbook paper for matting trim it down now. I just have approximately 1 mm showing on either side of the printable but it adds a little dimension and I like the look from the back {and the rolled up part on the bottom} with the double sided paper. Before I glued my printable down, I added some brown ink along the edges and lightly over random spots on the paper to make it look a little more worn. Use the glue stick to adhere the printable to the matting.
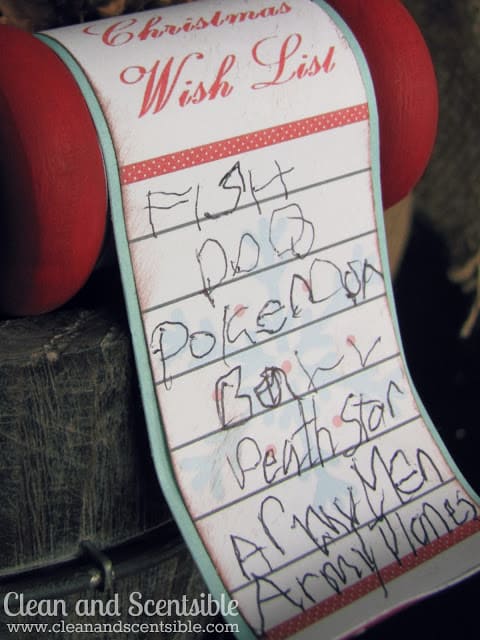
- To attach the list to the spool, apply a piece of double sided tape on the back {approximately where the first red line is}. Wrap the paper around the spool and adhere down. You could also use glue for this step if you don’t have double sided tape. Using a pen, roll up the end a bit to make it look more like a scroll and shape your list.
- Tie the twine up at the top with a couple of jingle bells and a tag. I wrote “Christmas 2012” on one side of the tag and my son’s name and age on the other side. I also inked the edges of the tag as well with some brown ink.
You can either hang it on your tree…
Or display it elsewhere in your home.
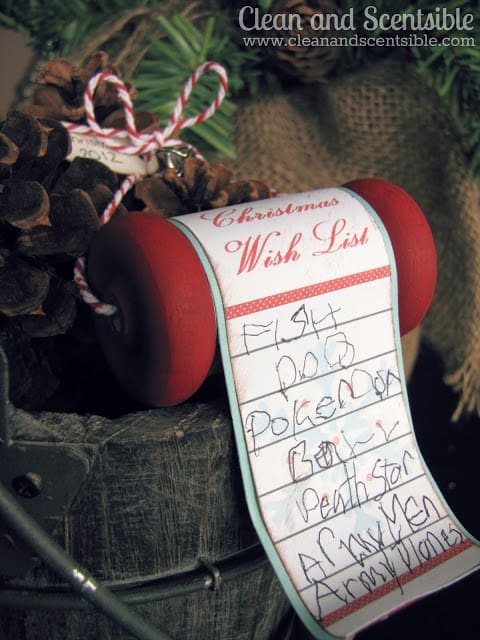
Either way, it makes a wonderful keepsake to enjoy for many Christmases to come!
Thank-you so much to Toni for having me today. If you get a chance, I would love to have you visit me over at Clean and Scentsible or drop by my Facebook page. I have been busy creating and decorating for the holiday season and would love to see you!
I wish you all a wonderful and happy Christmas!

Check our 100 Ideas of Christmas Wonderful for awesome Christmas ideas!


Kerry says
That is uber creative, Jenn! I bet your boys love it : )
Jenn says
Thanks so much for having me Toni! Happy Holidays!!