

I love seeing how my children’s hands, and feet, grow from year to year. I think it’s the Mommy in me. This year, we wanted to do a special set of ornaments for our Christmas tree (and maybe gift a set or two to Grandmothers). So, Daddy Crusader and I came up with a really cute way to capture our children’s handprints this Christmas season—Angel Keepsake Ornaments.

This craft was fun to do with our children, and not terribly expensive or time intensive. We were able to sit down as a family, one wet and rainy Sunday afternoon, and build all five Angels in about two hours – and that was with our kids doing the craft with us. Our fourth and second graders were able to do almost the entire craft themselves, while our Kindergartener and preschooler needed help for most of the craft. And, I got to build the baby’s Angel myself.
The supplies for this craft include:
one yard of four-ply cotton yarn, split into two strands
two pipe cleaners per Angel (we used the metallic kind)
one Styrofoam Snowball Ornament (pre-hung and coated)
one yard of glittery burlap, cut in half and glued together to create a page’s width
glitter glue
scratch paper
one hand sewing needle with a large eye
hot glue gun and glue sticks
scissors
power drill with ¼ drill bit
Here’s what to do. . .
- Using the drill, carefully drill a hole at the halfway point of the snowball ornament, through the ornament. Start the hole slowly, to avoid splitting the ornament. The ornament will be the head of the angel, and the hole is how the dress will be secured to the angel.
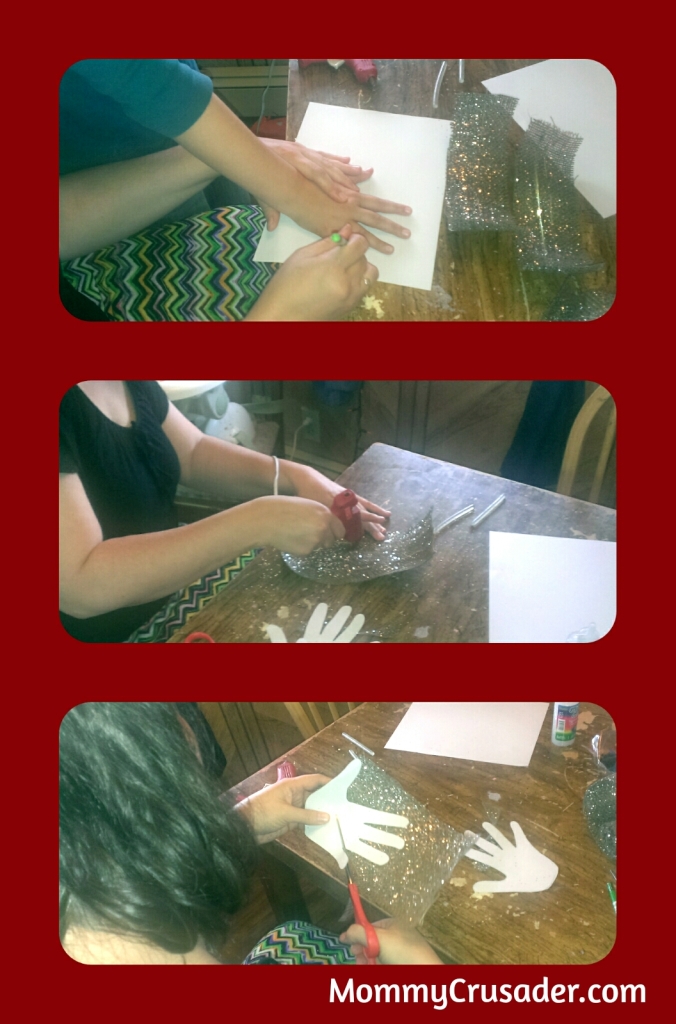
- Trace the child’s hands onto the scratch paper, cut the hands out, then tack the paper hands down onto the glittery burlap. I dotted the paper with the hot glue and then pressed them onto the burlap. You can save some time by overlapping the palms of the hands slightly so they create a wing shape, then gluing them down. After that, cut the hands out again. The wings are finished, and ready for final assembly.
Making the ornaments, step 2. Photo progression. - Take a pipe cleaner and poke each end into the snowball ornament at about ⅓ up from the bottom. This will make the pipe cleaner form a large loop. Next, place hot glue onto each place where the pipe cleaner touches the snowball ornament. Then, create a triangular look with the pipe cleaner by creating two corners in the loop. This forms the angel’s dress outline.

Adding the pipe cleaner to make the “skirt” - Next, thread the needle with the two-ply strand of cotton yarn. Pass the needle through the hole in the ornament, and tie a double knot underneath. Next, wrap the yarn by passing the needle over the “hem” of the angel’s dress, and then back up to the loop of yarn just tied under the head of the angel. Continue wrapping thread, moving a bit to the side with each wrap, until the dress has been created. Be careful not to pull too hard while wrapping because that will cause the pipe cleaner to loose shape – and that’s not an easy thing to fix. Tie off the yarn after the wrapping is finished.
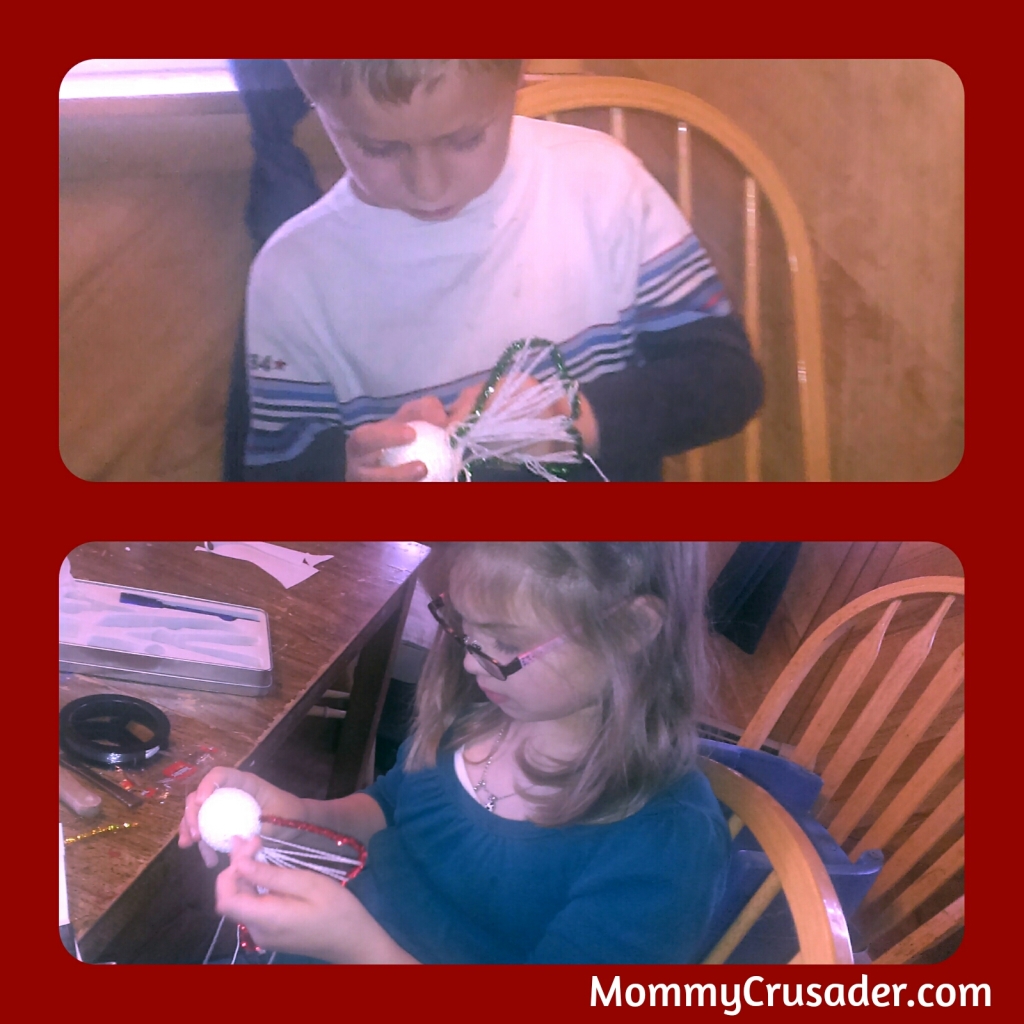
Creating the skirt by weaving the yarn around the pipe cleaner form. - Next, take a bit of pipe cleaner and wrap it around the “waist” of the angel, bringing the pipe cleaner on the side closer to the yarn. Tie it like a belt and cut off the excess. Also, create a loop out of the pipe cleaner with about ⅛ of an inch left straight to become a halo for the Angel, and poke the straight piece into the top of the angel. Secure the halo with a drop of hot glue where the halo was inserted.
- Now, take the glitter glue and glue the strands of thread to the “hem” of the pipe cleaner outline. The body of the angel is now ready to be assembled.
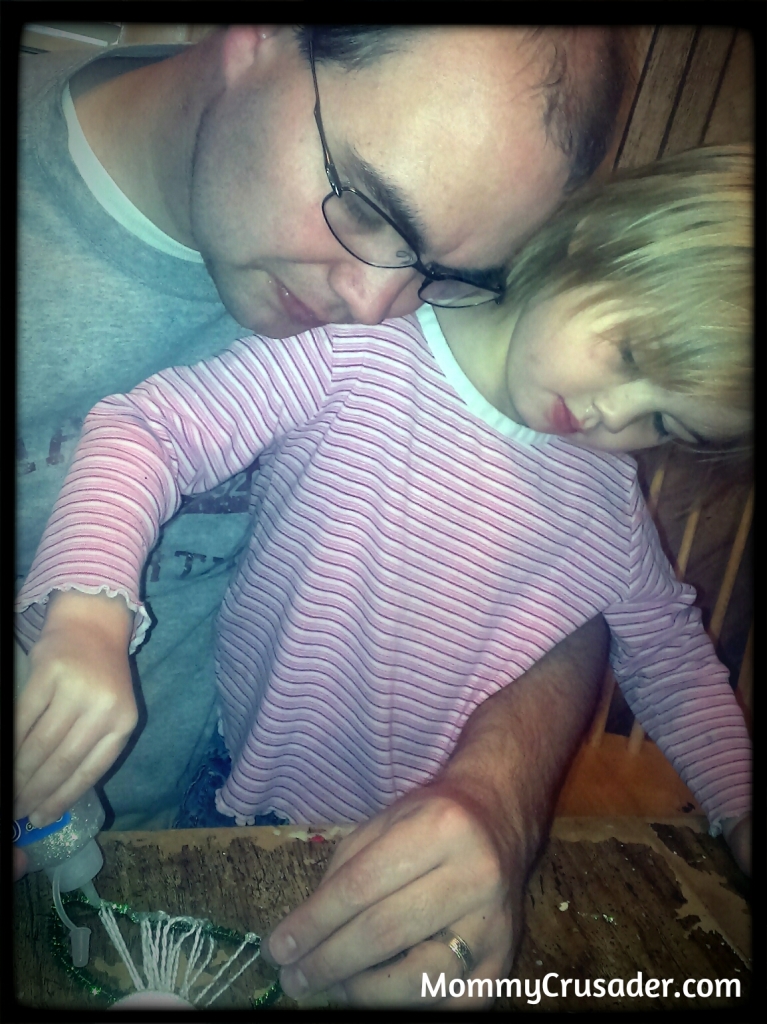
Our preschooler and Daddy adding the glitter glue - Finally, take the “wings” and “body”. Place a good amount of hot glue on the lower part of the angel’s head and glue the angel to the wings. Try to arrange the wings and body so the wings look like they are coming out of the back of the angel’s body. This is easier to do with smaller hands.
- Let the glitter glue and hot glue set and the Angel Keepsake Ornament is finished.
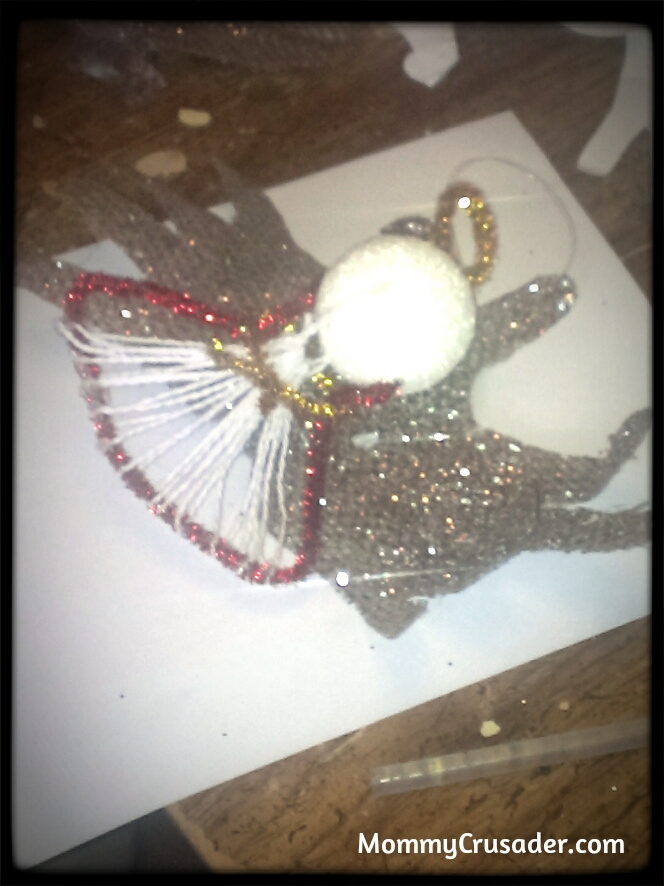
What our fourth grader’s angel looked like when it was finished. Cute, right?
This was a fun craft to do with my kids and husband, and a good fine motor skill activity for my children to do. I look forward to hanging these up on my Christmas tree, and (spoiler alert) hope the Grandmothers enjoy them too.

Blog | Pinterest | Facebook | Twitter | Google+
Hi! I blog at MommyCrusader.com. At my blog, I share stories about my life as a mom of five wonderful knights and ladies. I discuss parenting tips, kid crafts, preschool ideas and adventures, mom crafts, and kid-friendly recipes. I would love for you to stop by and say hi. Thanks to Design Dazzle for allowing me to share this craft with you. Happy Crafting!

Can’t wait that long? Take a look at our Christmas Wonderful archives.


Leave a Reply